While there are many nutritious treats you can feed your chickens to keep them happy and healthy, mealworms are one of the best that you can provide your flock. Mealworms are extremely high in protein. Dried mealworms can contain as much as 53% protein.
Mealworms are a really great treat to feed chickens, but they can also be pretty expensive. You can save yourself money by raising mealworms at home. They are easy to raise and don’t require much maintenance.
Hens need their diet to be about 16% protein in order to lay eggs properly. Feeding them mealworms will help ensure they are getting the proper amount.
Related Post: 17 Treats For Chickens
You might think that raising mealworms sounds gross and they’re something you’d be better off purchasing rather than growing in your home. You’d be surprised to know that many people raise mealworms.
It’s easy and cheap to get started and no, there aren’t weird smells or sounds associated with them. You can raise mealworms in your living room (right under your guests’ noses) without any strange questions.
What Are Mealworms?
Mealworms are the larval stage of the darkling beetle. Darkling beetles are black beetles that are small and have short lifespans. In fact, the entire darkling life cycle can be completed in about 5 to 6 months.
The female beetle will lay about 500 eggs in her adult life — which is about two months long. After 4 to 19 days, the eggs hatch and become larvae, or what you might know as mealworms. The mealworms will molt several times while they are in the larval stage. They will then enter the pupal stage which can last anywhere from two weeks up to nine months (if overwintering).
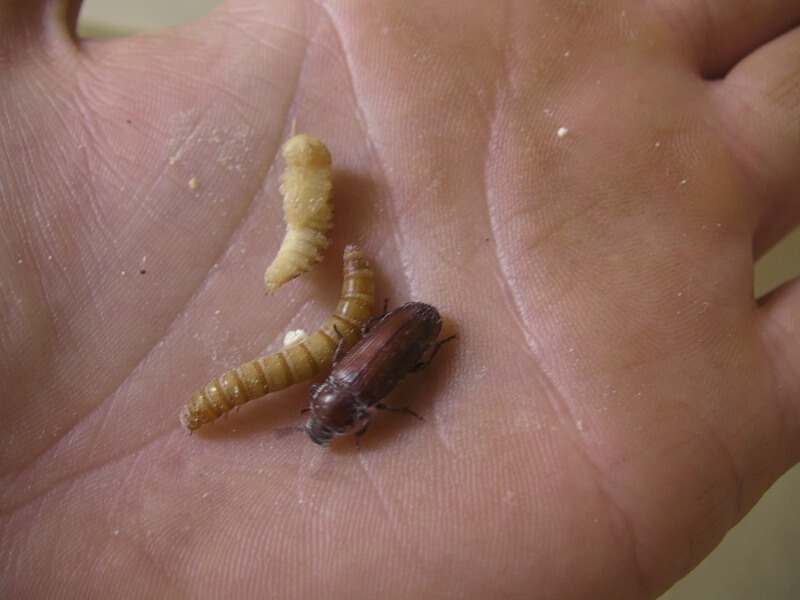
While they are pupae, they don’t appear to do anything from the outside. They will not eat or drink during this stage. They are busy turning into an adult beetle. When they hatch, they will look like a light brown version of the adult and will turn black over a few days. To learn more about the mealworm life cycle, check out this article.
How To Raise Mealworms
Raising mealworms is easy and doesn’t require any expensive gear to get started. You’ll need the following items to create the housing and environment for mealworms to thrive:
- Plastic set of drawers
- 1/4-inch hardware cloth
- Duct tape
- Oatmeal
- Carrots, potatoes, or apples
- Small mealworm colony — purchased at a local pet store
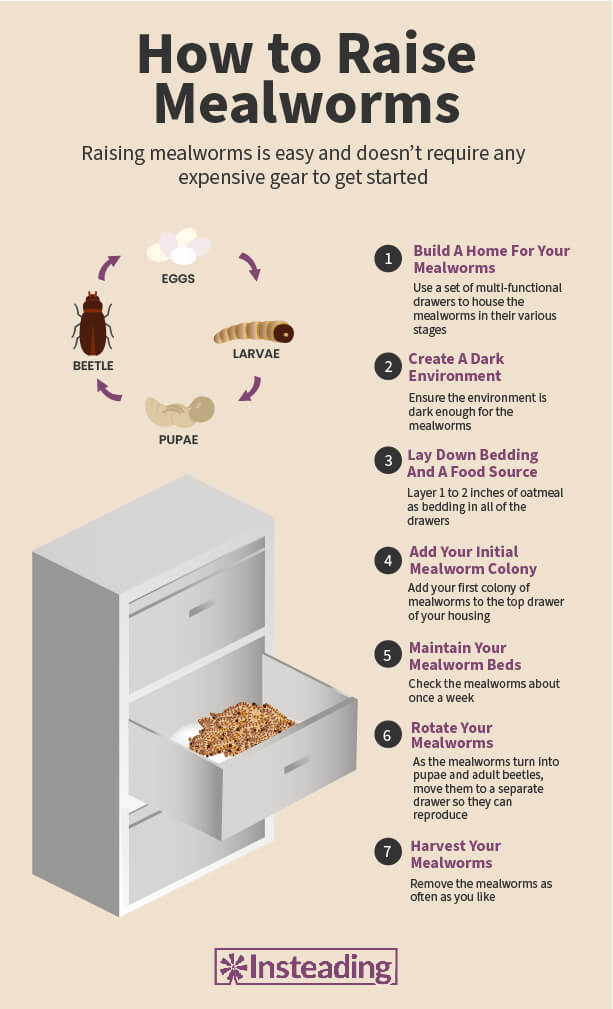
1. Build A Home For Your Mealworms
The plastic set of drawers will be used to house the mealworms in their various stages. Cut the bottom out of the top drawers, leaving it intact in the very lowest drawer. For a 3-drawer cart, cut the bottoms out of the top two drawers.
Replace the bottom of the drawers with the hardware cloth and secure it with a staple gun. The adult beetles will live in the top drawers where they will lay their eggs. The eggs will fall through the hardware cloth into the bottom drawer where the eggs will hatch and turn into mealworms.
2. Create A Dark Environment
If they are clear or opaque plastic, use the duct tape to cover all of the drawers. For a more eco-friendly option, consider using black stock paper to line the interior of the drawers and create a black-out effect.
You want to create a dark environment for raising mealworms. They would live in total darkness if they could, so you want to limit the amount of light that can get into the drawers.
3. Lay Down Bedding And A Food Source
Layer 1 to 2 inches of oatmeal as bedding in all of the drawers. When you put your mealworms into the bedding, roughly chop up carrots, potatoes, or apples and add them on top of the oatmeal layer. Once you put your mealworms in the bedding, they will get both food and water from the produce.
4. Add Your Initial Mealworm Colony
Add your first colony of mealworms to the top drawer of your housing.
5. Maintain Your Mealworm Beds
Check the mealworms about once a week. If the food is gone, give them more. Dried out food can be removed and put in a compost bin. Make sure to check the food isn’t getting moldy. If you see any signs of mold, toss the vegetables immediately and replace them.
The old bedding (called frass) can be cleaned out 3 or 4 times per year. This is an excellent fertilizer and can be put directly on the garden or added to compost.
6. Rotate Your Mealworms
As the mealworms turn into pupae and adult beetles, move them up to the top drawers so they can reproduce. You can rotate the drawers as often as necessary, but keep the bottom drawer on the bottom to prevent a mess from forming.
7. Harvest Your Mealworms
Remove the mealworms as often as you like. When removing mealworms, keep enough in the drawers to ensure you’ll have enough pupae to continue the cycle again. Raising mealworms is even cheaper when you let them continue to reproduce.
Do you have experience growing mealworms at home? Share your advice with us in the comments below!













Do you just put the carrots, potatoes or apples on the top drawer only?
Nancy,
You’d put the foodstuff in any containers that have mealworms or beetles in them. I personally use potato’s cut into quarters and will throw he odd leaf of lettuce on the top.
We grew mealworms years ago as we were fishing every weekend. It became so much fun, then they really took off and we were able to sell them as well.
This is a very good basic guide to producing mealworms – it is truly simple! And a great way to use up left over salad mixes and apples that are just not at their prime.
Photo/Attachment:
Hello
I’m trying to raise mealworms for my grandkids geckos, this is my first try.
The initial group that I bought already went into pupae stage.
I now have about 25 beetles in a plastic container. I feed them mealworm food and some fruit.
What now? Which ones will lay eggs and when ? Are the eggs easy to notice?
I heard that beetles will eat the eggs as well.
Thank you
Martha
I’m a newbie and just got started a few months ago. I was about ready to toss the project during early spring (our house is really cold) until I realized that as it warmed up, they were reproducing like crazy. As I ran a spoon through the bedding it was loaded with mealworms, fed some to chickens, put beetles in another box and started over. I made every mistake, too much vegetable matter, too wet and it molded. Tossed that box and started over. Now it seems so easy that anyone should be able to do it.
can i keep my mealworms outside? we have winder come on,. do i need to put a heat lamp on them?
If you raise too many meal worms. You want to keep them, can they be dried out or how would you keep them edible for the birds. The dried how worms in the stores, how do you do that ? Thank you
This is a very informative article. Thanks for sharing! I do have a question: My coop has an attached shed that is not heated. I live in central Georgia. Can I safely grow mealworms year-round in the coop-shed? Thank you in advance!
Hello! I have ravenous bluebirds and I am feeding mealworms constantly. We literally have a flock. It has occurred to me that maybe I’d like to farm my own or maybe even have some to share with others. They’re getting expensive.
How did you have the privilege of a flock🙂🙂🙂 U r so Lucky!!! B-birds tend to b territorial + dont share their bird space well.
Pls let me know how to grow mealworm ,where can I get it to start