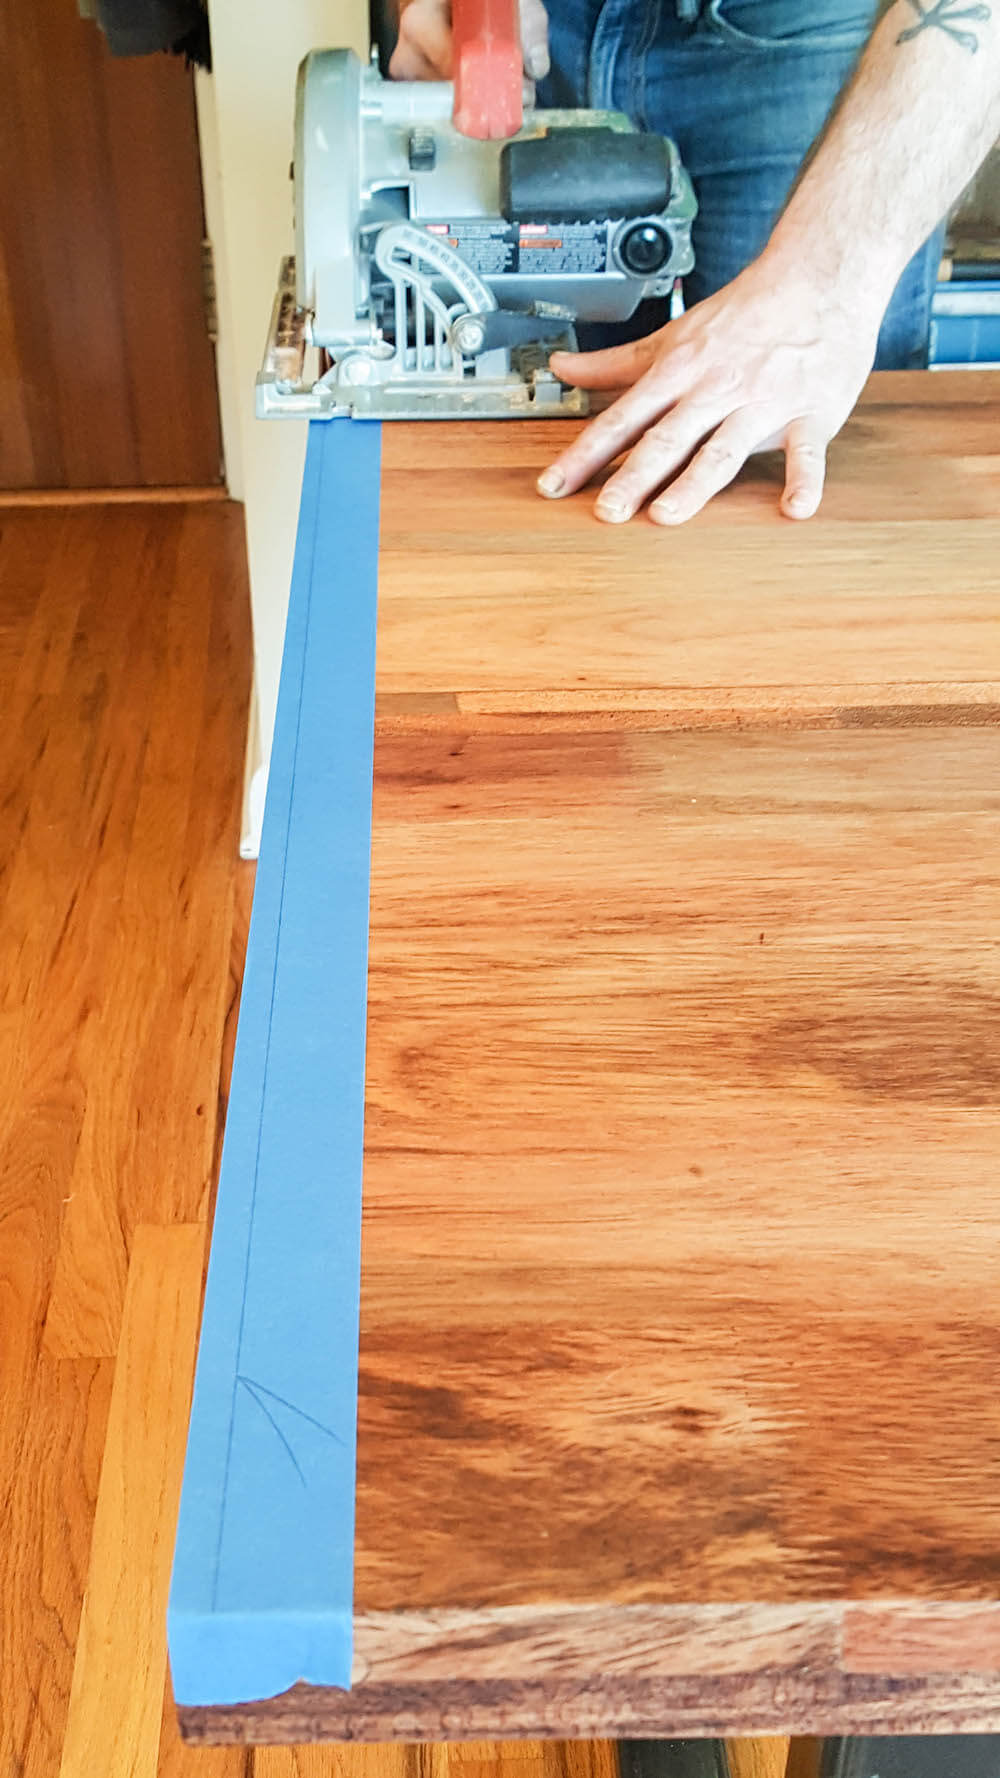
Painting isn’t blue tape’s only use. Blue tape comes in handy during finish work, furniture, and cabinetry carpentry, and even when cutting certain materials.
Blue tape loves you and it needs to produce clean lines.
Blue tape is on your side and will act as a buffer in case you make a mistake.
Blue tape wants you to succeed and promises that it won’t leave sticky residue when you’re finished with it.
Here are five awesome things you can do with blue tape:
1. Don’t Get Mad With Your Caulk—Get Even Lines
Caulking is a messy job, and to become a wizard with the caulk gun means you have to spend way too much time caulking. Using blue tape turns a caulking project into a relatively easy chore for both interior and exterior projects.
- Stretch your tape the length of whatever edge you’re caulking.
- Strategically adhere it to where you desire the outside edge of your caulk bead to end.
- Make sure you have an even bead on your surface.
- Go back and wipe it flat with a latex-gloved finger. This pushes the caulk where it needs to go and looks a heck of a lot tidier.
- Once you’ve slicked the bead smooth, pull the tape and gawk at your ridiculously straight caulking line.
2. When You Hang Art, Don’t Waste Time Making Your Own
Before I learned this trick, I’d scribble on my walls to plot out where my picture hooks were to go. I used to do that every time, until I was on a jobsite one day and my co-worker busted out the blue tape. He began measuring and marking his lines on the tape. My mind was blown, and I’ve been a happier person ever since.
- You’ll need a tape measure, an appropriate sized level, a pencil, and— of course—a roll of blue tape.
- Get an idea of where you’d like the picture to hang, and measure from your floor to the approximate height.
- Stretch a length of blue tape the width of your picture. Adhere it to the wall over the area where you plan to either nail or drill out for mollies.
- Use your level to draw your plane line on the tape, then plot where you want to put your holes. From there, nail, screw, or drill. Then rip off the tape. Easy!

FYI: this method is useful if you’re hanging just about anything on your walls. It works great for bath towel racks, small wall cabinets, and shelving.
3. Create A Perfect Circle
If you’ve ever tried to cut through a 4-inch PVC pipe with a sawzall or hacksaw, then you’ve probably noticed that your cut wasn’t nearly as flush as you would have liked. Cutting pipe flush isn’t easy, but blue tape can help, especially when secured in a vice.
- Tape around where you plan to cut, making sure that the edge of your tape lands on your mark. The edge will provide you with a reliable guide to follow.
- If your pipe isn’t connected to anything else, secure it in a vice.
- Tighten the vice around the pipe so that it’s firmly set and your mark is past the vice clamps.
- The tape will give you the guide you need, and the vice will give you the stability to make the perfect cut.
4. Keep Your Fine Edge And Avoid A Blowout
Making crosscuts is risky business. It’s easy to cut off the end of a shelf and be left with unsightly chatter and burring. In a perfect world we’d all have a table saw and/or chop saw to attempt precision cuts. Unfortunately, these power tools are expensive and unreasonable to own if you don’t use them often.
On the other hand, circular saws are far more portable, and with a new quality blade can do almost any job.

A common home project that involves a long crosscut is trimming off the bottom of a door.
What you’ll need is a circular saw, a straight edge as long as the width of your door, two clamps, a pencil, and blue tape!
- Make your cut line first.
- Measure where you want to cut. Run a band of blue tape over the area, and draw your line on the tape.
- Next, measure the distance from your blade to the edge of your saw’s fence, and measure up from your cut line on each side of the door and make a mark.
- Clamp your straight edge on these marks. This will create a guide running parallel to your cut line, which will abut to your saw’s fence and give you a straight cut.
- Don’t be shy, but take your time.
- Let your blade reach full RPM and run it steadily through your mark. The adhesive qualities of the blue tape will reduce the chance of blowout and chatter.
- When you’re finished with your cut, peel your tape off working it down towards the cut and not across.
- You should have a clean and consistent edge.
5. Have Fun Finding Your Mistakes
In construction, you learn more from your mistakes than your successes. Home improvement projects contain a lot of steps from beginning to end. Along the way, a growing list of fixes and touch-ups can pile up quickly, and it’s easy to forget them until they’re too late to fix.
When I’m finished with a task, I go back and check my work. Often, there’s the need for touch ups. What I do to remember them is to tear off a bit of blue tape and stick it where the fix is. The color blue stands out on a project and easily catches your eye.
This strategy is great for drywall, painting and woodworking—basically every component of the construction industry.
Always make the time to double check your work— bust out the blue tape!


Leave a Reply