Generally speaking, chickens are pretty healthy animals, and once they’re grown, they usually require little medical care from their owners. With that said, one of the most common ailments that adult chickens can get is a condition called bumblefoot.
Luckily, bumblefoot is preventable and treatable. Severe cases of bumblefoot can cause your chickens a ton of pain and lead to other problems like weight loss. But don’t panic! We’re going to go over what bumblefoot is, how to identify it, and how to treat it so your chickens can get back to their happy, clucking selves in no time.
What Causes Bumblefoot?
Bumblefoot is a condition in chickens that can develop after an injury has occurred to the chicken’s foot. The injury can be caused by a cut or splinter that just didn’t heal properly. And since chickens spend nearly all of their time on their feet, they’re susceptible to getting the occasional foot injury.
Most of the time, the injury will heal up well on its own. Sometimes, the injury gets dirty and becomes infected, creating a pocket of pus and swelling that is painful. Once the injury becomes infected and swollen, it’s known as bumblefoot.

Bumblefoot usually stems from injuries that are on the bottom of the foot. It can also be caused by an injury between the toes or on top of the foot, although these are less likely to turn into bumblefoot.
The bottom of a chicken’s foot (the pad) is rubbery in texture. It feels similar to Play-Doh. This softer tissue is easier to injure than the scaled, hardtop part of the foot. Since the pad is in constant contact with the ground and other potentially dirty surfaces, any injury to the pad can become infected.
Stages Of Bumblefoot
There are five distinct stages of bumblefoot. How you’ll treat the bumblefoot will depend on what stage it is in. Stage 1 is the mildest and easiest to treat. Stage 5 is pretty involved and requires a tougher approach to treating.
Stage 1: Infection Begins Forming
You’ll have to look closely to identify stage 1 in chickens. The footpad may have a shiny, pink area with flaking or peeling. In stage 1, an infection has just started to form around the original wound which may or may not be visible anymore.
Related Post: Chicken Diseases
Ideally, this is the best time to start treating bumblefoot. Since the infection is mild, the chicken may not show any symptoms of injury.
Stage 2: The Original Area Begins To Swell
In stage 2, there will be a shiny, smooth, and slightly swollen area around the original injury. The center of the swollen area will have a darkened spot or lesion.
At this stage, the infection has set in and is starting to cause some tissue damage. During stage 2, some chickens will have a slight limp while others may not show any signs of lameness.
Stage 3: Pocket Of Infection Has Developed
In stage 3, you will notice that a well-defined pocket of infection has developed. The foot around the original injury will be quite swollen and have a very visible lesion in the swollen area.
The areas around the swollen tissues will start developing calluses. The lesion in the center of the swelling is dark (almost black) in color. Some chickens will have a slight limp, others may still not show signs of lameness.
Stage 4: Chicken Will Show Signs Of Injury
In stage 4, the infection will start to cause enough pain and tissue damage that most chickens will show signs of lameness. The lesion in the center of the swollen area no longer looks like a scab but has developed a plug appearance. Swelling is pretty severe in stage 4 and there will be redness around the lesion.
Stage 5: Entire Foot Shows Swelling
Stage 5 is the most severe stage of bumblefoot. Most chickens with stage 5 bumblefoot won’t walk to reach food or water. The bumblefoot at this point will cause a large swollen area that looks like a bubble on the verge of bursting.
Related Post: Rooster Spurs: What They Are and What to Do With Them
Stage 5 bumblefoot will cause swelling not just around the original injury, but possibly all over the foot. Stage 5 bumblefoot can lead to damage of the bones and tendons in the foot if not treated. Necrosis, or tissue damage, can be extensive at this point.
How To Treat Bumblefoot
The sooner you catch bumblefoot, the easier it is to treat. If you notice a wound on one of your chickens’ feet, clean it up and dress it with a poultry-safe, topical wound treatment.
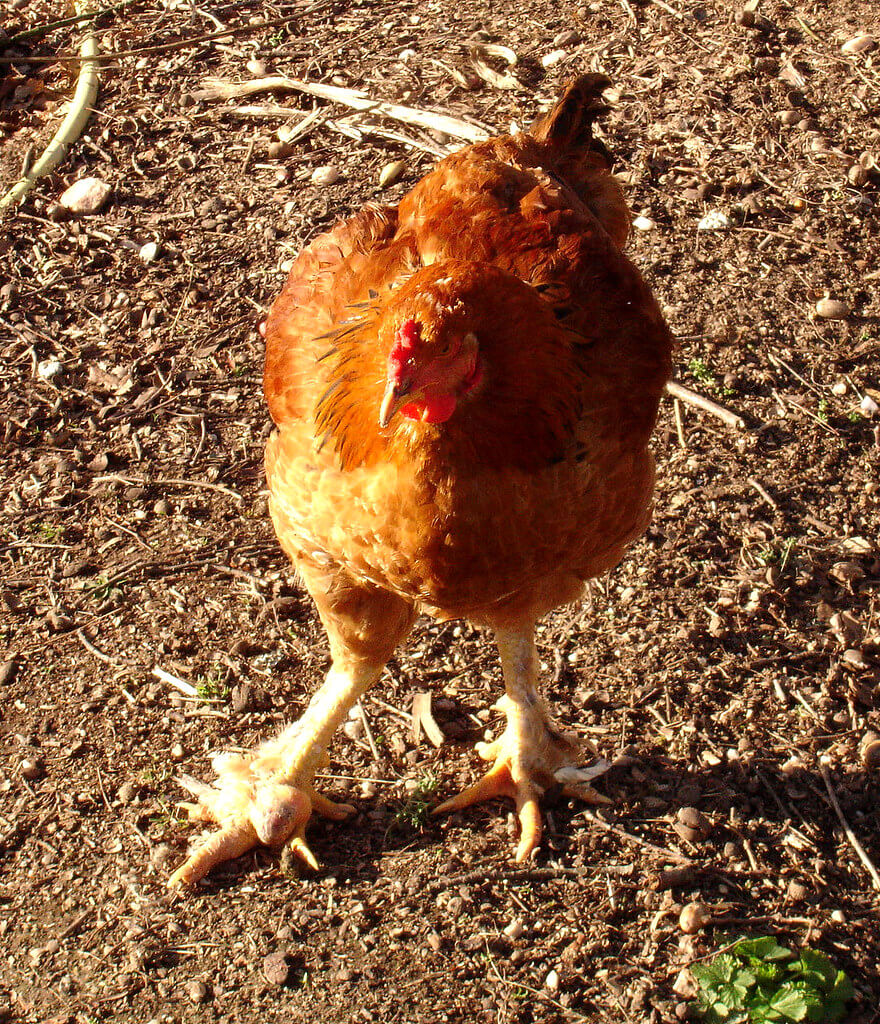
Make it a habit to check your chickens’ feet frequently for early signs of bumblefoot. Chickens are really good at hiding injury or illness and won’t show signs that something is wrong until the injury is pretty advanced.
Epsom Salt Soak
For the early stages of bumblefoot, bring the chicken inside and soak the feet in a warm foot bath made with Epsom salt. The Epsom salt will help to soften the tissues of the foot. Let the feet soak for about 10 minutes. Pat the feet dry. Scrub the affected area with a topical antiseptic like Betadine.
Lesion Treatment
If there is a lesion, gently remove it with a pair of tweezers and scrub the area under the lesion. Apply a topical antibacterial ointment that is poultry-safe. A triple antibiotic ointment that doesn’t contain painkillers is fine to use on chickens. Repeat the process daily until the area has healed.
Later stages of bumblefoot are harder to treat, but don’t avoid treatment. If you notice a lame chicken and determine that bumblefoot is the cause, treat it immediately and aggressively to prevent permanent damage to the tendons and bones of the foot.
Treating Later Stages of Bumblefoot
Treating later stages of bumblefoot requires some additional equipment. Along with Epsom salt, Betadine, antibiotic wound treatment, and tweezers, you’ll need a towel, gauze, vet wrap, and possibly a scalpel.
Use a dry towel to wrap around the chicken’s body. Treating a more severe case of bumblefoot can be painful. If there is someone to help you, have them hold the chicken snugly, wrapped in a towel with the affected foot exposed.
Start by soaking the foot in an Epsom salt foot bath for 10 minutes. Gently pat the feet dry with a clean towel. Use the tweezers to remove the plug-like lesion. The lesion is usually attached to the bottom of the abscess. When it’s attached, removing the lesion will remove a large portion of the abscess with it but the lesion isn’t always solidly attached. When you remove the lesion, you may notice stringy bits of tissue and infection that come out.
Related Post: 23 Genius Epsom Salt Uses for Your Home, Garden, and Wellness
It may be easier to remove the lesion with a clean scalpel. Gently use the scalpel to slowly cut the lesion away from the healthy tissue. Once the lesion has been removed, put the chicken back into the footbath. Rinse the foot. Gently massage and squeeze the abscess to remove as much of the pus and infection as possible. Alternate between soaking and working out the pus.
Once you’re happy with the wound and it’s clean, pack the abscessed area with an antibiotic ointment. Use a small square of clean gauze and cover the wound. Cut the vet wrap into narrow strips, and wrap around the foot to hold the gauze in place. Vet wrap will stay on the best if you weave it between the toes in an X pattern and make it 2 to 3 layers deep.
Severe cases of bumblefoot should be cleaned and have fresh ointment applied 2 or 3 times a day until the wound is healed. When you clean and apply fresh ointment, be sure to use clean gauze and new vet wrap to dress the wound. It’s a good idea to keep chickens with severe bumblefoot in an isolation ward. A dog kennel or cage is the perfect place for your injured chicken. Provide a fresh supply of food and water.
Preventing Bumblefoot
There are a few things that you can do to prevent bumblefoot. Your chickens will spend the majority of their days scratching and pecking for food. They’ll also spend their nights roosting, another activity on their feet.
Check the coop and run frequently for sharp objects that can cut their feet while they are scratching. Broken glass, bits of wire, and broken feeders or waterers are common causes for foot injures. Remove any items that might cut your chickens’ feet. Replace or repair waterers or feeders that have sharp points.
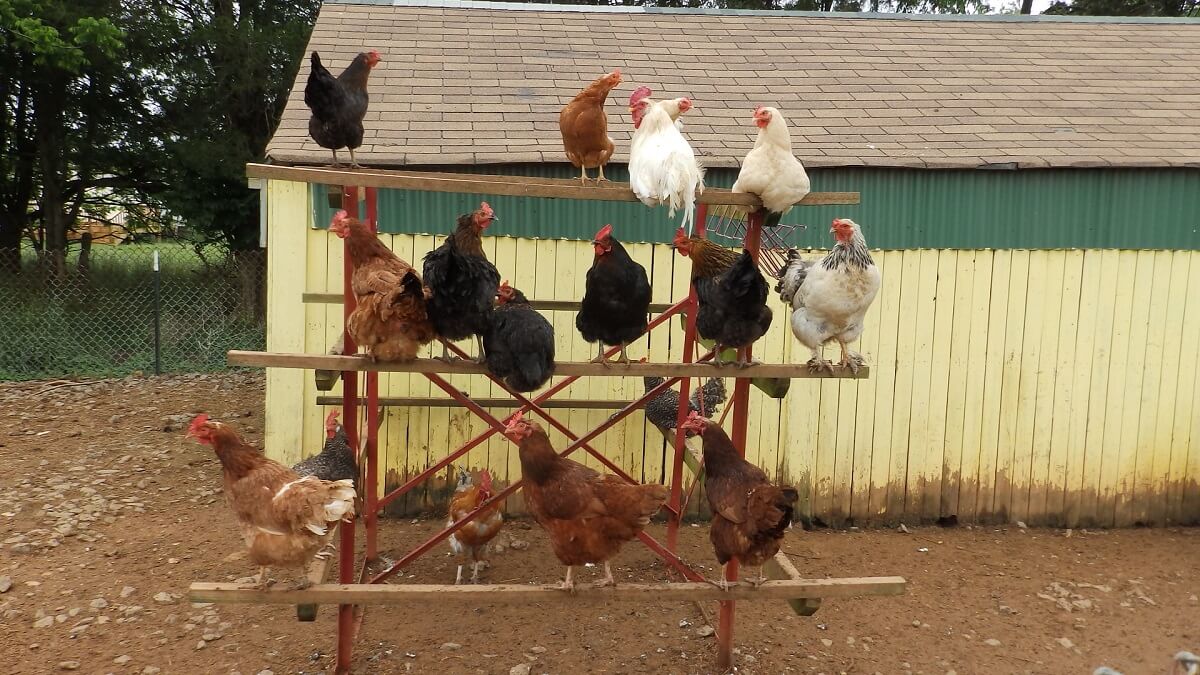
Another frequent cause for foot injuries in chickens is the roost. Roosting bars should be round and smooth. Many chicken owners use wooden rods or tree branches to make roosts for their chickens. Check wooden roosts for places where chickens can get splinters. Remove any rough spots and sand them smooth.
Safe chicken roosts can be made from PVC pipe. A 2-inch PVC pipe is the perfect diameter for your chickens to roost comfortably. PVC pipe is also easy to clean and won’t create splinters that can cut up your chickens’ feet.
Check your chickens frequently for signs of injuries. Checking your chickens once a week will help you to catch and treat foot injuries before they have the chance to turn into bumblefoot. If you miss a foot injury, don’t fret. Although it can be painful for your chickens, treating it quickly will help get your chickens back on the road to recovery.

























Leave a Reply