Summer is waning, which means if you’re in elderberry territory — and most of us are — there are literal buckets on buckets of fruit available to anyone who doesn’t mind having purple fingers. If you read my last article on foraging for American elder, you should be a pro at finding and identifying this common, generous, and easy-to-harvest wild plant.

This article is about turning that abundant (yet perishable) bounty into something you can use and enjoy all year long. Now, I have seen lots of recipes for elderberry pies, muffins, and scones online, but I wager most of them were crafted with the more palatable, blue elderberry in mind. For those of us who live in black elder territory, I think it’s safe to anticipate that some recipes you find online won’t work satisfyingly for your harvest.
At least, that’s been my experience. But rather than bemoaning my lack of ability to make satisfying desserts with my local elderberries, I’d rather use my ample harvest for what it’s best suited: homemade elderberry syrup.
Raw elderberries are not all that tasty when eaten raw, and too many of them will give you a sick stomach. As such, you’ll find the most common, and perhaps, most practical use for black elderberries is extracting their nutrient-rich, delicious juice and turning it into an easy-to-use, long-storing syrup.
If made sugary enough, the syrup can be stored in jars at room temperature. If you’re not a fan of sugar, or are conscious of sugar content, the extracted juice can be slightly sweetened and then pressure-canned or frozen. That’s the process I’ll be describing here.
So all that said, I think it’s time to take the following quote from a 1971 issue of The Mother Earth News into consideration.
Don’t say I didn’t warn you.
Cleaning Elderberries

Picking elderberries one-by-one, is a study in impracticality. It takes forever, the berries end up everywhere, and you will be squishing as many berries as you free. Thankfully, people who use elder every year gave up on that waste of time long ago, and came up with ways to quickly and efficiently remove berries from their stems.
One way is to use a fork to rake the berries off the stems into a large bowl. You run the risk of stray berries flying in unexpected directions, but it sure beats hand picking.
If you have access to a freezer, however, my favorite, less-mess way to clean elderberries is to freeze the fresh-picked berry clusters immediately after harvesting. Place the clusters, stems and all, in a bowl and freeze. DO NOT pack the berries tightly in the bowl. You want them to be loose and freeze as clusters, not as a lump of mashed-together matter. Once totally frozen, the rock-hard berries will easily and cleanly fall off their stems at the gentle touch of a finger.
Whatever method you use, don’t fret if a spare stem (or five) ends up with your cleaned berries. They won’t affect the final product.
You can either proceed to making elderberry syrup, or as I prefer, keep picking, freezing, cleaning, and re-freezing the berries until the season is done (the berries keep quite well if frozen in half-gallon mason jars). Once my harvest is complete, I can dedicate a single day to making my kitchen look like a purple bomb exploded, rather than having a repeat performance with every berry picking.
Making Elderberry Syrup
So now you have a big bowl (or several frozen jars) of berries; all ready to transform into elderberry syrup. Embrace the purple. There are numerous elderberry recipes, ingredients, and procedures for making elderberry syrup. Here is my simple recipe and process.
Supplies Needed
- 1/2 gallon of frozen, cleaned elderberries
- Water
- Large stock pot (a gallon is ideal)
- Hand-cranked food mill (it makes the job SO much easier — I got mine at an antique store for less than $10)
- Fine mesh strainer
- Large bowl that can hold at least a gallon of liquid
- Sugar
- Freezable container or canning jars to hold your final product
Place the frozen berries in a large stock pot with room to spare. Cover the berries with water, then bring to a boil to cook them and release their juices.
I cannot stress this enough: Don’t walk away from your berries! They have a tendency to form a crust on the top of the pot while being heated, which once it reaches the boiling point, explodes like a berry volcano, sending tiny, potently purple, boiling berry bits all over your formerly clean stove, counter, and floor. Yes, I speak from repeat experience.

Once the berries reach boiling, reduce the heat to simmer and allow them to cook for about 10 minutes.
Then it’s time to separate the berry seeds and skins from the nutrient-dense juice. You may find a different way with your own kitchen tools.
I gingerly transfer the boiling-hot berry soup into a large bowl, quickly rinse the pot to remove any residual seeds, then place it back on the stove. I put my food mill over the pot, then (a ladle-full at a time), process the hot berry soup through the food mill. Juice and pulp (and a few seeds) fall in the pot, and the bulk of the seeds, stems, and skins are left behind in the food mill. These I either throw in the compost or feed the chickens.

Once you have milled all the berries, you should have around three-quarters of a gallon of juice. Set this to simmer on low to medium heat and allow it to reduce for at least two hours — though some folks reduce longer. This is not a scientific process. I usually reduce for as long as I can during the day it’s happening, then allow it to be “done” by the time the sun sets. Of course, my final product is still very much juice-like in consistency, since we won’t be adding tons of sugar. If you want a true syrup, you’re going to have to use a ton of (I believe unnecessary) sugar and reduce longer. But if you want that end product, you can look up pretty much any other elderberry syrup recipe online.

I set my reducing pot on the front porch on a portable burner to simmer. Usually by this point of the year, it’s blazing hot in the Ozark summer sunshine, and the thought of setting a pot to boil inside my unairconditioned, off-grid home is untenable!

While the juice is simmering, a thick, brown foam will form on top of the liquid. Periodically skim this with a spoon to clean up your syrup.

You are welcome to taste the cooked elderberry juice at any point during this reducing process, as it is safe to consume once it is cooked. You may find that it is somewhat unpalatably mouth-puckering at first, but with a pleasant background flavor. That pleasant flavor will be brought to the foreground with the addition of a bit of sugar.
I usually only add about one-quarter cup of sugar at first, then taste to see if the astringency has been ameliorated. If it is still a bit unpleasant, I add sugar, a tablespoon at a time, until it tastes good. Since I’ll be freezing this liquid, I won’t need sugar’s preserving powers to keep my syrup safe … which means I don’t have to use cups and cups of the stuff in the first place.
Whenever the syrup has reduced “enough” (or in my case, once the sun starts to set on the day), I ladle the syrup into canning jars and freeze. I find that the one-pint size works best though honestly, we sometimes harvest so many berries that I wind up scavenging for any available jar I can find. I transfer the juice through a fine-mesh strainer as it pours into the jar — the mesh catches any stray seeds I may have missed.

Now … face your pigmented kitchen and begin the long process of cleaning up.

Using Elderberry Syrup
Let’s say you’ve gone through the purple-y pigmented process of procuring your potent elderberry syrup, and you’ve got a nice supply of the sweet stuff at hand. How do you use it?
Elder syrup has two main uses: culinary and medicinal. If you research elder syrup online, you will encounter a huge wave of adoration and belief in its powers as a panacea for everything and anything that might ail you. The esteem that elderberry syrup is endowed with is on par with that given kombucha, and the internet is awash with articles that both knowledgeably and ignorantly extol its virtues to the point of turning a simple sugar-berry syrup into something transcendent and nearly deified.
This article is not going to be one of those effusive articles. I absolutely believe that elderberry syrup has potent medicinal benefits to support the immune system. That is, after all, how it was used for hundreds of years, and well before the internet of clickbait titles. But the belief that a simple, daily teaspoon of berry syrup will cure a lifetime of poor health choices is just wrong.
You can absolutely add elderberry syrup to your diet as a delicious and nutritious supplement to encourage good health. You can mix it into a soothing tea like chamomile or mint to help boost healing. But if you’re expecting it to cure every disease you have without doing anything else to improve your lifestyle, you’re going to be disappointed.
If you’re interested in using elderberry juice in herbal medicine, I recommend doing research and seeking medical advice as I’m a humble homesteader, not a medical expert. That said, I personally mix a teaspoon of elder syrup into my herbal tea when I feel a cold or the flu coming on, and it seems to help.
From a culinary standpoint, we really enjoy using elder in our dessert treats. For a super simple, refreshing snack, mix 2 tablespoons of elder with one and three-quarter cups of apple juice. Heat to steaming, combine with 2 tablespoons of beef gelatin “bloomed” in a quarter cup of cool apple juice, and allow to set in the refrigerator overnight. You’ll have a garnet-hued gelatin that is positively delightful on a hot summer day.
Another dessert we enjoy is a multilayered summer pie. Make the blackberry tart (but be sure to add lemon) from my earlier article on foraging for bramble berries, and allow to cool. Mix the elder gelatin mix mentioned above, and pour over the cooled tart. Allow to sit overnight, and you’ll have a many-layered summer treat that looks complicated, but was quite easy to make.
Bonus! Elderberry Lore
We care for several dozen elder bushes on my homestead that we specifically tend for berry-picking, and prune them selectively to maintain an easy picking height and encourage heavy cropping.
The trimmings seem to want nothing more than to turn into new elder bushes, merely needing to be pushed into moist ground to start growing roots. I share as many of the elderberry starts as I can every spring, but I inevitably end up with a heap of homeless trimmings.
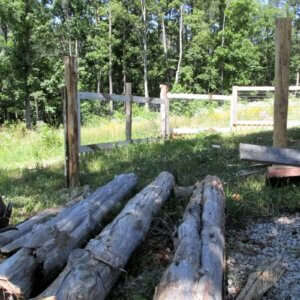
My first year with elder prunings, I piled them directly on the ground and built a compost heap on top of them. A year later, I harvested the compost, only to find that the elder prunings were basically unchanged. They don’t seem to degrade unless they’re left to rot for years and years or are burned.
Ancient people probably learned this quickly, and realized that easy-to-hollow stems that didn’t rot when warm, moist human breath passed through them were perfect materials for flutes and pipes. That is how the plant received its English name, derived from the Anglo-Saxon “aeld” which means “fire.” The pith in its branches is easily removed to make a hollow pipe, which ancient people used for blowing on a fire to really get it going.
Additionally, its scientific name is Sambucus nigra. Although its Latin family name is Sambucus (derived from the Greek word sambuca), an instrument that is, oddly, a stringed instrument rather than the flute its hollow stems seem to demand. The Italian peasants also made pipes of the plant’s stems. Simple instruments they refer to as sampogna. (This historical information was gleaned from the excellent and in depth entry on elderberry in Maude Grieve’s site, Modern Herbal — which you can read in full here.)
Perhaps you’ve noticed elderberry in the late spring when its huge, showy blossoms dot the edges of roadsides and fields. Maybe you haven’t thought much about it, but when you see elderberry as a helper offering tasty and medicinal goodness for the price of gathering it, you’ll likely have a slightly different perspective when you come across a thicket. Hopefully, with this information in tow, you’ll have another reason for gratitude, and a huge source of tasty goodness to harvest this summer.
















Leave a Reply