Owning chickens and other backyard poultry is an amazing experience. One of the best parts about raising backyard chickens is an abundant supply of fresh eggs. But if you find yourself with an overabundance of eggs, you might start considering ways you can use them up or get rid of them.
A profitable way to get rid of extra eggs is to hatch them and sell chicks. You’ll also get to spend time with tons of fluffy, baby chicks, and who doesn’t want to do that?
Whether you’re planning on hatching eggs to sell baby chicks or simply to grow your own flock, one of the best ways to check which eggs are viable is to candle them. Read on to learn more about candling eggs, why you should do it, and how to candle eggs at home.
Why You Should Candle Eggs
The main reason to candle eggs is to determine whether or not they have been fertilized. Candling an egg allows you to see inside of the egg and look at the yolk. You can determine which eggs are developing and which ones aren’t — which is key to having good hatch rates in your incubator.
It’s important to realize that not all eggs are going to hatch. Even the best hatcheries don’t have a 100% hatch rate, so don’t be disappointed if all of your eggs don’t hatch.
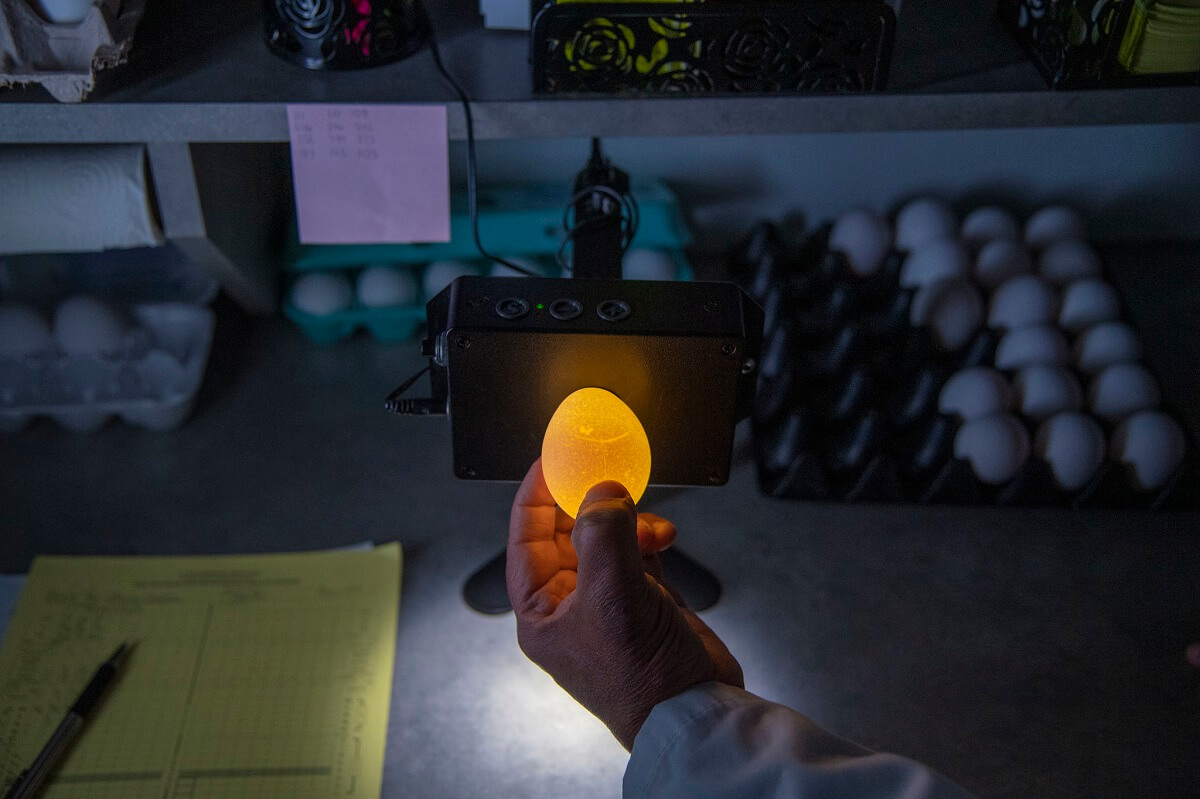
There are many reasons why an egg may not develop. Some eggs never get fertilized, and sometimes, despite being fertilized, eggs don’t continue to develop after fertilization. The eggs that never start developing are often called yolkers since they never develop beyond the yolk.
A few eggs may start to develop and then all of a sudden stop. These eggs are aptly named quitters. If you notice yolkers or quitters in your incubator, it’s important to remove them as soon as possible. Eggs that don’t continue developing will start to rot.
Related Post: Raising Baby Chicks: A Guide for First Time “Parents”
This rot can create a buildup of gas within the egg. If the rotting egg is left in the incubator, it can burst. Not only will it smell awful, it can introduce dangerous bacteria to your developing eggs.
Eggs that continue to develop properly are called winners. As long as the majority of your eggs are winners and hatch, you can rest assured you’re doing a good job incubating your eggs.
Supplies You’ll Need For Candling Eggs
While it may sound highly technical to look inside of an egg, it’s actually a very simple process that requires only one tool. You’ll need a candling light.
Candling lights look like a flashlight. They should have a funneled end that will concentrate the light directly into the egg. A strong flashlight can be used for candling eggs, but it won’t concentrate light the same way, making it more difficult to see the interior of the egg.
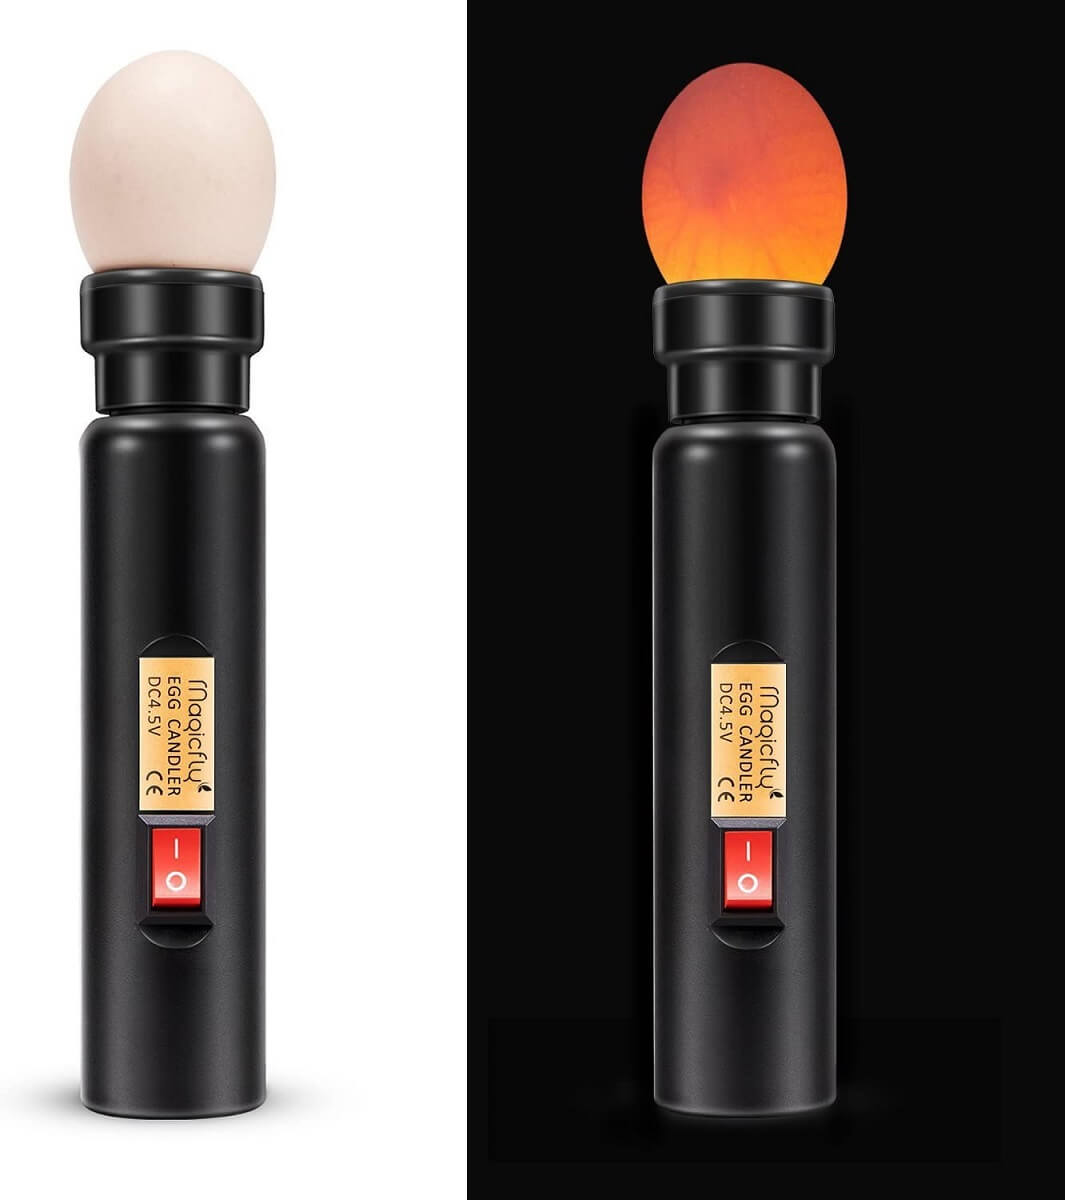
Other than your candling light, you’ll need a dark room and of course, eggs. Don’t try to candle eggs in a room with light. You want the room as dark as possible. That way, when you shine the light on the egg, you’ll be able to see inside.
It’s a good idea to set up a candling station when you get ready to candle your eggs. Clear off a table or counter. Bring in your candling light and all of the eggs that you plan to candle.
What To Look For While Candling Eggs
The main purpose of candling eggs is to determine which ones are developing properly and which ones are not. You’ll be able to see winners as well as yolkers and quitters.
An egg that is a winner egg will have visible blood vessels. These blood vessels will look like white lines that run all through the yolk and interior of the egg. It is the first visible sign that a chick is starting to develop. You can start to see this about six days after the eggs go into the incubator.
For eggs with a dark brown shell, it may be harder to see the blood vessels. If you have chocolate brown eggs, you may want to check them eight days after putting them in the incubator.
Eggs that are winners may also have a dark outline at the center of the blood vessels. You may even see a larger dark spot that is the developing eye of the chick. All of these are good signs that your egg is developing properly.
You may also notice a dark red ring inside of the egg. If you see this, it’s a sign the developing embryo has died. The dark red ring is a blood ring and only appears after an embryo has stopped developing. A dark red streak could also be a sign of a quitter, but is easily mistaken for some of the developments in a healthy embryo.
So if you notice dark red streaking, it’s best to leave that egg in the incubator and check it again. Don’t give up on the egg unless you see the distinct blood ring.
Yolkers never develop and look just like a normal egg. These eggs weren’t fertilized and didn’t start developing. The yolk will be visible and there won’t be any white or red colors in the interior of the egg.
Schedule For Candling Eggs
Knowing when to candle your eggs is as important as knowing what to look for while candling eggs. Developing eggs shouldn’t be handled after they’ve been in the incubator for 14 days. Handling eggs after day 14 can introduce bacteria into the developing chick and decrease your hatch rates.
Plan on candling your eggs three times. All three of these need to be done before day 14 in the incubator.
First Set Of Candling
The first candling should take place before eggs are placed in the incubator. When you first candle the eggs, you probably won’t notice any signs of development. In the first candling, you want to check for signs the egg is normal. Eggs should have one yolk that is visible and easy to see. Don’t try to hatch eggs with double yolks or no visible yolk.
Second Set Of Candling
The second candling should occur 6 to 8 days after placing them into the incubator. This candling is when you should expect to see some development. Look for developing blood vessels or visible chick development.
If you notice a blood ring, remove the egg. Eggs that haven’t started developing can also be removed from the incubator. Most eggs can be candled easily on day six. Dark shelled eggs are harder to see and may need to be candled on day eight.
The Third And Last Candling
The last candling should occur one week after the second candling, but no later than day 14 in the incubator (even if you candled eggs at day eight). When you candle eggs the last time, you’ll be checking to make sure your chicks are still developing properly. Look for further development.
Any eggs that stopped developing or have a blood ring should be removed. Don’t attempt to candle your eggs again after the third time. Any eggs that are questionable can be removed from the incubator if they don’t hatch within a couple of days of their anticipated hatch day.
Candling eggs is a unique experience that is quite enjoyable. It’s interesting to watch the chicks develop within the egg. You can’t look inside other livestock species and see the developing baby without the assistance of an ultrasound machine (which still doesn’t give you the same experience that candling eggs does). So if you’re thinking about raising chicks, candling eggs is an invaluable skill that you can use quickly to improve your hatch rates.













Leave a Reply