My brother had a dresser he was looking to get rid of. It was no longer usable … as a dresser that is! I could see the DIY potential, so I upcycled and repurposed what I could salvage and made some shelves for the kids’ playroom.
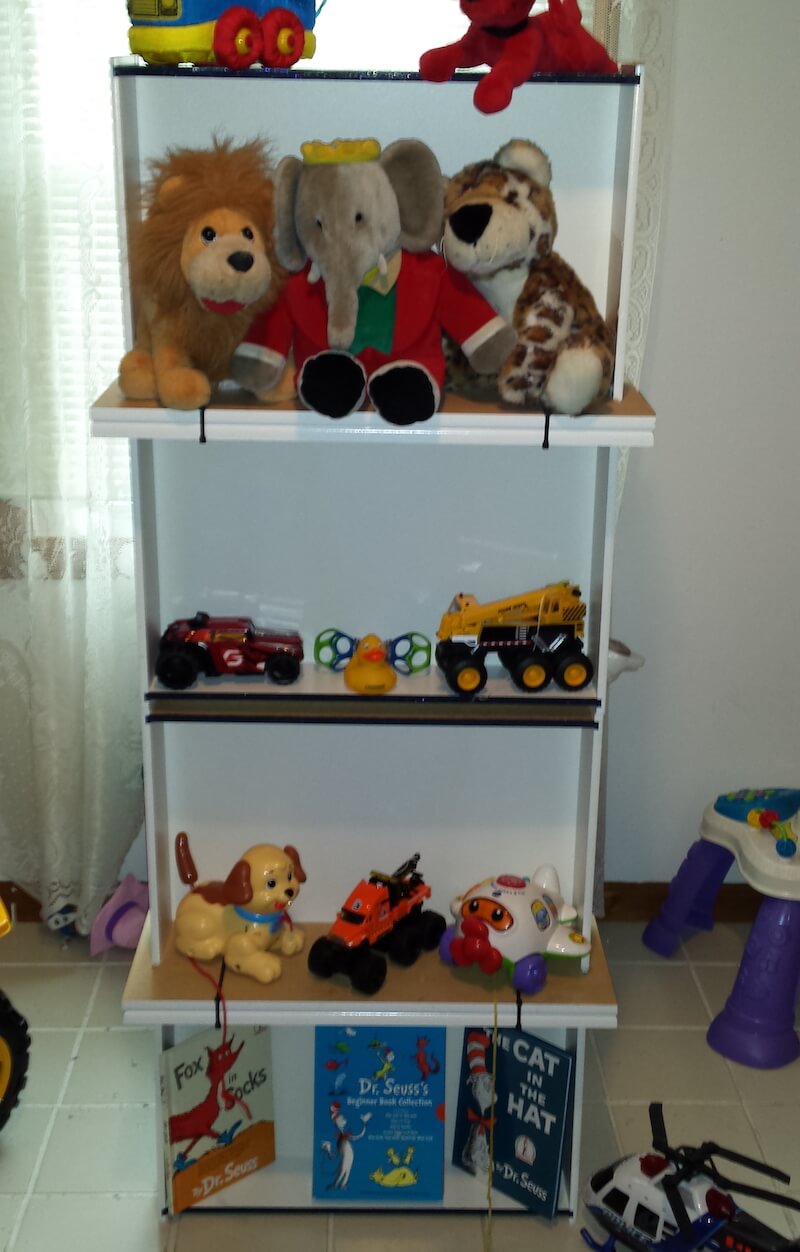
This project is super simple and doesn’t require too many resources, supplies, or time, for that matter.
Tools And Supplies
- Dresser drawers
- 11-inch cable ties/zip ties or screws (I combined two to make four longer ties.)
- Screwdriver
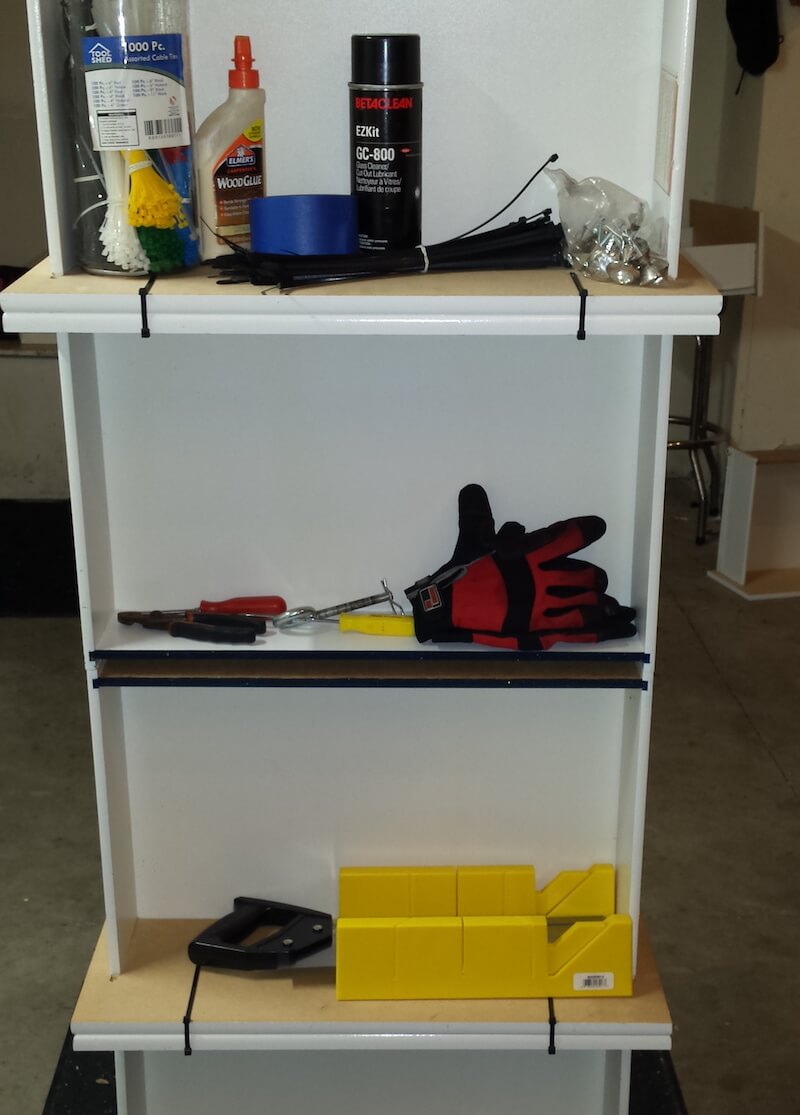
When it comes to what fasteners you use, it all depends on the shelves’ purpose. I used the zip ties, because the shelves were created for holding and storing mostly light items.
If you need something more sturdy or you’d feel safer adding an adhesive, you could always add some wood glue and a screw and eliminate the zip ties.
Directions
The specific drawers I used measured 1 foot 10 inches wide from side to side and edge to edge. The whole shelf measures 4 feet 10 inches. You can make it taller or shorter if you’d like. I didn’t want to change the paint color or anything, so all I had to do to get started was clean out the drawers and wipe them down. If you wanted to stain, paint, or re-finish the cabinet, you’ll want to do that once the dresser is disassembled.
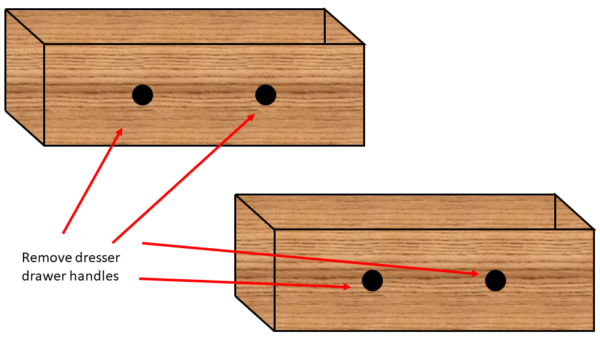
- Once your drawers are removed and cleaned, take your screwdriver and remove the drawer handles, if there are any. I set mine aside for future use and projects.

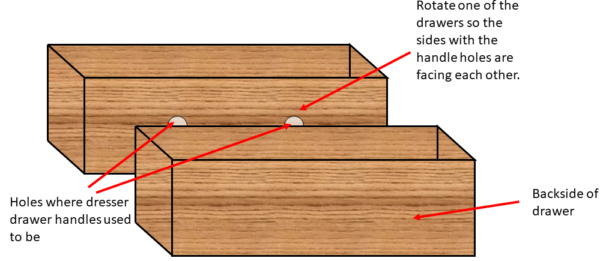
- I used the back end of the drawer as the bottom base.
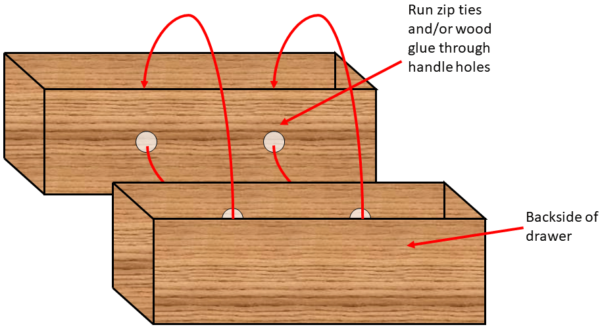
- Face the front of the drawers toward each other. The holes where the handles were should be touching and aligned with each other.

- This is where you’re going to apply the glue. Make sure to check that they line up correctly.
- If you are using wood glue, you’re going to want to put some around the edges of the drawers where they sit on top of one another.
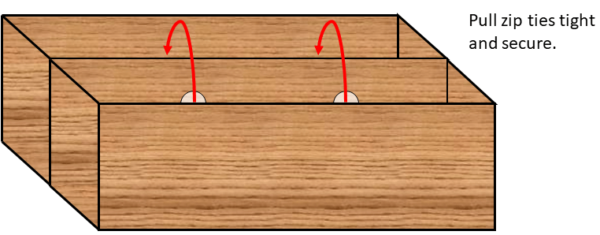
- Run the zip ties through the pre-existing handle holes and secure them. If you are using nails or screws, the zip ties will hold the drawers in place while you insert the fastener of choice.

- You can remove the zip ties once the glue dries or your fasteners are in place. I only used the zip ties as my fastener, so mine stayed in place.

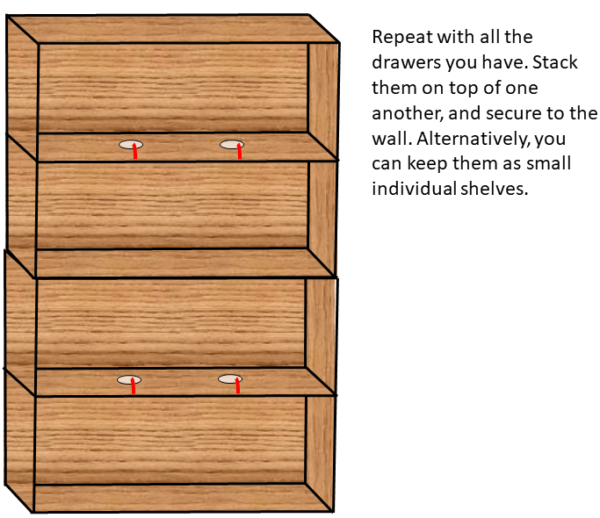
- Repeat this process with the next set of drawers starting with Step 2 and ending on Step 6.
- I chose to leave the shelves in two sections that stand 2 feet 5 inches so they can be separated easily when necessary.

- Now I have the option to stack them as one tall shelf or leave them as individuals for the little ones. You can also fasten the shelves to a wall so they can be wall shelves.

I added some dark blue, shiny paint around some of the trim. You can leave the drawers as they are, change their color, or simply add on to the existing color schemes.
That’s one of the reasons I love DIY projects, because you have the freedom to specialize and make anything unique!
Other Drawer Upcycle Projects
While looking around for ideas and options to play with, I came across some really amazing and awesome alternative options for repurposing old dressers and drawers. I’d like to share some of them with you!
- This dresser-to-bookshelf upcycle conversion requires a little more skill, but the work is so worth the end result! I love that an old antique was brought back to life to serve another purpose instead of being discarded.
- I love this idea! This guy takes an old dresser and upcycled it into a kitchen island. It’s so awesome! With the right tools, equipment, and elbow grease, you can turn an old good-for-nothing into an incredible great-for-something!
- I found this video of a photo collage that shows some really neat ideas for upcycling drawers. You will see everything from garden planters to eloquent pieces of furniture. Unfortunately, there doesn’t seem to be any instructions, but the ideas are so cool. And with a little creativity, you can even figure out how to do it on your own.
- Does your pet need a new bed? Check out this in-depth video and get a step-by-step tutorial that will teach you how to take an old dresser and make your dog its very own hideaway bed. It’s so cute!
- This awesome drawer-to-dog-food-and-water station can be adjusted and made for cats and other animals as well.
- Try out Insteading’s upcycled lampshades!
There are endless projects one can do with old furniture. Whether you’re going to refurbish it, recycle it, repurpose it, or upcycle it, there’s something cool to be done.




















Photo/Attachment:
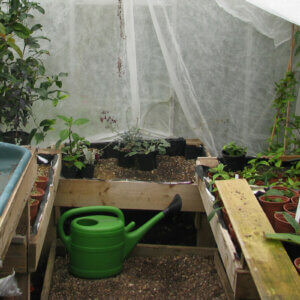
I took an old changing table and made the drawer into the top to create …well…this