It is hard not to admire old barns that are resting, quietly in old, abandoned farm fields. I often wonder what stories they could tell. This insight would provide a pivotal history to its former owner and the landscape the barns guard with a watchful eye.
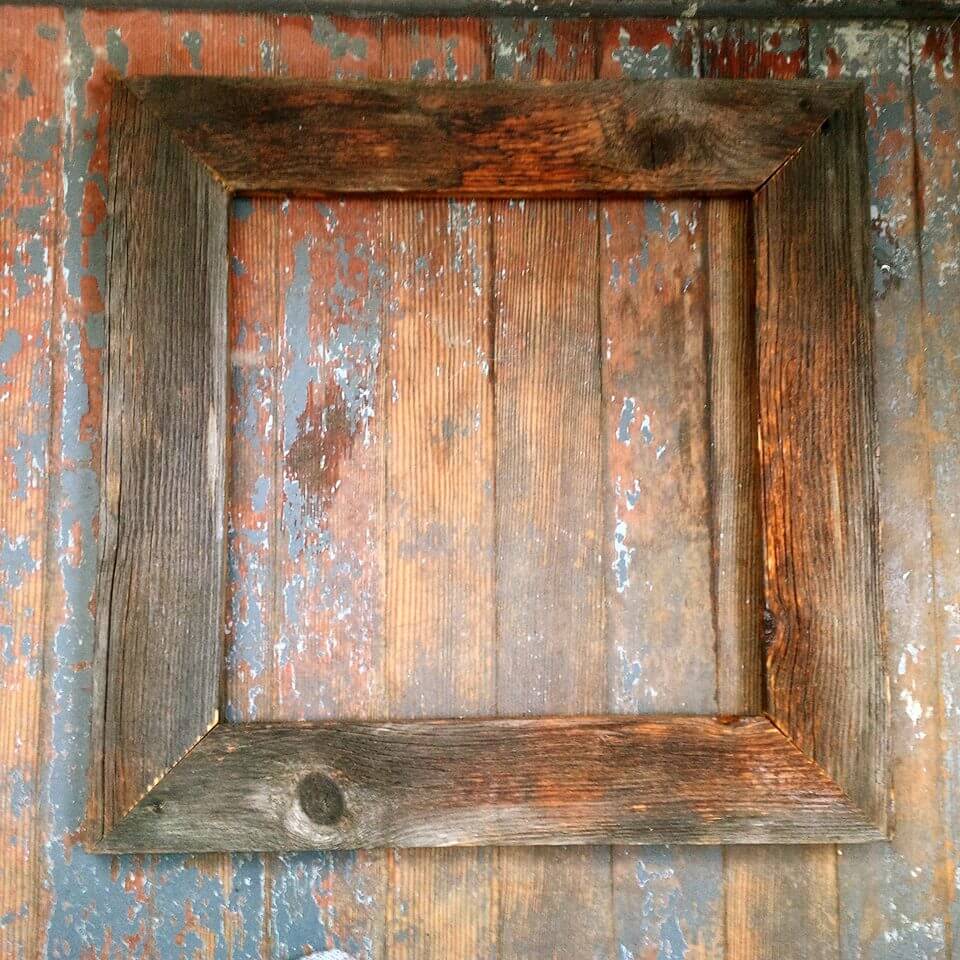
A few months ago, a friend of mine was in the process of tearing down one of his old barns and asked if I wanted any of the lumber. I couldn’t say yes quick enough. Re-using structurally sound timber from nearby barns lets you create one-of-a-kind gifts that can hold local history.
Timber from beams and joists are usually the best slabs to use as they are more seasoned and less likely to have rot or infestation. I find that using old wood not only is cost-effective but also looks better than new lumber.
Now, do note that I am no crafts person. I cannot make beautifully engraved wood workings, cabinetry or other objects that would make a stranger gasp in delight. I make boxes.
I am a wood worker and this has a merit within itself. I know my boundaries in taking upon projects. I also know that I enjoy making items in the simplest way. My theory is that less is more.
In looking at the old barn wood, I knew by its dimensions that I wanted to create a very basic and simple frame. The boards were straight and this saved a step in cutting the boards into straight slabs.
Building a frame is easy and the uses are endless. A frame can be turned into a mirror or picture frame. Or you can place cork boards (which you can purchase inexpensively at a discount store) in the center to hang pictures or jewelry. Your only limitation is your creativity.
To Begin
The first step is to cut the pieces to a uniform(ish) form. (Be sure that you have removed any nails from the recycled boards prior to use!)
I used a handsaw to cut the edges of each piece into a simple 45-degree angle that was made by way of a straight line that was measured with a ruler. You could use a circular saw but I did not have one to utilize.
The lumber I had acquired was Eastern White Pine (Pinus strobus) which is a softwood that is easy to work with and cut through. The downside is that it can dent easily, but I find that dents provide character to the finished project.
Once the angles are cut, you can sand the edges slightly. You do not have to do this process, as it is optional, but it does give your final project a cleaner look.
Pre-Drilling
I chose the length of each of the pieces to be 17″. That’s an uneven number but the length provided enough lumber to create a frame out of a single board. You can decide on the length of your pieces as the process of pre-drilling and assembly are exactly the same.
To prepare the pieces for assembly, measure the thickness of the boards you just cut. You want to figure out how many screws you will need to assemble the boards together. Two screws will usually be suitable for anything between 4-6 inches wide.
You will need to pre-drill the holes or the wood will splint. Pre-drilling is the process of marking the position of each of the screws that you will be drilling into the wood. Each pilot hole is a hole that is drilled a bit smaller in diameter than the size of the permanent screw.
Drill the hole in the wood. Make sure you do not drill completely into the wood right to the bottom. Leave 1/2″ of material at the end of the hole for the screw to fit into snugly.
Be careful! Even if you drill a pilot hole, the head of the screw may force the wood apart when you drive it into the wood.
Do note that hardwoods require a slower drilling speed than softwoods. This is so that it does not burn out the motor in your drill. Therefore, if you use species of wood such as mahogany, maple, or walnut you will want to use a slower speed. I used a slightly faster speed as I used pine, which is a softwood.
Frame Assembly
Clamp two pieces together and make sure the angles are flush.
Sink the head of the permanent screw no more than 1/16” past the surface of the wood. Be sure you use a screw that is not too long or you will go through the face of your project. I have done this many of times and tears have been shed. Thus, save the tears for another day and choose wisely.
If you want to sink the head of the screw deeper, countersink by drilling a shallow hole to the depth you want to sink the head. Use a drill bit slightly larger than the head of the screw. This is done to give the project a cleaner look. Also, it does prevent any hang-ups when you sand the completed project. Sinking the screw is not required. It really is based on your personal aesthetics.
Do this for all four corners and voila..you have yourself a barn wood frame.
You can sand the face of the frame to give it a polished look or leave it in its rustic form. Again, the choice is yours.
Related Post: 20 Free Pole Barn Plans
Ideas For Finishing
- Warm up olive oil (the finish that I used) and dab on the oil with a paper towel. Let the frame rest flat over night to allow the oil to set in.
- Soak a steel wool in 16 oz. of white vinegar overnight. The vinegar “eats” the steel wool and provides a nice aged/weathered stain at a low cost.
- Use leftover paint as a finish for your project.
Again, use your creativity and have fun. The potential is limitless!























Leave a Reply