A few years ago, I served as a Peace Corps Volunteer in Senegal, West Africa with the specific task of implementing agroforestry practices. Before this position, I was only vaguely familiar with agroforestry, but since then, my eyes have been opened to it, and I see it quite a lot. Whether done unintentionally through home gardens with shade trees or purposefully with live fencing techniques, it is a common and useful practice and a relatively simple concept to grasp.
Before we go further, here’s a brief overview of agroforestry and a generalized definition: a mixture of trees, crops, and animals on the same parcel of land.
The utilization of crops and livestock is optional, but trees are an essential part of agroforestry. Trees usually provide multiple services when integrated with agriculture whether through shade generation, shelter, erosion prevention, natural borders, green manure, fodder for livestock, or windbreaks.
This article will serve as a specific approach to implement live fencing, a very common agroforestry practice.
What Is Live Fencing?
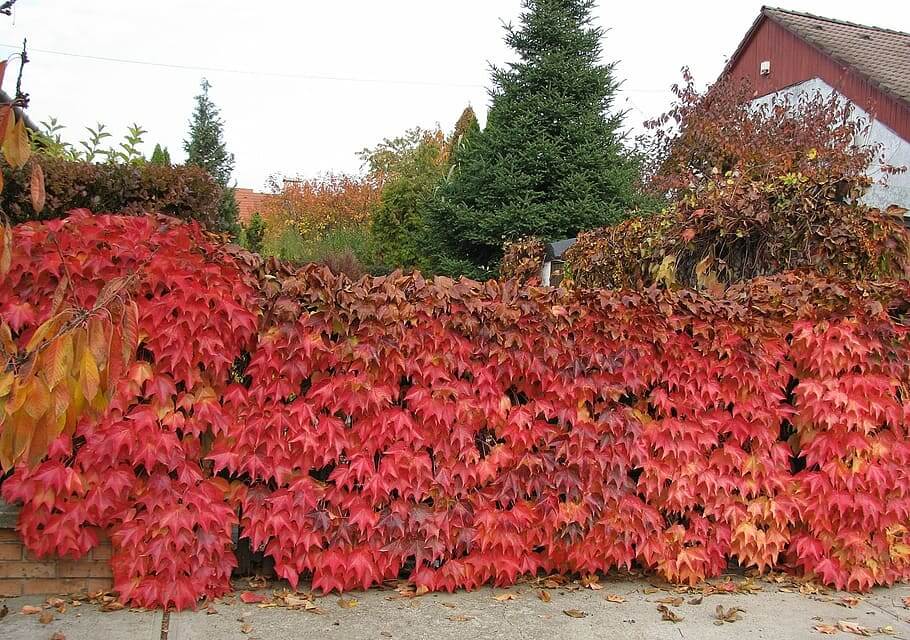
Live fencing is the use of woody species that are planted in close proximity to create a natural, living border. In truth, live fencing is exactly what it sounds like – a living fence, a fence that is alive. Having trouble seeing it? Picture the traditional American white picket fence, and then imagine each post replaced with a tree/shrub, and instead of connected horizontal planks of wood between them, the branches of the trees/shrubs are interwoven to create an impassable border. That is live fencing.
Live fencing is beautiful when you think about it. It creates living out of the inanimate/dead and allows a more natural environment. While there are, of course, natural borders existing within nature (i.e. mountains, rivers, canyons), fences are at large a human invention. Generally, borders existing within nature are larger, have a vital place in the ecosystem, and the transitions between them are gentle. Usually, fences create an artificial buffer that disconnects nature.
It is something you can think of as a “soft edge”, forest that gradually and naturally transitions into shrubbery and then a field. Regular fencing can be understood as a “hard edge”, like a forest that borders a parking lot.
Live fences are also an artificial buffer (human created, that is), but one that allows connection to still take place by providing habitat for wildlife (i.e. ground squirrels, song birds, reptiles and/or amphibians) and other environmental services. These attractive environmentally friendly aspects are as follows: helping sequester carbon (as living trees do) and growing trees instead buying products. Live fencing is a longer-term investment, as the fence could, theoretically, live forever, if taken care of properly. It won’t require post replacements or paint jobs, nor will it rust. It can be a more economically feasible option for this reason.
Goals and Objectives of Live Fencing
Privacy, natural borders, wildlife habitat, containment of livestock/keep out pesky wildlife species, and other agroforestry functions such as windbreaks and soil conservation.
Pros of Live Fencing
1. Durable for multiple generations (i.e., longer lasting)
2. More economically feasible
3. Provides wildlife habitat
4. May provide wood
5. More environmentally friendly and sustainable
6. Offer biological and agricultural functions that a manufactured fence cannot.
Cons of Live Fencing
1. Time consuming
2. Requires excess maintenance like pruning/watering
3. Sometimes hard to establish
Good Species for Live Fencing
Your specific objectives behind live fencing will dictate what species you use. For example, if your goal is to keep out (or in) livestock/wildlife, you will want to use thorny species. However, if you simply want a natural border, lower maintenance, or a privacy wall, your species choice will change.
Another factor that will impact your species choice, is your local environmental conditions. If you live in an area with subjectively dry, arid soil, there’s certain species choices that will not thrive here. This is important to keep in mind when selecting your live fencing species.
Here’s a list of common goals behind live fencing and some species ideas to go with them (many of them are interchangeable):
Privacy Live Fence Species
- Boxwood
- Privet
- Holly
Low Maintenance Live Fence Species
- Bamboo – no interweaving of branches needed
- Junipers/coniferous evergreens – no leaf drop cleanup
Natural Border/Aesthetics Live Fence Species
- Lilac
- Willows
- Boxwood
- Holly
Keeping Livestock/Wildlife In/Out Live Fence Species
- Cactus – obviously, climate is an important factor here
- Acacea species
- Acacia paradoxa
- Acacia verticillata
- Holly
After you have decided what species you would like to create your live fence, you will need to further decide if you would rather cultivate a tree nursery, or buy young trees that are ready to be planted. This decision depends on your time limitations and the amount of personal effort you would like to put into the project. If it isn’t obvious, creating a tree nursery will take more time and care than simply buying young trees. However, it will be more economically feasible to go this route.
How to Plant A Live Fence
1. Prepare the soil/hole
Dig a hole 3 to 4 times larger than the grow bag or seedlings container
If soil in your area is of low quality or arid, it can be helpful for seedling establishment to amend the soil where you will be planting the seedlings before the planting takes place. To do this, dig the hole as already described and add amendments. Mix the amendments, water the hole, and allow it to sit for a day or two before planting the seedlings (to allow amendments to absorb into the soil).
Soil amendments can include compost, tree ash, manure (cow, goat, bunny), silica, etc.
2. Remove the seedling from the grow sack
Carefully do so to ensuring the roots are not damaged or broken in the process.
It can be helpful to roll the grow sack in your hands first to help break the soil up to decrease likelihood of root breakage.
3. Ruffle the soil
Doing so around the rootstock will help decompact it and allow roots to easily grow outwards.
4. Place seedling
Place seedling in the center of the hole being conscious to not plant it too deep. The depth should be enough to completely cover the soil encasing the roots, but not so deep it covers more than an inch of the seedling stem.
5. Fill the hole
Fill in the remainder of the hole and pack soil down enough to discourage the seedling from shifting within the hole.
6. Water the seedlings
Continue watering freshly outplanted seedlings until they have become adequately established.
The proximity/planting distance between the seedlings directly coincides with the species you decide to plant. This is personal research that should be done after you decide the species you would like to use for live fencing. Generally, the seedlings will be planted in a row about 1 to 2 feet apart (again, this depends on the species you use).
Pruning and Weaving Live Fencing
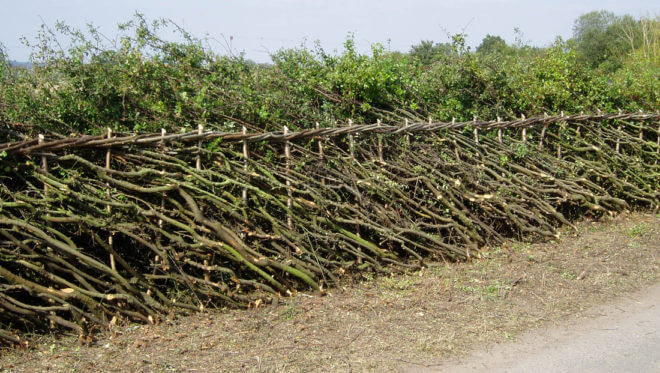
After the live fencing seedlings have been out-planted and begun growing, the pruning and weaving process begins. Your objectives for having a live fence will dictate what exactly this process looks like for you in terms of the height, thickness, shape, etc., of your fence.
Here’s a list of general steps for after-planting care:
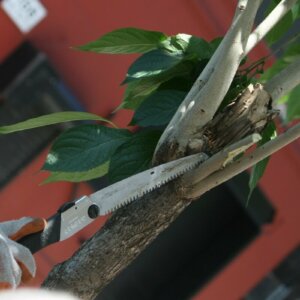
- Trim to the shape and height you desire with clean pruning shears (or a tool that works the same).
- Tall live fence/windbreak – leave the top of the seedling alone and only trim the side branches.
- Short/squat/privacy barrier/keep livestock in or wildlife out – trim the top of the seedling to help promote side branching, and therefore make the tree grow thicker, creating a natural privacy barrier and making it difficult for animals to break through.
- Begin weaving branches between the live fencing trees. Weaving essentially allows the trees to grow together as one, without there being gaps and spaces between the tops of the trees.
Live Fencing FAQ
Some important things to keep in mind depending on your objectives:
What do I plant for privacy?
If you desire a privacy barrier, ensure you plant evergreen species so you don’t have an unwanted surprise when winter comes, and your privacy barrier suddenly loses its leaves and becomes see-through!
What do I plant for safety from wildlife?
If you want a live fence that is designed to keep livestock in and wildlife out, use a thorny species to discourage the animals from breaking through the fence and discourage animals from eating the fence!
What do I plant if I live in an area with animal activity?
If you’re are creating a live fence in an area that has a lot of animal activity, make sure you protect the fence during the establishment process so it is not mowed down via animals eating it and destroyed before it is established.
What do I plant if I live close to a sidewalk?
If planting the live fence close to a sidewalk, paved road, or driveway, make sure you choose a species with roots known to grow downward versus outward, otherwise you will deal with a cracking sidewalk, road, or driveway from the roots growing under it.
Have a plan in mind for entrances and exits for your live fence (you can’t move the trees in and out of place as you would a doorway).
Know your allergies! It would be terribly unfortunate to create a live fence with annual flowering cycles that trigger allergic reactions.
After establishment, live fences are relatively low maintenance and beautiful to have around. They are long lasting and generally damage-resistant. The environmentally friendly aspect is a huge attraction, especially knowing you are providing wildlife habitat for birds and small critters.















Leave a Reply