To those unfamiliar, there may not seem to be much difference between a gourd and squash. Fruit-wise, they share a lot of similar attributes — cool shapes, hard rind, seeds hidden inside, and beautiful colors. But once you try to grow one, you will quickly notice the enormously long, trailing vines, the beautiful, night-blooming flowers, and the broad, plate-like leaves that set them apart.
The fruit that results from these huge vines has been used as vessels and instruments for thousands of years around the world. Once cured properly, they basically become a beautifully round, perfectly formed, (and nearly forever-lasting) wood-like shape that can be used for whatever you dream up.
If you have the space to go on the gourd adventure, you should try your hand at growing these useful and unusual plants.
Requirements For Growing Gourds
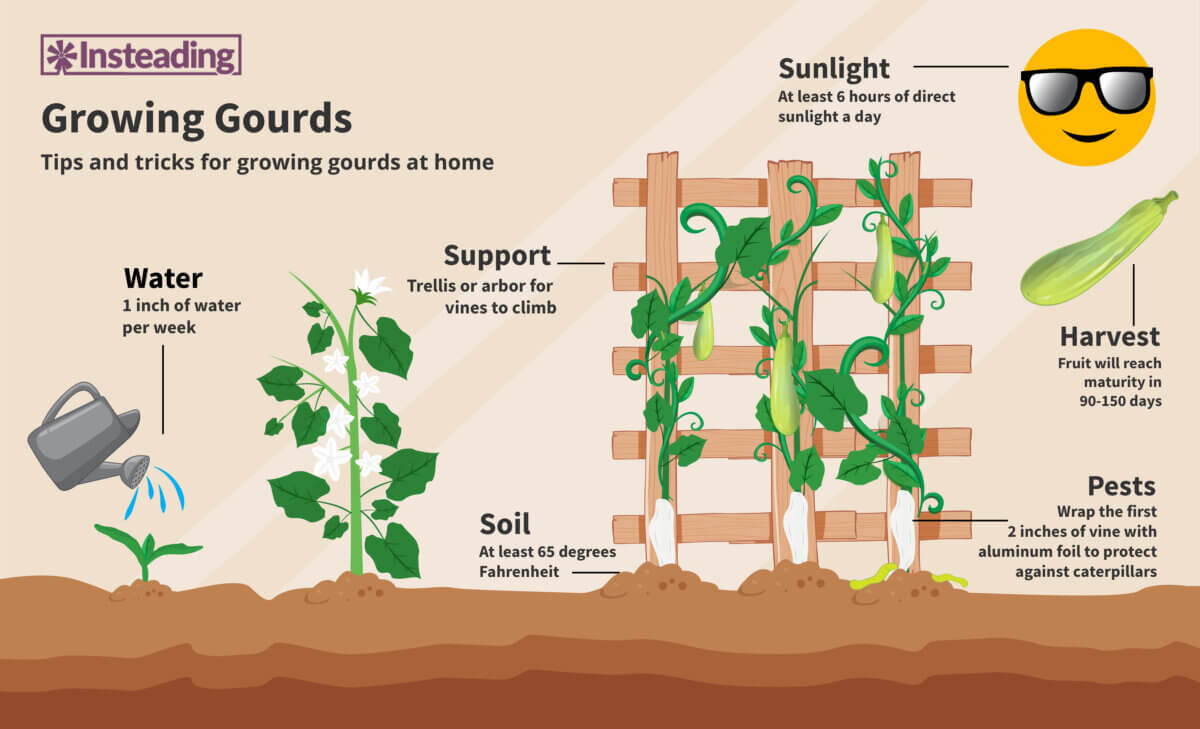
It is often said that gourds thrive on neglect — and I have to confirm that in my experience, this is true! While I’m carefully caging my tomatoes, fighting cabbage worms on my kale, and ripping squash bug eggs off of the zucchini, my gourds keep on blithely climbing their trellis. Gourds, like pretty much all plants, thrive in fertile, well-draining situations with full sun. Other than that, they really don’t need much else when it comes to daily care.
Related Post: Growing Squash
Gourd seeds can be sowed inside using pots, usually 4-6 weeks before the last spring frost. In a warm environment, it will take seedlings about 1 week to germinate then 2-3 weeks before it can be transplanted outside. They should be sown about 1-2 inches deep, and spaced at least 3-5 feet apart to allow enough space to thrive. The soil should be well-draining, with a temperature of at least 65 degrees Fahrenheit and a pH of 6.5.
If you are directly sowing outside, you must wait until the weather gets warmer. Spring is the ideal growing season, once the threat of the last frost has subsided. Wait a week or two after the last frost to direct sow your gourd seeds.
Make sure that the area outside gets tons of direct sun, with at least 6 hours a day. Full-sun gourd plants will already be setting fruit by the time shady plants have their first few tendrils. They need at least 1 inch of water per week, and a balanced fertilizer like a 10-10-10 or manure is recommended. Gourds would do well planted near corn, pole beans, datura, and sunflower. However, never plant gourds near potato plants as they are incompatible.
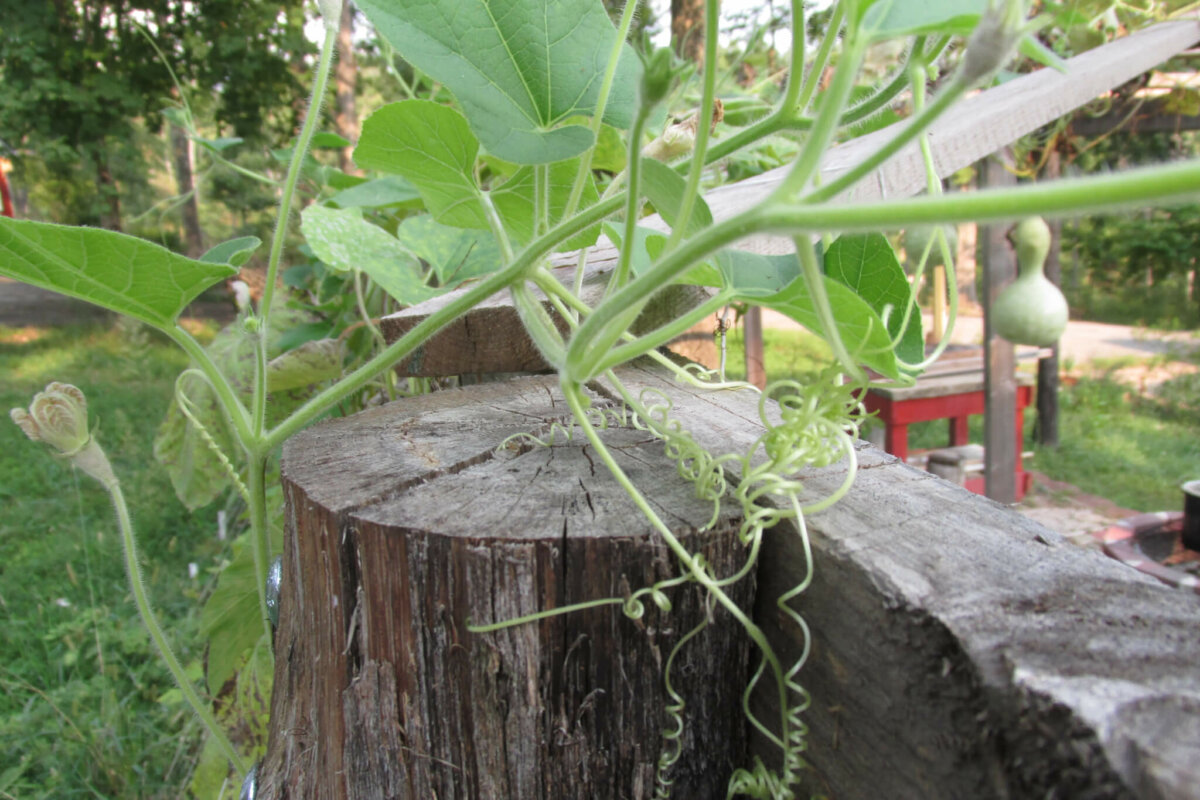
Have a support system already in place when you plant the seeds. Once they sprout, they will grow rapidly. Young plants especially will need extra support. Whether you opt for a trellis, fence, arbor, or even a defunct tractor (as one homestead I saw did), these long, trailing vines will need some structure to climb if you want to keep them from taking over. Some Lagenaria varieties such as dipper gourds, require ample and careful trellising to allow their shape to be nice and straight.
On our homestead, our gourds have a living roof over our outdoor kitchen area. The night-blooming white flowers of the birdhouse gourd are absolutely beautiful above an evening dinner. However, if you prefer bright yellow flowers a day-blooming plant might be a better choice, such as the luffa gourd.
Related Post: Birdhouses: 32 Homes For Your Feathered Friends
Probably the hardest thing about growing gourds is waiting for them to reach maturity. It can take more than 150 days for the hard-shelled types. Though you can experiment with growing gourds in any USDA planting zone, be aware that this is a long time to wait to pull in a harvest.
It may not be attainable for folks who get a late start in their gardens or have very short growing seasons because gourd vines are sensitive to frost. But if you don’t have a long growing season, don’t despair. If it’s merely fall decorations you seek, the soft-skinned, warty, colorful, and ornamental gourds that you’re familiar with (Cucurbita pepo varieties) may take only 90 to 100 days.
Common Gourd Pests
If there was any garden pest that could quell your hopes of growing gourds that are healthy and delicious, it is the squash vine borer. These caterpillars are most active in June and July, and wreak havoc on both squash and gourd vines by tunneling into the bases and eating away the vine from the inside-out. Eventually, the vine dies in a rotten, light-brown pile of sadness, taking the chances of a good harvest with it.
The first signs of trouble may be the sight of your gourd vines wilting in the midday sun. You may still have time to solve the problem, though. Check the bases of the plants for little holes full of greenish sawdust-like material. This is technically called “frass” which is a nice word for caterpillar poop. That’s your cue to take some organic, borer-battling action.

One of the more unique methods for controlling these pests that I have heard requires some nighttime stealth. Go out at night with a flashlight and illuminate the vines from behind. When you see the caterpillar hidden inside the hollow of the stem, take a pin or needle and stab the pest into oblivion.
A little violent, perhaps, but effective. An alternative is to slit the stem, remove the caterpillar with a bit of wire, and then bury the wounded stem in well-drained soil. It should be able to produce more rootlets as it heals, and it will anchor and protect itself.
Another organic method I’ve seen is wrapping the first 2 inches of vine that emerge from the ground with aluminum foil. This method also helps to protect against disease and mold. It will require you to adjust the wrapping every week or so to prevent girdling the growing plant, but the effort is well worth it.
Related Post: How To Get Rid Of Aphids
And a third idea is to plant a sacrificial trap crop of blue hubbard squash near the area where you’re growing gourds. That variety of squash is apparently one of the borer’s favorites.
The best action against any garden pest, however, is always prevention. Good crop rotation, removal of spent vines, experimenting with floating row covers, and cleaning up the garden at the end of every year (pupae overwinter in the soil) are excellent practices for mitigating pest attacks.
Aside from insect pests, keep a wary eye on sharp-beaked poultry. My ducks have never bothered my growing gourds, but I did have a male guinea who made it his mission to destroy growing fruit, and we only got a few finished gourds that year. My chickens don’t have access to the gourd patch, but if you free-range, make sure you’re growing gourds on a trellis that is high enough that the chickens aren’t tempted.
Harvesting Gourds
The time to harvest gourds depends on the intended use, as there are many different types of gourds. Believe it or not, some varieties are edible when young, so not every fruit needs to become a wren house! If you’re going to be putting them on the supper table, you need to cut them from the vine while they are still young and tender. The fruit color will be fully present, and the stem will dry up and turn brown. It’s recommended that you use a sharp knife or garden shears to snip the stem of each fruit.
If the gourd has already grown a rind strong enough to resist being dented with a fingernail, they’re too far gone for eating. You may as well let those reach maturity, which will take about 75-110 days. If you plan on doing this method, you can enjoy them for next year’s seeds and projects.
Harvesting Gourds for Vessels
Before there were lathes to turn beautiful wooden bowls and goblets, there were gourds. Gourds make fascinating vessels for eating, drinking, and storing materials, and they are naturally beautiful. Believe it or not, they can even be used as musical instruments!
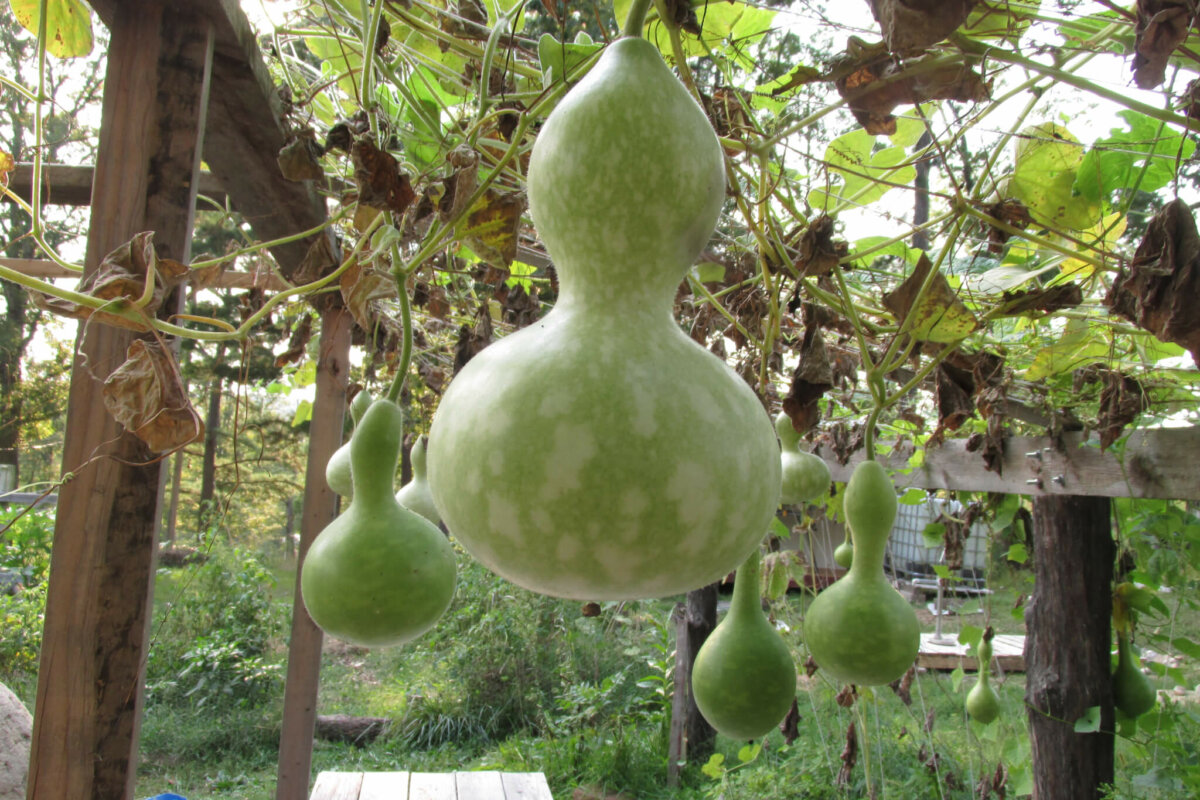
So, if you’re growing bottle gourds, dipper gourds, and other Lagenaria siceraria varieties, it is best to leave the gourd on the vine until the stem connecting it to the main plant has turned a nice woody brown. This ensures the plant is fully mature and will be able to cure.
I once unknowingly harvested a few gourds too early, and the skins merely rotted away when I tried to cure them, so this woodiness is an important detail to notice. Be picky when it comes to these gourds. Any with blemishes or discolored spots may rot instead of cure, and they can affect the good gourds curing near them.
Related Post: Gourd Lamps
To cure a hard-shell gourd like a birdhouse gourd, there are several approaches. They all take time, though — sometimes, up to six months! More easy-going growers will leave the gourds on the vine, allowing them to naturally dry and cure in the field. They’re often ready by January which leaves you plenty of time to clean up the garden beds before the spring planting.

Other methods are more proactive: Collecting the gourds with as much stem as possible, putting them in a well-ventilated, dry place, and rotating them every week or so. Don’t worry if you see some fungus on the surface. As long as it’s not a soft spot, it’s just a natural part of the curing process. In time, the gourds will go from being heavy and waxy to light and hard. You’ll know they’re ready when the seeds inside make a rattling sound.
Then what you do with your cured gourd is up to you! Whether you go for wren houses, martin houses, dippers, painted decorations, bowls, cups, or even instruments, there are thousands of years of cultural traditions in gourd use for inspiration.
Harvesting Gourds for Eating
Yes, you can eat gourds. Some of them, anyway. Many of them taste just like zucchini when picked young, giving you the choice of making a meal from the immature fruits.
The cucuzzi gourd (also called serpent gourd) sometimes makes tender fruits up to 5 feet long — which is plenty for dinner and then some. Edible varieties include the snake gourd, young luffa gourds, and bottle gourds.
Harvesting Gourds As Sponges
Luffa gourds are famous as natural, gentle sponges. In order to stock your bathroom with months of good scrubbing, allow the gourds to fully mature and wither on the vine. Then peel off the outer skin to reveal the useful, beautifully-arranged fibers inside.
Related Post: 20 Pumpkins You Should Have Planted This Year
Tap out the seeds for next year, wash away unwanted plant material with sprays of water, and allow the sponge gourd to fully dry in the sun before storing it. If you have tons of fruit, don’t forget that you can eat young luffa gourds just like any summer squash.
Harvesting for Decoration
If it’s fall table decor you seek, the answer is probably gourds from C. pepo. These brightly-colored relatives of most summer squash retain their colors when dried, outclassing the hard-shell gourds of Lagenaria siceraria which admittedly, turn a not-unattractive light tan. But you will need to wait six months to have them ready, so you won’t be decorating with them the same fall you grew them.
Rather than recommending a certain type, it’s probably the most cost-effective to get a good gourd mix and see what green-striped, orange-speckled, or warty beauty comes out of the ground.
Gourd Background
Gourds have been grown for utility for thousands of years. In fact, some scientific data and research indicate that these long vines may have been the first domesticated crop — probably cultivated in Asia — though the domestication of gourds has been an integral part of many African agricultural traditions for nearly as long.
Precisely defining what species a gourd is, however, is more complicated than simply rattling off a Latin phrase. The term “gourd” encompasses several genera and species including the bottle gourd (Lagenaria siceraria), the Calabash Tree (Crescentia cujete), various C. pepo varieties used as fall decorations, luffa gourds (Luffa aegyptiaca and Luffa acutangula), edible snake gourds (Trichosanthes cucumerina), and long-storage wax gourds (Benincasa hispida).
Even the bitter melon featured in many Asian dishes (Momordica charantia) is sometimes referred to as a gourd. Dig into the rich, long history of these plants, and you’ll end up touching every corner of the globe.
Do you have experience growing gourds on your homestead? If you do, how do you use them? We make birdhouses and fun containers out of ours — I’d love to hear your ideas in the comments below!



















Leave a Reply