
A front door is something you often take for granted. You don’t often need to think too much about it. But when my family moved into our new-to-us home, we quickly discovered that the front door was in pretty bad shape. It was made with particle board instead of solid core, and it wasn’t energy efficient at all. We felt drafts in the entryway hall even after replacing the weather stripping. It was also showing signs of significant deterioration.
Your front door is the first line of defense against intrusions of the elements, so investing in a good one is truly worth the effort. We opted to replace our door with a fiberglass model, since it had more insulating value than wood. Our new door was also Energy Star-qualified, which meant is had the tighter-fitting frame, energy-efficient core and triple-panel insulating glass required to meet the criteria.
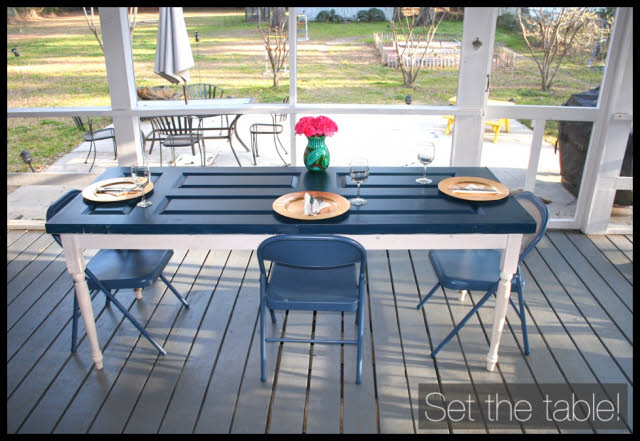
While our old door wasn’t up to scratch, it certainly hadn’t reached the end of its useful life. With spring coming in like a lamb and our screened-in porch in desperate need of some furniture, we decided to turn our old door into an outdoor dining table. Here’s a step-by-step guide to show how you can do the same.
Supplies
- A front door
- Three 8-foot long 1” x 6” pine boards
- Four table legs
- Four corner plates
- Exterior paint and primer
- At least 12 1 ¼” screws
Equipment
- A power drill
- A chop saw
- A pocket-hole jig
- A handsaw
Step 1:
Clean up the old door, including removing the hardware and weather stripping. Then, give it a coat of paint with some exterior-grade paint and primer.
Step 2:
Start building the base for the table, which is known as the table skirt. To do this, cut your 1x6s into four pieces: two long and two short. Each piece should be measured at eight inches short of the length and width of the door to allow for overhang. Then, use a pocket-hole jig to drill pocket holes eight inches apart along the length of each 1×6.
Step 3:
With a handsaw, make a ¼-inch deep notch about one inch from each end of the 1×6. Then, insert the corner plate into the notch and attach it with a screw. Do the same with all four corner plates and all four 1x6s. Now you have the frame of your table skirt.
Step 4:
Place the legs upside-down in the corners of the table skirt, with the flat edge facing the center, marked where you need to drill for the bolts. Then, drill a hole in each leg. Screw the bolts that came with your corner plate into each leg and repeat for each corner of the table skirt.
Step 5:
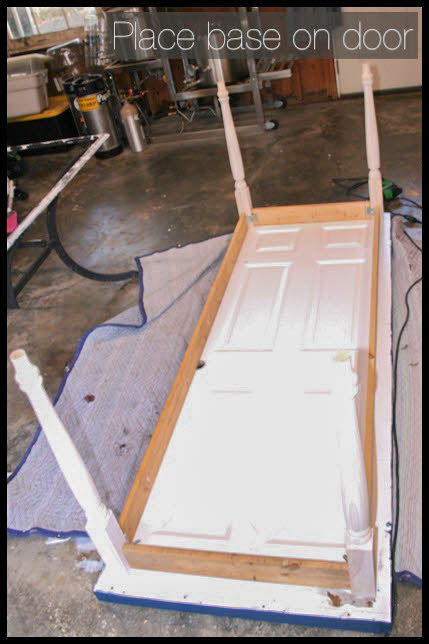
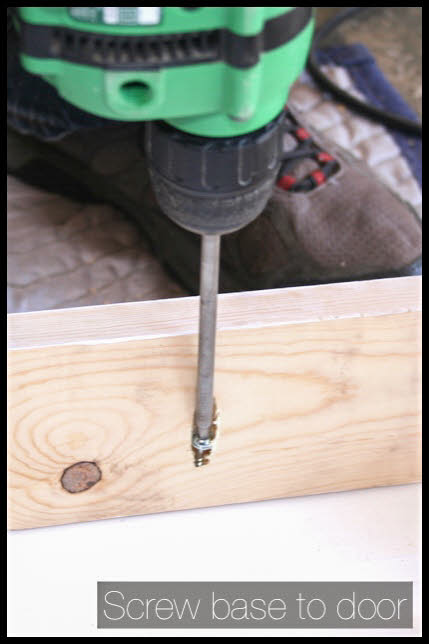
Once all the legs are attached, place the base of the table on the bottom of the door, centering it before drilling 1 ¼-inch screws through the pocket holes to attach it to the door.
Step 6:
Finally, flip it over and admire your new table.
As we were doing this project, I realized that if we’d had an old table that had seen better days, we could have easily repurposed the skirt from that to create a completely upcycled table. Or, if the door you’re re-using is still high quality, you could attach the legs directly to the door and forgo the skirt entirely. Either way, you’ll end up with a beautiful new piece of furniture. The next time you replace your front door, don’t throw away the old one—upcycle it!
Jennifer Tuohy is an environmentally conscious mom who likes to find new life for old things. From making planters out of old rain boots to creating a dining table out of an old door, Jennifer shares how-tos for many different projects with her readers. If you don’t have an extra door hanging around, you can find plenty of new front door options at The Home Depot.
















Thanks. One step missing. Sand down door before painting.
HI,
Thank you for these instructions. I would like to make an old door into a temporary table for displays during the holidays. Does anyone know how to make something that could use old porch posts that could be detached from the door once the holidays are done?
Thank you
Tamara