I have a secret weapon in my kitchen. It makes my daily bread taste amazing (and far more digestible than anything store-bought). As long as I take care of the starter, this weapon is an endless material. And the best part of all? It’s free for the taking. I’m talking about wild yeast — a faithful little organism that can be harnessed by anyone who takes time to get to know it.
Watch The Video
The English word yeast comes from the Old English “gist” and the Old High German “jesen” which means to ferment. This tiny fungus may very well be the first domesticated organism, having been captured and pressed into service to make alcoholic drinks and bread for humankind for centuries. Without it, life would be a lot less merry and a lot more hungry, that’s for sure!
Forming a relationship with wild yeast is a declaration of independence. Once you understand how to use your own locally captured wild yeast strains, you’ll never need to go to the store to buy yeast again, and you’ll have truly unforgettable bread and brews in exchange.
For the purpose of this article, I will be describing the means, method, and maintenance of a sourdough starter; the wild yeast that’s used to bake delicious bread. For those interested in catching wild yeast to make boozy concoctions, I cannot more heartily recommend Pascal Baudar’s book The Wildcrafting Brewer.
Where Is Wild Yeast Found?
Defining sources of wild yeast is a bit of a nonspecific endeavor when you think about it, because wild yeasts are everywhere. They form the bloomy layer on wild grapes and blueberries. They can be extracted from pine cones, flowers, or tree leaves. Your skin is even home to different types of yeast.
Wild yeast ubiquity is a confident assurance that you, too, will be able to capture it with ease. As long as you don’t live in an autoclave, you will have wild yeast in your environment. It’s there in your kitchen. You merely need to give it a nice place to colonize and thrive.
How To Capture Wild Yeast
I’m probably going to offend some purveyors of specific sourdough strains with this section, but I don’t mind. Come join me in a starter insurrection, and I’ll let you in on a little secret: A wild-yeast sourdough starter is so easy to capture, a child could do it with a jar, flour, and water.
Related Post: How To Make Sourdough
You don’t need to buy a kit from an online store. You don’t need to delve through endless threads on sourdough forums trying to hack the process with pineapple juice, organic grapes, or whey. You don’t need to attend some workshop to glean the carefully-guarded, month-long, secret process not available to the non-baking, ignorant hoi polloi. A sourdough starter is dead easy to make and maintain, and it is only a recent phenomenon that this knowledge has dropped out of our culture.
I have done a lot of reading on the subject. Baking bread is a daily activity for me, and I have been shocked by how convoluted the process is described in print. Having made dozens of homemade starters over the years that have all produced delicious bread, I am confident that my honed-down, simple process is foolproof for anyone with the attention to see it through.
This is just one of many different methods for catching and using wild yeast, but it works for me as a busy homesteader, and it can work for you too.
Supplies
- 1-quart mason jars (2)
- Non-chlorinated water
- Whole wheat flour or whole rye flour
- Chopstick/non-metal utensil
- Rubber band
- Clean washcloth or double-folded section of cheesecloth big enough to cover the mason jar
- One week of time (or less depending on the weather)
The basic premise is that we’re going to create an ideal environment for wild yeast to live, and then maintain that environment. If you are new to fermentation, this is going to be a bit of a wild ride, but hang on, it’s so worth it. Though there may be some weird smells at the outset, the final product is going to be pleasantly fragrant and will raise your home-baked sourdough bread.
Day One
In one of the mason jars, use a chopstick to thoroughly mix 1 cup whole grain flour of your choice with 1 cup of NON-CHLORINATED water. If you have city water, this means you can’t run water from your tap straight into the mason jar. The chemicals will kill the wild yeast in your starter.
The whole grains are also important. Though you can technically make a starter with white flour (I’ve never tried it), whole grain flour offers better results as it feeds the yeast more complete nutrition.
The mix should have the consistency of very thick pancake batter, and you’ll want to maintain that consistency over the next week. Cover the mix with a cloth secured in place with a rubber band, and set the jar in your kitchen — out of direct sunlight, but where you will see it and not forget.
Day Two
Compost half the water and flour mix, and then add ½ cup of water and ½ cup of flour, mixing thoroughly with the chopstick and adding more flour or water as needed to regain that pancake batter thickness. What you’ve just done is reduce the yeast population by half and provided food for the yeast that remains. This food is what they’ll use to grow in strength. Cover again.
Day Three
Depending on the ambient temperature of your kitchen, you may or may not start seeing little bubbles form in your starter when you stir it. There may also be a layer of clear liquid starting to form on the top.
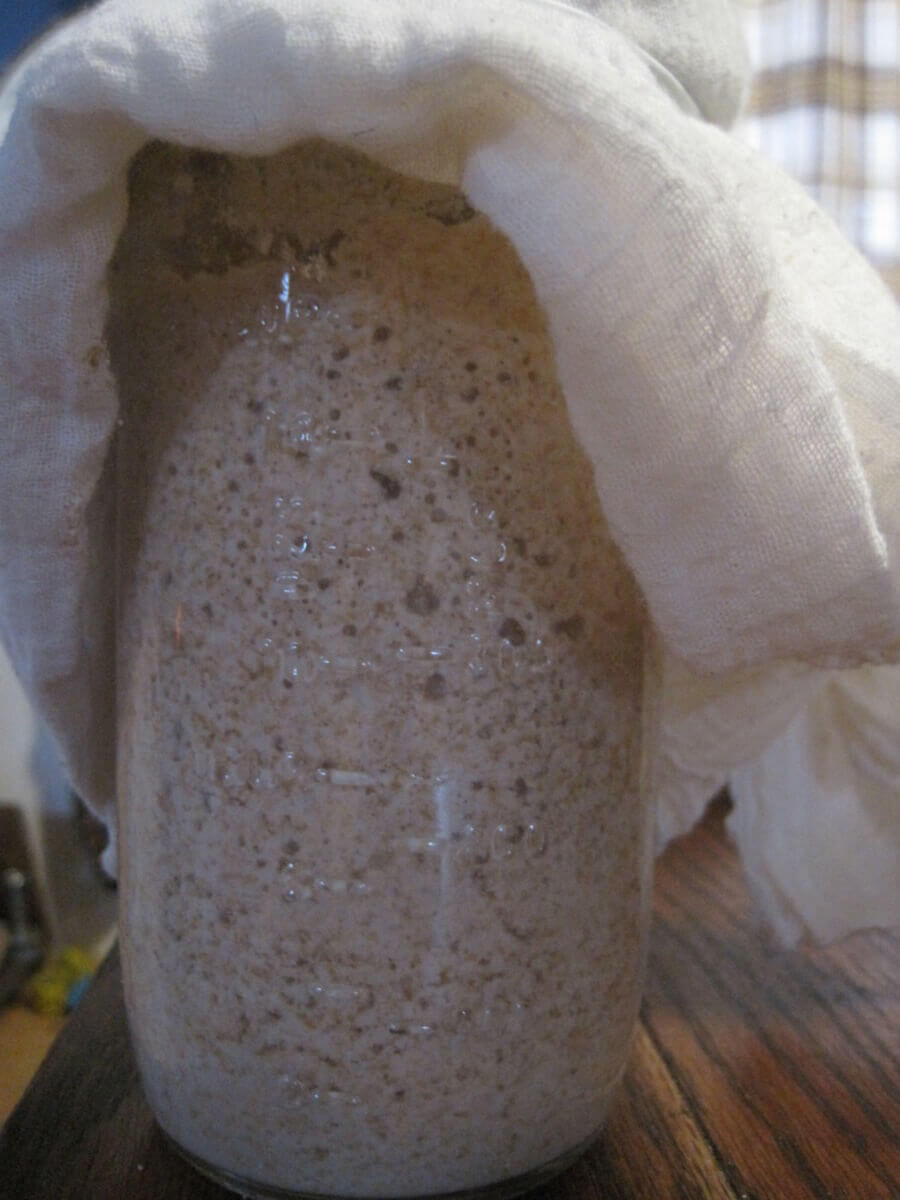
Additionally, you may notice a rather unpleasant smell coming from the jar. If you notice these, take heart! Your starter is alive and beginning the process of becoming stable. Don’t worry, that smell is going to change for the better in a few days. And if you don’t see these signs yet, no worries. Starters develop more slowly in cooler temperatures, and there’s still time to get your wild yeast established.
As on day two, reduce by half, feed, and cover.
Days Four Through Seven
Continue reducing by half and feeding as above. If all is going well, you will start to see your starter change in character. Bubbles will become a regular sight, percolating up like a carbonated milkshake. The clear liquid will also become a normal occurrence. It’s the (vaguely alcoholic) waste of the yeast.
Related Post: Bread Proofing
The volume of the batter in the jar will start to increase after feeding as the yeast produce hundreds of carbon dioxide bubbles (the power to raise bread has arrived). Finally, and most pleasantly, the smell of the jar is going to change dramatically. It will shift from that rotten cheese funk to something that smells downright pleasant like a nice, dark beer or wine.
Days Eight Through Forever
After the mix in the jar has become active, smells good, and has changed in volume after a feeding, give yourself a pat on the back: You have a sourdough starter, and can now decide what to do next. If you bake every day, the starter can live happily on your counter.
You’ll want to change out the jar every so often so you don’t have a crusty build-up of starter around the opening of the jar (hence the second jar in the supplies list). Now that your starter is fully cultured, you no longer need to compost the reduced starter material. It’s what you’ll use to bake.
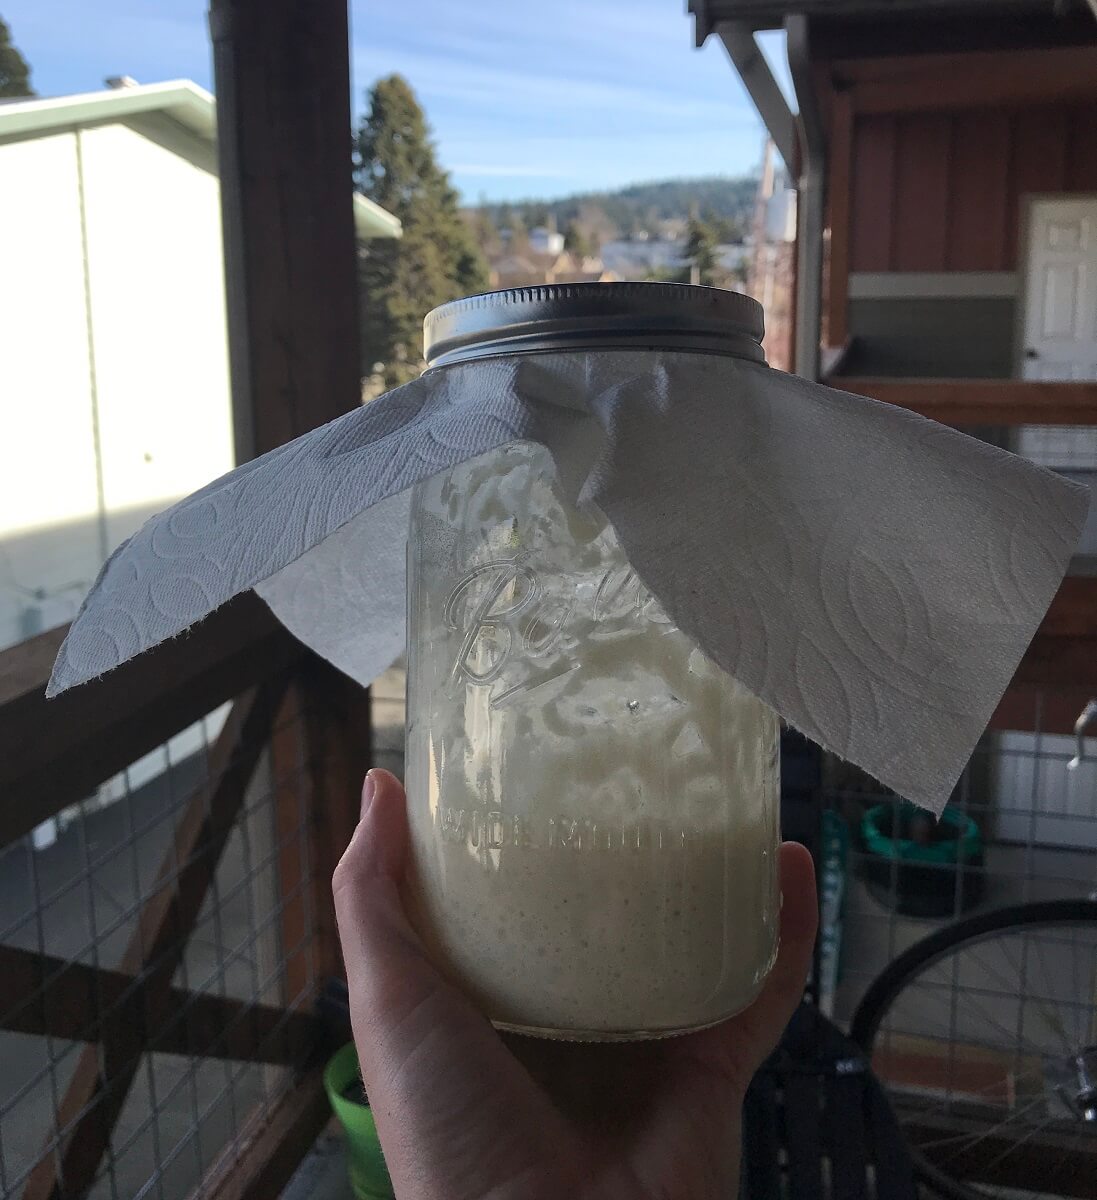
If you bake weekly, you can store the starter in a refrigerator to retard its activity when not in use. Take it out the night before you bake, then reduce and feed it enough that you’ll have plenty for breadmaking. After you bake, feed the starter again before putting it back in cool storage.
If you don’t bake weekly (maybe you should start), make sure you store the starter in the refrigerator and continue to reduce and feed it at least twice a week to keep it healthy.
As long as you give your starter basic care and attention — keeping the jar clean, covering it, reducing and feeding at regular intervals, and of course, baking with it — you should have a happy symbiotic relationship for as long as you desire.
Troubleshooting And Common Problems
- Problem: Nasty surprise! The starter has maggots in it.
- Solution: Your starter is ruined. Start over, then cover the new starter with a thicker or more densely-woven cloth. Fruit flies love starter, and they’ll go to great lengths to get it.
- Problem: The starter is covered by a layer of clear or yellowish liquid.
- Solution: Your starter is just hungry. The liquid is a byproduct of fermentation, so pour off the layer, reduce by half, and feed.
- Problem: The starter is growing pink, green, blue, white, or black, fuzzy mold.
- Solution: Your starter is ruined. Under-maintenance allowed invading mold to overtake the weakened yeast. Start over, and put your starter someplace where you’ll remember to feed it daily.
- Problem: The starter is covered with a weird, whitish, skin-like film on top of a layer of liquid.
- Solution: Your starter is REALLY hungry. Kahm yeast (what makes the film) is an indication that your starter needs to be fed ASAP. You may want to give your starter a recovery day before you bake with it again — just to get it back to full strength.
- Problem: The starter doesn’t seem to be very active.
- Solution: Try feeding the starter whole rye flour (this is starter superfood) or feeding more than once a day. This problem may also be a result of colder winter temperatures. Try storing your starter on the warm top of the refrigerator (as long as you don’t forget it).
- Problem: Something else not listed here.
- Solution: Let me know in the comments below! I’d be happy to help you however I can.
How To Use Your Wild Yeast Starter
I have forgone store-bought yeast for five years now when I started my sourdough journey, and I’m convinced that if you are willing to relearn this “what’s-old-is-new” way of making bread, you’ll find that store-bought yeast is an unnecessary purchase in your kitchen. Using only a sourdough starter as a rising agent, I can make brownies, cakes, muffins, biscuits, pizza dough, naan, and all manner of sweet and savory breads.
The best way to get to know your sourdough is to bake with it often, and there’s no better reason to fire up the oven than to make a homemade loaf of real, whole grain sourdough bread. You can find many, many recipes for making sourdough bread online, so I may as well offer our homestead’s super-simple recipe as well.
This is a straightforward bread recipe that I’ve developed over the years, and even though it only uses four ingredients, it produces a nourishing, delicious loaf that we make nearly every day.
Related Post: 25 Delicious Sourdough Recipes For Your Home Starter
Since it doesn’t have an overnight ferment, the resulting loaf is hardly sour, and perfect for pretty much any use. It is 100% whole grain and won’t make the exact same lacquer-crust and a spongy interior that you may expect from a commercial bakery’s white sourdough, but you can’t beat the flavor and nutrition.
Watch The Video
Ingredients
- 8 ounces recently fed starter (basically 1 cup)
- 3 ½ cups whole wheat flour (increase to 4 cups if you grind your own) *
- Filtered water/non-chlorinated water (start with 1 cup — you’ll need more)
- 2 teaspoons salt
- Cornmeal for dusting baking surfaces
*NOTE: If you have the option to grind your own flour, I recommend grinding a combination of 3-parts organic hard red winter wheat to 1-part organic rye grain. This is our favorite combination for a hearty, flavorful, easy-to-knead, and excellently-textured loaf. It’s also a really good combination to feed your starter).
Optional, But Helpful Equipment
- Cast-iron cloche
- Danish dough whisk
- Banneton with linen liner
- Pizza peel
- Baking stone
- Instant read thermometer
Directions
1. Remove Your Starter From The Fridge
The night before you bake, remove your starter from the fridge (if applicable), reduce, and feed twice as much as you usually do. I like to have at least 2 (or more) cups of starter available when I begin a baking day.
2. Add Flour To A Bowl And Slowly Mix In Water
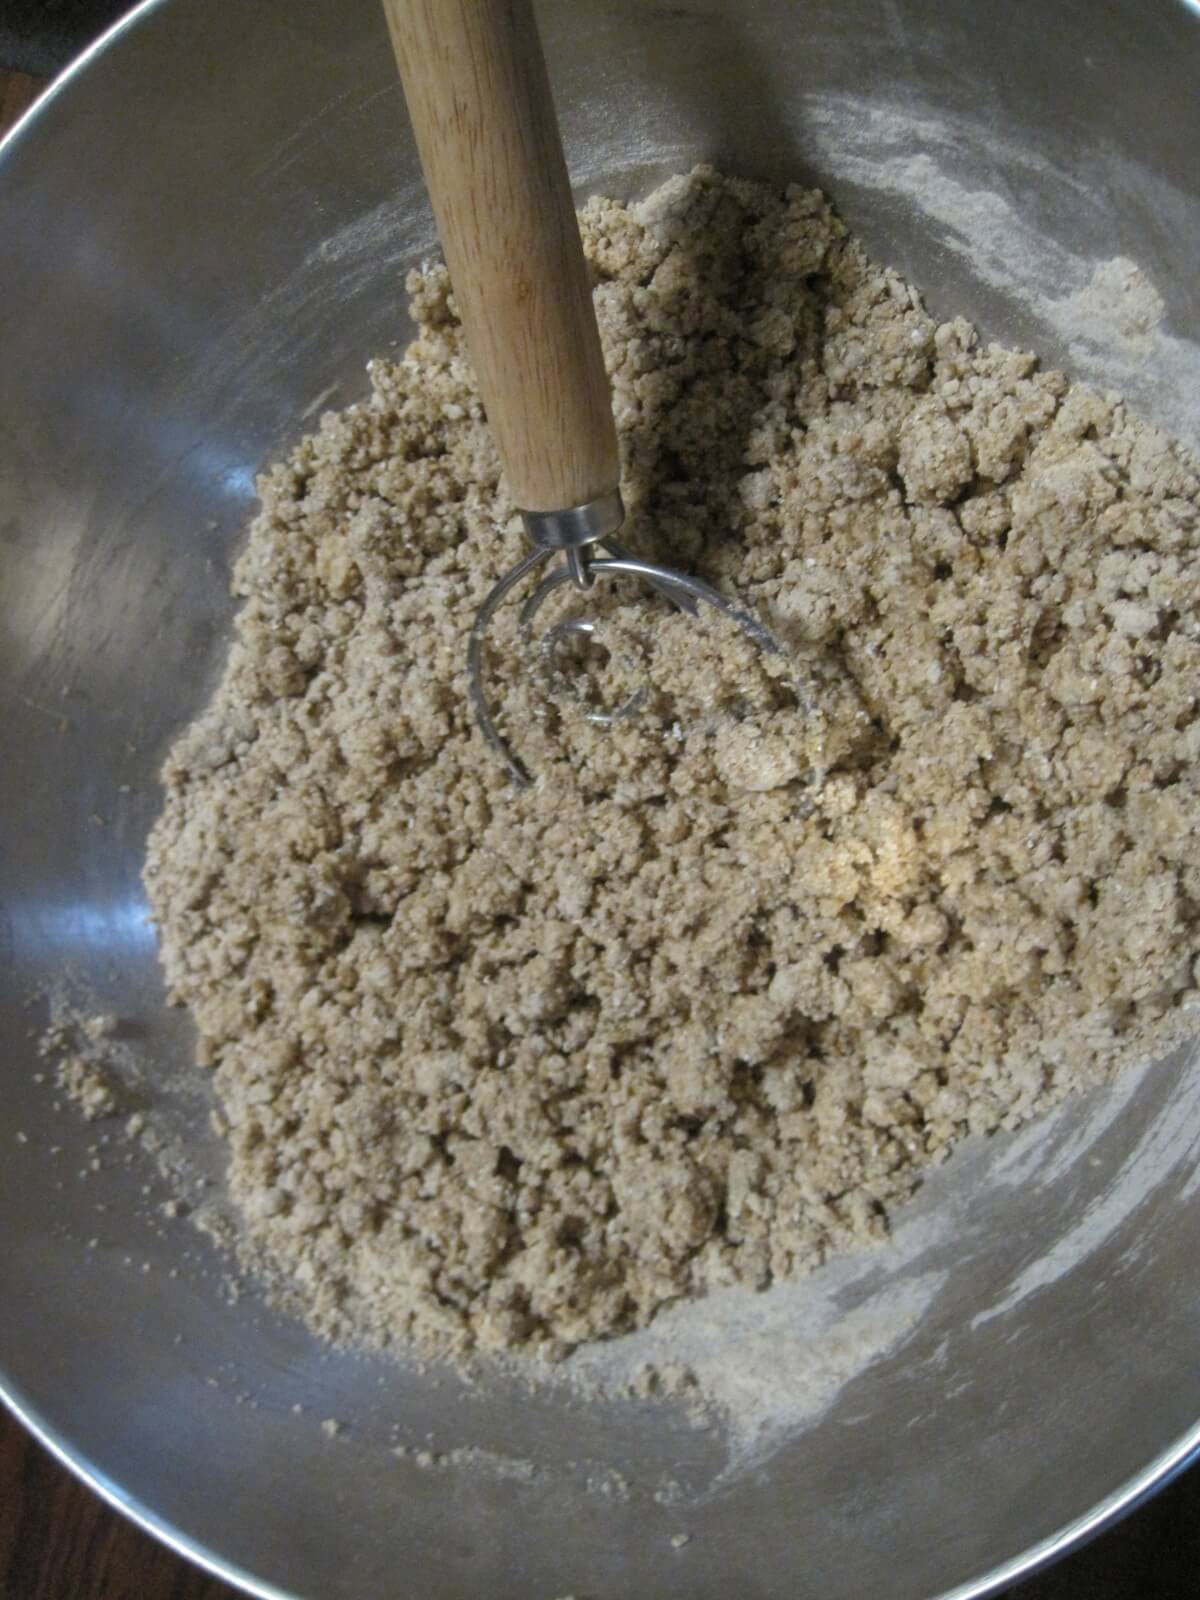
Place the flour in a large bowl. Slowly mix in enough water to make the dough stick together without being sticky and wet. It’s okay if it looks crumbly. Allow to rest for 20 minutes.
3. Add Salt And Starter
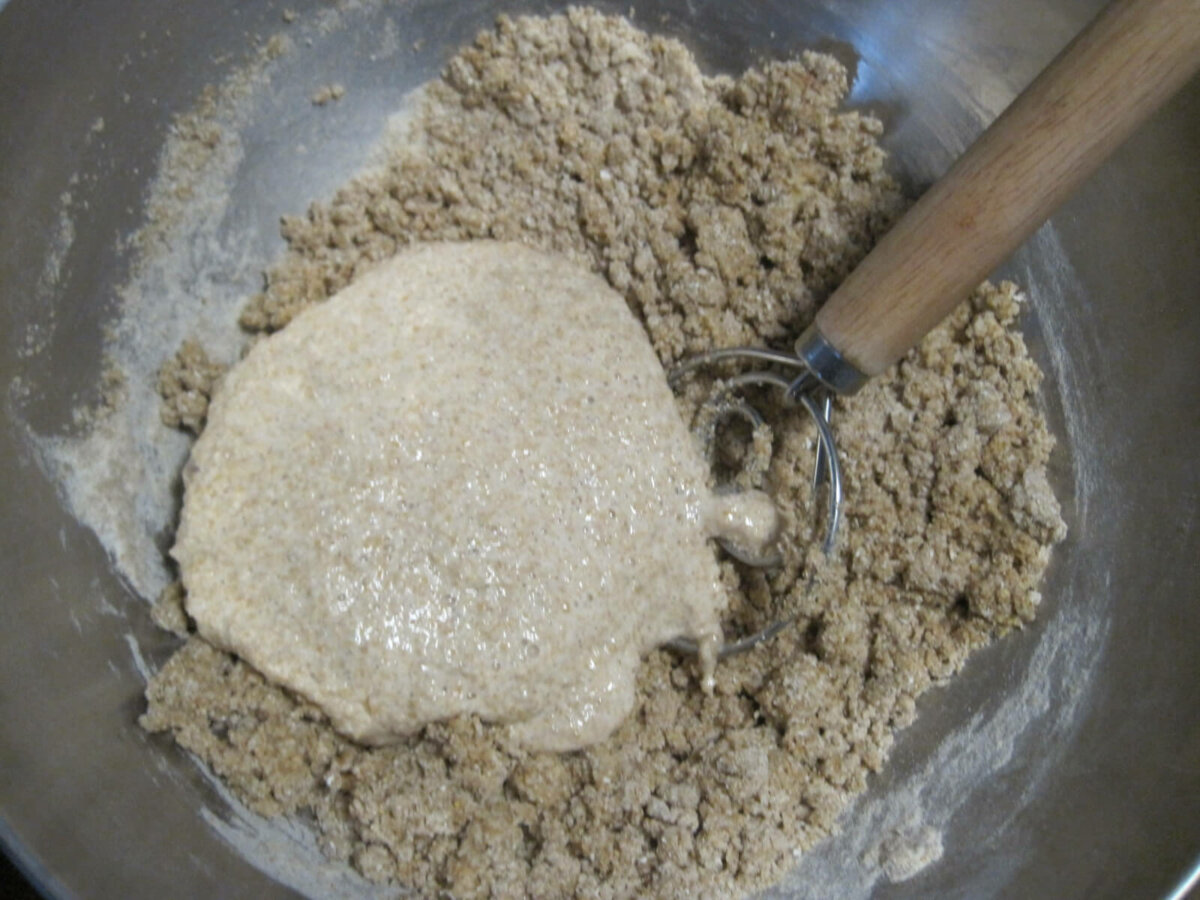
Add salt and starter, and incorporate using your hand until the wet flour begins to merge with the starter. Once they are mixed well, allow to rest for 10 more minutes. Feed your starter in the meantime, and put it back in its place.
4. Knead The Dough
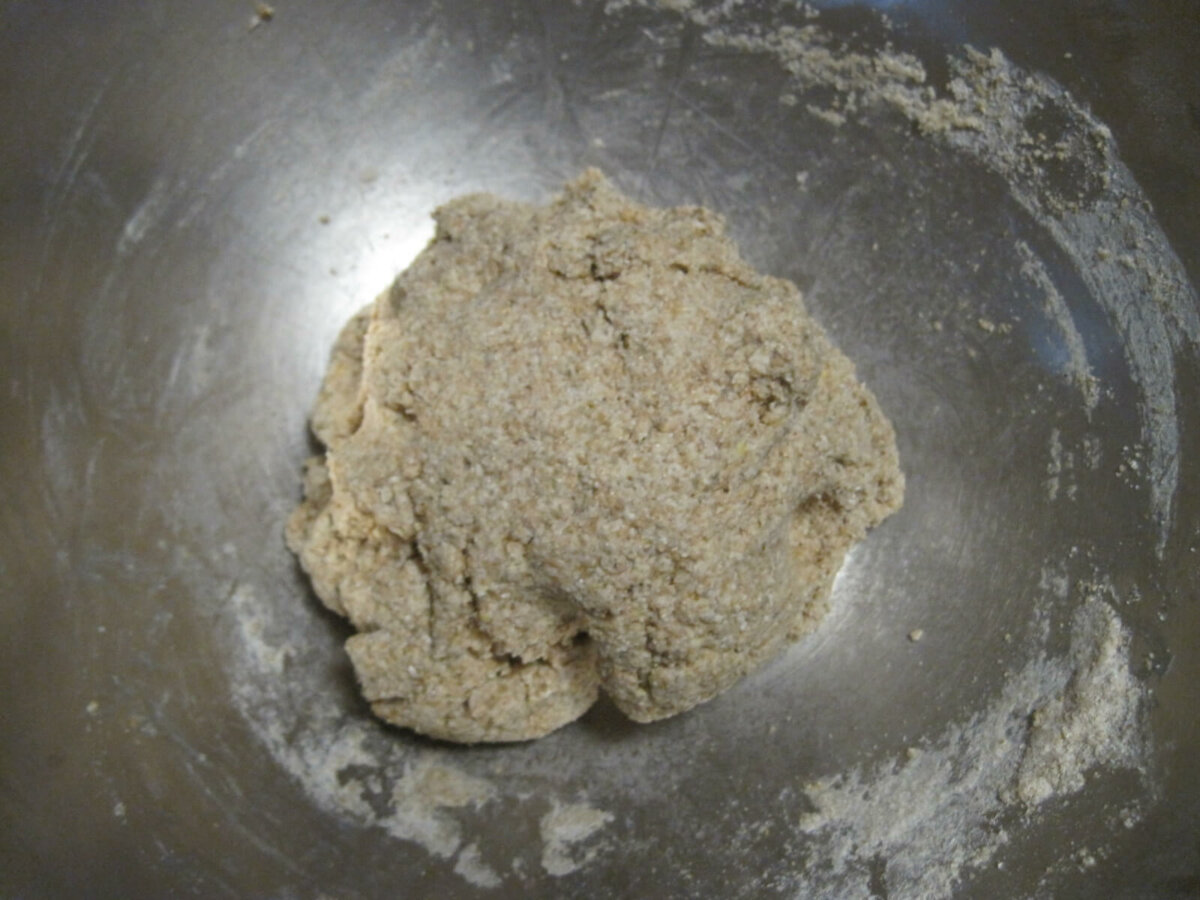
Wet your hands with water, and start to knead the dough in the bowl. Ideally, the dough should be pliable enough to work easily, but not so sticky and wet that it mushes and doesn’t hold its shape. Allow the dough to rest for five minutes.
Don’t be too frustrated if this stage is difficult for you. Learning the right consistency of dough during and after kneading is truly more art than science, and can be best learned through experience. Resist the urge to add too much flour. With whole grain, adding too much flour will result in a dense and crumbly, dry bread.
5. Continue Kneading Into A Round Ball
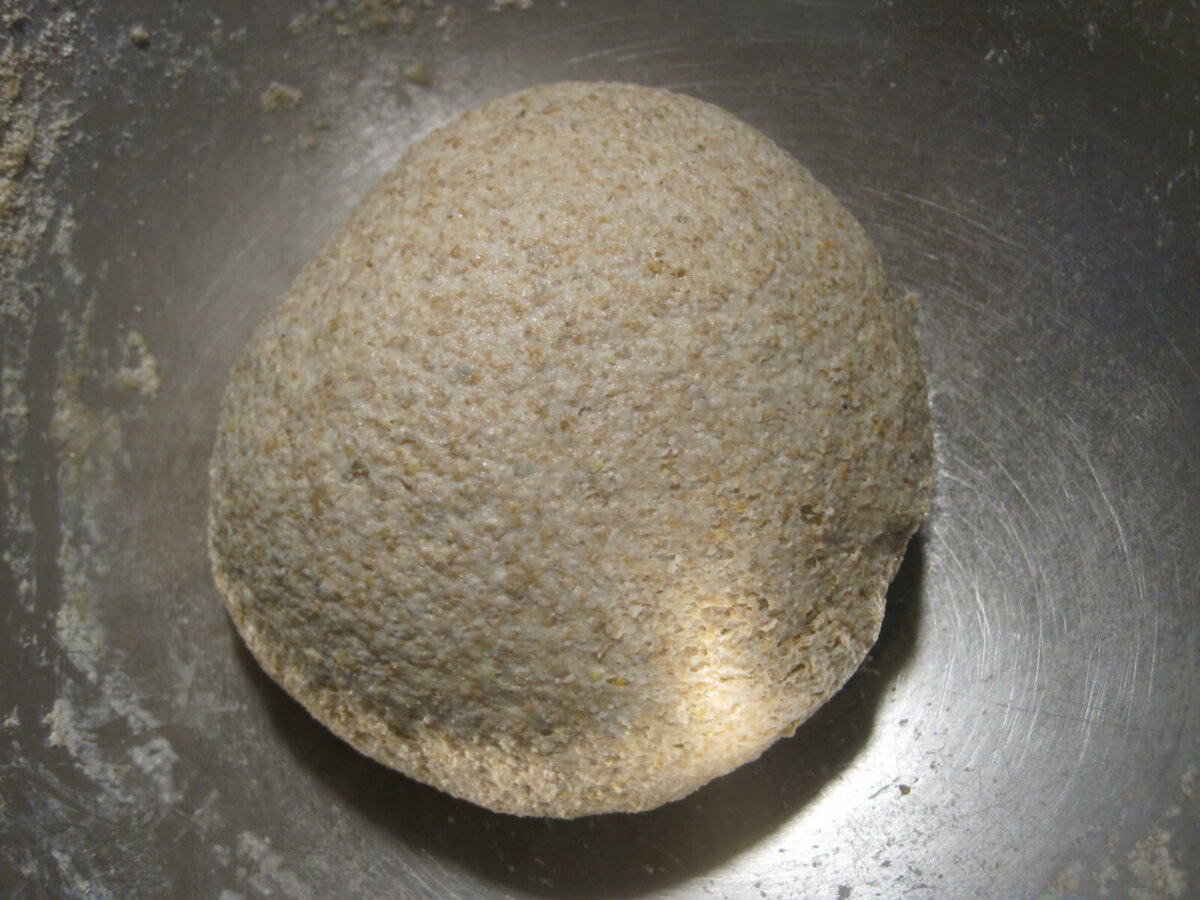
Knead for about 3 to 5 more minutes with a wet hand. By this point, the dough ball should be smooth. Cover and allow it to rise in a warm place for 2 to 3 hours.
6. Punch The Dough And Allow It To Rise
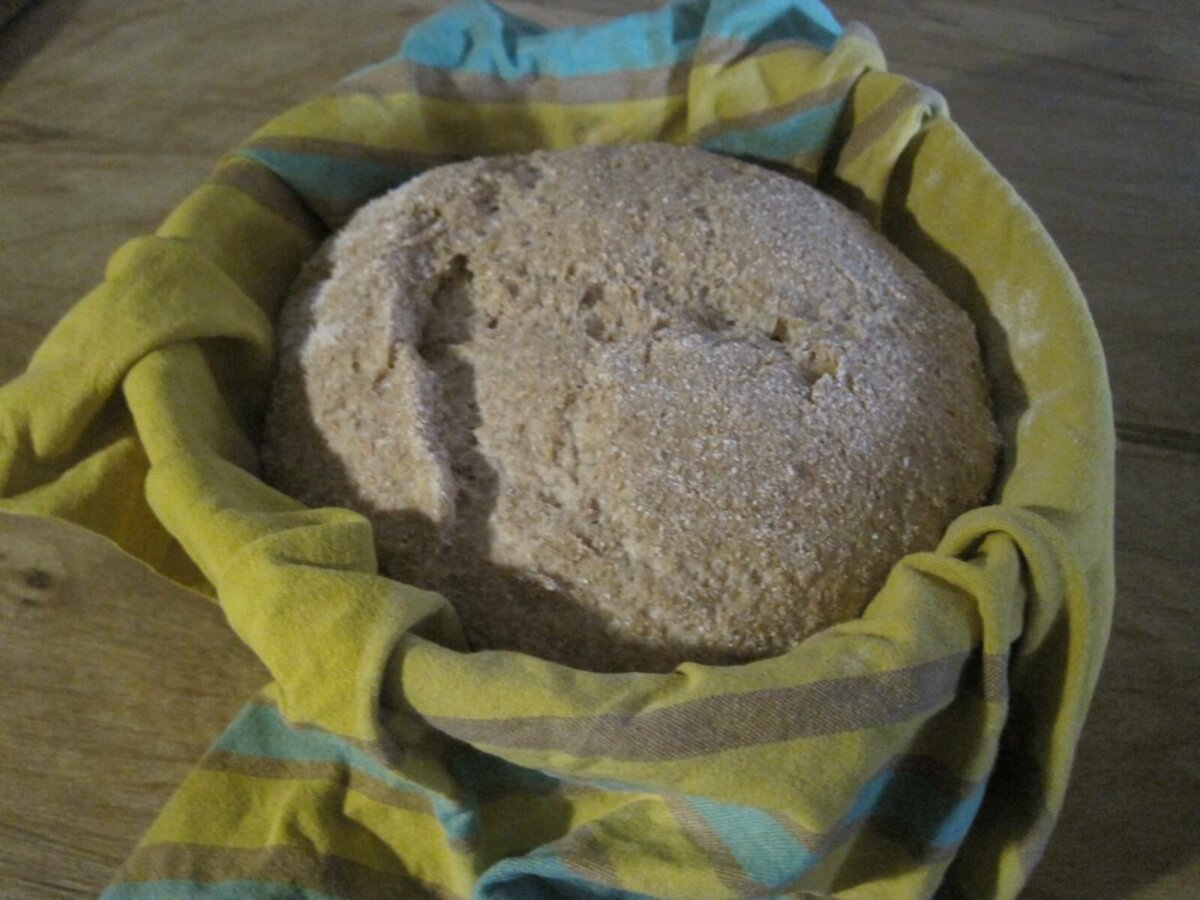
Gently punch down the dough mass, shape into a round boule (shaping tutorial here), and place in a banneton lined with flour-dusted linen. If you don’t have these traditional bread-raising baskets, a flour-dusted cloth napkin in a large mixing bowl can also work. Allow to rise again in a warm place for at least three hours.
7. Preheat The Oven And Prepare Your Baking Cloche And Stone
Preheat an oven to 450 degrees Fahrenheit. If you have a cast-iron cloche, preheat the empty cloche for 25 minutes as the oven heats. If you are using a cloche and also have a baking stone in your oven, make sure it is on a rack below the cloche, not in direct contact with it. If you are using a baking stone alone, place it on the second-lowest rack in your oven. If you don’t have these things, a cookie sheet is fine.
8. Dust The Cloche And Prepare The Loaf
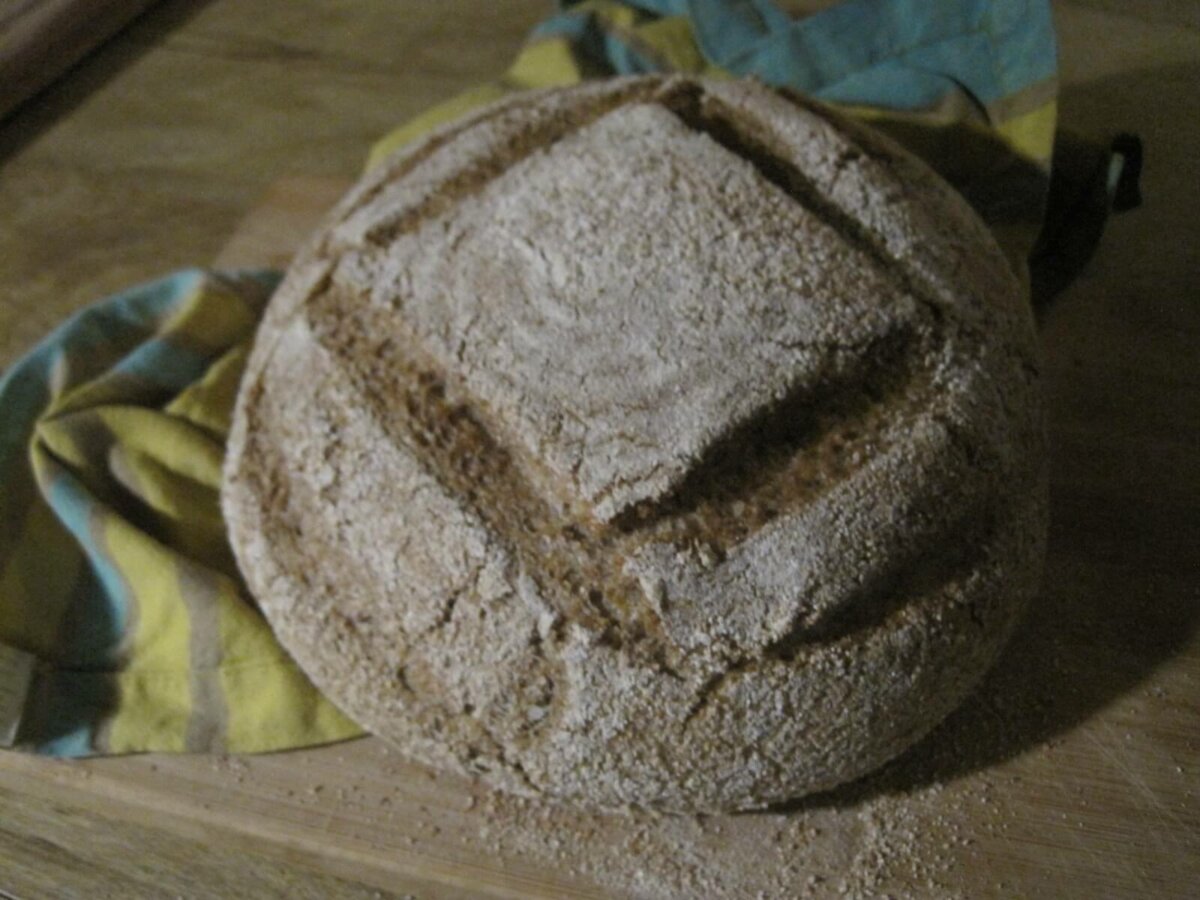
Carefully remove the hot cloche from the oven, then dust the bottom of the cloche with cornmeal, or if using a pizza peel or cookie sheet, dust the peel with cornmeal. Turn the loaf onto the cornmeal, and slash the top with a serrated knife to allow for expansion in the oven.
Cover with cloche top (if applicable), slide onto a pizza peel (if applicable), and place in the oven for 25 minutes.
9. Reduce Heat And Check The Loaf
Reduce the heat to 425 degrees, remove cloche top, and bake for 15 to 20 minutes longer, or until the internal temperature of the loaf registers somewhere between 190 and 200 degrees Fahrenheit. A hollow sound produced by tapping the base of the loaf is the traditional method for testing doneness.
10. Allow Your Loaf To Cool And Enjoy!
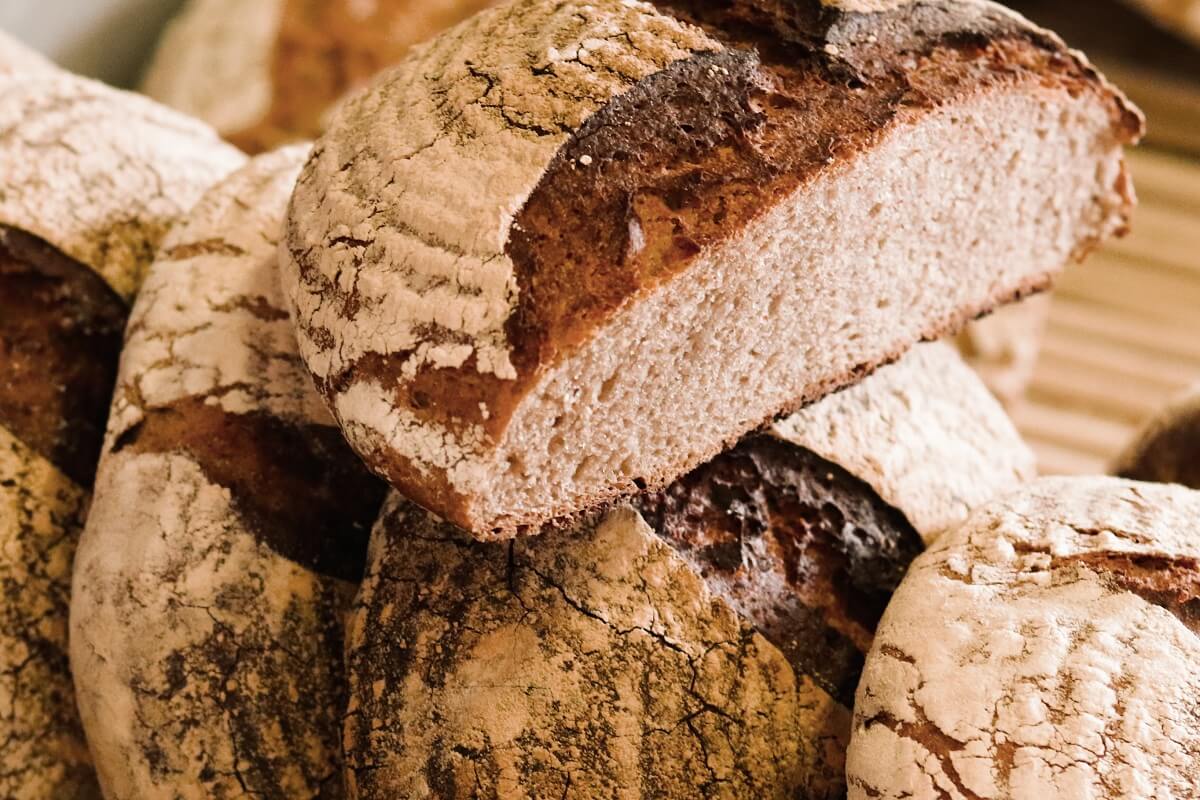
Allow the loaf to cool on a drying rack for 10 minutes before slicing, and then enjoy with lots of butter and homemade preserves. It should last for around five days (wrapped in a cloth napkin) getting slightly more sour with every passing day — although our bread never lasts that long!
Wild Yeast Or Store-Bought?
When reading sourdough bread recipes online, you’ll often see that both professionals and home bakers combine the sourdough starter with store-bought yeast to make sure the process works. This is not only unnecessary; it may hamper the success of your bread. Wild yeast and store-bought yeast are different materials entirely.
Wild yeast is the common name for Saccharomyces exiguus, a naturally-occurring yeast that varies fascinatingly by region. The starter that you’re going to make for bread baking is technically a leaven which is a mixture of wild yeast and acid-producing, acid-tolerant bacteria.
Related Post: How To Make Irish Soda Bread
The two organisms work together to ferment dough, produce the carbon dioxide bubbles that aerate and lift the loaf, and provide the distinctive sour taste of sourdough. I love natural yeast because it is specific to place. The starter I ferment in my Ozark kitchen will be different than the one you make in yours. You can’t get much more locally harvested than that!
In contrast, store-bought yeast is Saccharomyces cerevisiae. It was originally a byproduct of the brewing industry but has been selectively bred in laboratories since the 1840s to shortcut the long fermentation process in favor of quick gas production. Commercial yeast doesn’t form a relationship with any bacteria which is why bread that’s made with it lacks that distinctive sourdough acidity.
The rapid rise provided by lab-refined yeast may get you a loaf in record time, but many of the minerals and nutrients in wheat will remain in a form that is relatively inaccessible to the human body. Without the acidification of being cultured from a long, fermenting rise, bread just won’t offer you the same food value.
When you understand this difference between the active, bubbling culture in your jar and the packet of dried, pale pellets that you get from the store, you’ll finally be on your way to trusting your starter to let it raise your bread, muffins, and biscuits on its own merit. It may take longer, but it’s worth it.
The Benefits Of Wild Yeast
The long fermentation process used to make sourdough products doesn’t just give it a complex flavor, it also does you the service of predigesting your food, making it far easier to benefit from the nutrition otherwise locked away in wheat.
There is considerable evidence that those with a sensitivity to gluten may benefit from long-fermented sourdough products. Though they may not be able to eat wheat products made with quick-rise yeasts, many gluten-sensitive individuals can eat organic, sourdough-leavened bakery without problems.
The health benefits notwithstanding, the difference in eating experience between a store-bought, chemical-laden loaf of bread and a crusty, wholegrain sourdough loaf are nothing short of extraordinary. After biting into a complexly flavorful, toothsome, bite of homemade bread, the flabby, featureless, store-bought stuff can seem downright insipid.
If you’re as absurdly passionate about real sourdough as I am, you’ll not have any trouble finding a daily use for your sourdough starter. If you start falling into the deep end of bread independence, you may even find yourself grinding and blending your own flour (it really makes a difference), geeking-out over excellent books like The Bread Builders or anything by Peter Reinhart, and upping the consistency of your baking game by learning baker’s percentages. I challenge you to give it a try. Reclaiming bread independence is a delightful, healthy, and delicious endeavor.
If you have any questions or need help troubleshooting problems with a starter or loaf of bread, let me know in the comments below!
























Hi Wren,
I have been making my sourdough bread with Red Star Yeast. Thanks for the information about a better way. Can’t wait to begin.
BTW, I have very fond memories of the Ozarks. I had 23 acres near Hindsville, AR 45 years ago. Are you anywhere near there? At the time I bought the property, I did not appreciate the importance of having someone to share the experience with. Wish I still owned the property but I now live in the Philippines and have a loving wife to share every day with.
Doug Patton
Thanks for your comment, Doug! In the early days of my bread-baking, I mixed starter with Red Star yeast as well–I really didn’t “trust” the starter at first. I can guarantee it works, though! I hope your loaves come out wonderfully–I bet that the warmer climate in the Philippines will make for some speedy culturing!
Wow, you are such a concise informative writer Wren. I have been feeding a starter for a couple years now and keeping it in the fridge.. I don’t bake nearly enough because I keep doing the cold rise looking for that sourdough taste I love. The problem is, it’s so time consuming. Your recipe seems more accommodating and doesn’t take essentially 2-3 days to get a couple loaves of bread. Anyway always appreciate another take on it. Thanks.
That’s so kind of you, Kim! I hope this recipe works out for you–if you want a more sour flavor, just let it do the first rise overnight and it should still have that lovely sourdough tang.
WOW..Thanks….This is truly incredible..
Thanks, Jonathan! I hope you have some tasty baking success!
Hi Wren,
I am a bit confused as to why I need to use a wood stick to stir the water and flour together. I assume, at this point in the process, there are no chemical reactions going on that would interact with the metal and a stainless steel table knife would seem to make stirring easier. Can you fill me in as to exactly why I need to use a wood stick? Thanks
Hey, Doug! Thanks for your comment. Your assumption is correct–since sourdough is acidic, it has the potential to react with metallic substances. Even though the first mix of flour and water isn’t acidic, the starter will be, so it’s good to get into the habit for when you’ll be feeding the active culture a week down the road. Since the quality of stainless steel (what I assume many kitchen things are made of) varies so widely, some utensils may cause a reaction while others might be of higher quality and not. Using a wooden utensil just takes that unknown element out of the picture.
Of course, while I write this, I do it in the knowledge that my big bread mixing bowl is currently a stainless steel bowl (it was the biggest one I could find at the moment, and I’d rather have that then plastic). I try to protect the starter culture jar from potential weird reactions, but I don’t worry so much with the mixing bowls–the dough is only in there for a few hours.
I hope that clarifies things! And if you mix the first pre-starter batter with a table knife, I can’t imagine it would cause problems. Happy bread baking!
I started a wild yeast starter from white flour—am I now able to feed it any type flour to keep alive going forward? And will it change based on the type of flour fed to it?
You can feed a starter white, whole-wheat, or rye flour with excellent results. The more whole-grain the flour you use, the more vigorous the starter will become. Some bakers bake only with white flour, but still feed their starters rye flour because it is such good nutrition for the little guys! I imagine ground kamut , emmer, and einkorn could also work without a problem, but I haven’t messed around with those.
Do you know if this process will work with gluten-free flours? If so, is one flour or another better for it?
Gluten free flour blends are often made up with lots of different additives to mimic gluten, so I have no idea how they would respond when fermented. I did a quick google search and saw that King Arthur flours does have a gluten-free sourdough starter recipe, but I’ve never done it and so I can’t really offer advice on how to do it!
I will say though, to echo the point in the article, that the long fermentation of wheat flour (and organic wheat flour specifically) can make wheat products that can be easier to digest to those with gluten sensitivities. Obviously I don’t know your personal situation, but it may be worth experimenting with if you are comfortable trying! Hope you can find the answer you’re looking for, Molly, and thanks for your comment.
My starter is into its third day of fermentation, and seems to be healthy, but the clear liquid has sunk to the bottom. Is that a problem?
Hey, Xtina. I have found that, particularly during the initial stages of establishing a starter–that clear liquid travels all over the jar. It also depends on what consistency of starter you maintain–they can be anywhere from melted milkshake in thickness all the way to hard-to-stir and still work (I prefer a little thicker than pancake batter, personally). Really liquid starters may “separate” at different points in the jar.
Anyway, all that said–as long as you’re feeding it regularly, it’s bubbling, and there’ s no mold or acetone smell, you are good to go! Happy future baking!
I was eager to get started and did not have a mason jar, so I reused a cleaned out clear plastic protein powder jar. Do you think the plastic will cause any issues? Or should i just put this off until I get the glass jar?
Hey, Randy! Great question. You don’t specifically need a Mason Jar–any glass vessel will do (such as a cleaned-out mustard jar, or pickle jar, for example.) Mason Jars are just a really convenient size. 🙂
I wouldn’t recommend using plastic, though–the starter is acidic and will probably slowly but surely react with the material over time. The starter you have in there isn’t
“bad,” so no need to toss it–just transfer it to a ceramic/glass/nonmetallic vessel whenever you get one!
Hope that helps!
Greetings, I’m a screenwriter and I’m working on a story that involves an off the grid survivalist. I want to be authentic in describing his cooking/baking.
On Day 2 you say to “compost” part of the mixture. Do you mean tossing part out? Can’t I just divide it into two batches, so I always have some ready to go?
Thanks!
Hi Mike! Thanks for your question. Hopefully this lends some clarity.
The first week of instructions given in this article are for ESTABLISHING a new starter–during this process, the beneficial and useful bacteria are culturing the water/flour mixture, but it takes some time. The half of the mixture that is composted/tossed out isn’t a starter yet–and it smells bad, too. A few days of waste are somewhat necessary to get the bacteria properly cultured. And you have to reduce it during this process, otherwise you’ll end up with a starter the size of your bathtub or something.
Once you have an ESTABLISHED starter, the part that you reduce from the mix is exactly what you use to bake. If you bake daily/every other day, you’ll never be composting or wasting flour–you’ll be using it in your daily bread, just like much of humanity used to do.
If you really want to understand the process for your screenplay, there’s no better way than to just do it yourself! It only takes a few minutes to mix up, and you can observe the process firsthand.
Do you have a printable version of this yeast starter recipe, and other recipes detailing how to use it?
As a side note: I live in the Ozarks too.
Photo/Attachment:
Hello, I’m on my second day with the starter and there’s clear liquid separating at the bottom. Should I stir it so the batter is mixed before I feed it of just feed it as is?
From my understanding, that’s waste product of the yeast, pour it out and do the reduce by half and feed it again.
What’s the percentage of starter to use for 100% flour? Eg: 1 kg of flour – how much starter to use?
Hi, I’m doing a starter and this instruction along with numerous others suggests letting your starter grow in a dark place. However, I’ve heard that the Yeast population grows in presence of UV light and have since put my jar next to the window (though there’s something to block it from fully direct sunlight) for that and additional warmth. It seems to be progressing well, though the funky cheese smell stage of the instruction doesn’t seem to go away as fast as the instruction indicates, is everything alright? (the yeast is consuming a lot, though, and some days I had to reduce and feed the yeast twice)
I have my mother in law’s sourdough starter brought over from her village in Germany, and it’s more than delicious. My question is what water to use for each iteration, since our city water is chlorinated. Her water is well water so she doesn’t have this problem. I hesitate to buy store distilled water in plastic jugs. Can my tap water be de-chlorinated? And I’ve used the tap water fir years, by letting it sit on the counter a while, but I’ve always wondered how much of the yeast dies.