Like all things there’s a messy way and a clean way to go about demolishing a wall. In the lively and magical world of demolition construction nearly every challenge can generally be solved with a sledgehammer and an oversized lunch pail. However, the end result is usually a catastrophic mess and a heavy film of dust.
I want to throw out some tips that can easily turn a train wreck of a project like tearing out a wall, into a well-oiled operating room.
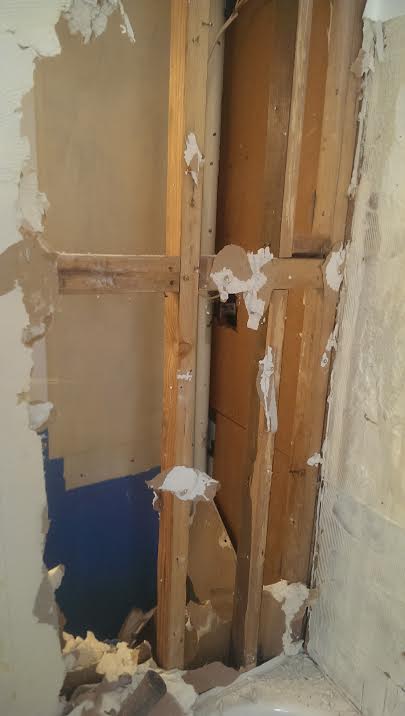
Double-Check Your Wall
Before you do anything, make sure you are positive about these two things:
- That the wall you plan to demolish is a curtain wall and not load-bearing.
- That there’s no electrical running through the wall that cannot be simply abandoned and capped.
In other words, know the kind of can of worms you’re opening before you dig in.
Prepare Your Workspace
If you’re old enough you’ll remember the part in ET when the government sealed Elliot’s house into a foreboding plexus of plastic bubbles. No worries, in this application you don’t need to go that far, but you’ll still want to protect your demolition area.
Build A Tented Enclosure
Tenting off your work area will minimize the spread of harmful dust and greatly reduces the amount of clean-up. I suggest using painters plastic or visqueen if you want something thicker and less likely to tear when building your enclosure’s walls.
Next, you’ll need blue painter’s tape. Not duct tape, not Scotch tape, and for the love of it all, not a 20 year-old roll of white masking tape. Blue tape is a bit pricier, but it leaves little to no residue on your surfaces.
First, take your tape and define the edges of where the plastic is going to adhere to, making sure to seal only one hemisphere of the tape to the desired surface, while leaving the other flap loose to grip the plastic.
Protect Your Flooring/Carpet
Crushed drywall is notorious for scratching hardwoods and discoloring carpet. Also, with this project there will be exposed nails present and you will want a barrier between a loose nail and your flooring.
Ram board is the best protective barrier to place between construction debris and your floor because it’s easy to thick, easy to unroll and cut, and easy to rip up and dispose of at the end. Double it up for extra protection if you’re concerned about the safety of your floors.
Ventilation And Other Safety Measures
Once you have gone through the slightly maddening process of putting your plastic up (on both sides of your wall) and securing on all sides, you need to think about ventilation. an exhaust outlet and will create a vacuum within the enclosure.
Consider taping a square hepa filter onto the front side of a box fan and cut the fan into the corner of your enclosure with the filter facing out.
The last thing before you get started is donning your personal protection gear. Goggles, gloves and a clean breather mask are mandatory—you don’t want to breathe in a million dust mites a breath and later sneeze out flecks of black goo do you? Be smart!
A Few Bonus Tips
With all that settled there are a few techniques here that can save you from a lot of extra clean up. One thing you can do if you’re permanently removing your wall is to snap chalk lines two inches back from your corners and inside edges onto the connecting walls you plan to keep.
If you have a Fein tool or any other brand multi-tool designed to make fine cuts through drywall take the time to create clean lines along the perimeter of your demo zone. You’ll thank yourself when it comes time to re-drywall over your area as the new drywall will butt up evenly and plain next to the existing ceiling and walls. Also, if you have a shop vac with the attachments to connect to your multi-tool you’ll greatly minimize your dust output.
Starting To Cut
The next step can be done in several ways, but the cleanest is to use a reciprocating saw (sometimes called a Sawzall) and cut your wall into a grid of equally-sized squares.
To do this safely lay the body of the saw on the wall or ceiling and tilt the blade into the wall doing your best to just score through the drywall. You don’t want your blade going all the way through and cutting through electrical.
Once you’ve gridded out your wall grab your hammer and flat bar and start peeling the squares off and toss them into heavy-duty contractor bags. When your wall is peeled off on both sides bag the insulation if there’s any.
Taking Out Studs And Outlets
All that should be left is your studs, blocking and possible outlet receptacles and/or light fixtures. Remove the blocking, or the short lateral pieces of 2×4 used to tie in your studs and keep them true, first. Then move on to the technical stuff. If you have little experience with electricity turn off your power in those areas at the fuse box.
Remove all receptacles and cap the wires. With your Sawzall and a metal cutting blade cut through the top and bottom creases of your studs where they meet their respective top and bottom plates—the 2×4’s that lay flat and sandwich your studs. They should pop out without having to apply much brute force. provided you punched out the blocking between studs.
Use a flat bar to remove your top and bottom plates and that should be it.
Clean-Up
Remove your debris, vacuum, and pull your Ram board before you tear down your enclosure.
The end product is a clean and calculated interior demolishment with little spread of debris and minimal environmental impact on the other rooms inside your house. Plus, taking the time to do it right makes you look like a pro and not a caveman.









Leave a Reply