When you’re new to cooking, or if you’ve been raised with a certain style of cooking, the spice aisle can seem intimidating. The names, colors, and flavors are intriguing, but their unfamiliarity may put the brakes on you purchasing them. For the bold and curious, however, branching out and experimenting with new spices may be the key to unlocking some of your creative culinary potential. Here, then, is a guide to knowing, cooking with, and growing some spices that you may not have tried …well, not yet, anyway.
Note: A lot of the spices in this list have a huge array of uses, both medicinal and culinary. I’ll be focusing on culinary uses for this article, but if one strikes your interest, you should absolutely do some research on their healing properties as well.
Turmeric

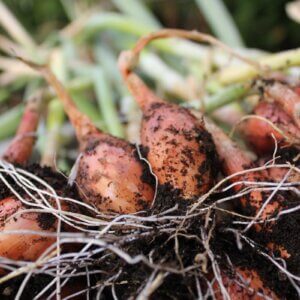
This shocking-yellow root (that also comes in an electric blue) is a common ingredient in Asian cooking, and is probably most associated with Indian food and culture. The ginger-family relative is usually sold in the United States as a bright, orangey-yellow powder, though some health food markets sell the fleshy, ginger-like rhizomes as well.
Cooking With Turmeric
When it comes to flavor, turmeric is earthy, slightly bitter, and imparts a warming sensation to food.
If you’ve never tried using turmeric before, you’ve got to give it a go in a homemade curry. Curries may seem exotic and difficult, but they’re a great place for a beginner to branch out into new flavors, and they’re healthy and delicious to boot.
You can also use turmeric to make yourself a mug of the increasingly-popular “golden milk” where it is blended with cinnamon, cardamom, black pepper, coconut oil or ghee, and some form of milk to make a healthful and calming beverage.
Turmeric is sometimes used as a saffron substitute. I sometimes throw a dash of it into my homemade cheese sauce, if I ever find that the color is lacking.
Other Uses of Turmeric
You may think you’ve never encountered it, but you have probably known it unintentionally since childhood. It’s the reason most regular mustards are a sunny yellow. Its highly pigmented nature has made it useful as a coloring dye.
Growing Turmeric
For all its exotic-seeming uses, it is possible to grow your own turmeric. It’s a big-leafed perennial that makes gorgeous red flowers if it’s happy (those leaves and flowers are edible, too).
Turmeric is easiest to grow from fresh rhizomes. You can find these in many health food stores, but be warned — any that are conventionally grown may be treated with sprout inhibitors and may not grow. Organic turmeric should be fine. If in doubt, you can now order fresh turmeric rhizomes from several seed companies.
Growing Zone
Just like its close relative ginger (thriving in zones 8 to 11), turmeric is a tropical plant that can’t tolerate winter. That means if you live below zone 8, it’s best to grow turmeric in pots, and bring it indoors before winter chills it to death.
Sunlight and Soil
Turmeric prefers full to partial sun, with at least six hours of sunlight daily. It grows best in rich, well-draining, loamy soil with plenty of organic matter. Adding compost or aged manure can improve soil fertility and help with moisture retention.
Watering and Climate
Keep the soil consistently moist (but not soggy). Turmeric does best in warm, humid conditions around 70 to 90 degrees Fahrenheit.
Harvesting
Rhizomes should be ready for use in about 8 to 10 months when the leaves turn yellow. Dig them up, wash off any excess soil, and let them cure in a warm, dry place for about a week.
Green Cardamom

I find the scent of green cardamom to be deliciously intoxicating, which is one of the reasons it was one of the “weird spices” that first piqued my interest in learning how to cook. Green cardamom (Elettaria cardamomum) is made from the green seed pods of a tropical bush that grows wild in India, but is now cultivated in many tropical countries.
You can buy it in whole form (recommended) and grind it yourself, or you can buy it as a brown, pre-ground powder (which often has a fraction of the aroma and flavor). Green cardamom smells strongly floral, warm, pungent, and clean. It’s hard to describe perfectly — you’ll have to catch a whiff yourself!
Cooking With Green Cardamom
Cardamom is one of those spices best used in moderation, as it can overwhelm a dish if used too heavy-handedly. That said, it lends itself well to both sweet and savory flavors.
Cardamom is stewed with fruit, added ground to curries, added whole to pilafs (where it is removed before eating), and a makes a wonderful addition to both tea and coffee. It’s surprisingly common in Scandinavia, Germany, and Russia, where it flavors cakes, pastries, breads, and some meat dishes.
To get to know this spice on its own, try brewing a tea of crushed cardamom pods and sweetening it with a drizzle of honey. You can add it to rice pudding, or simmer it in your next stewed meat dish for a surprisingly delicious combination.
Growing Green Cardamom
Growing cardamom is a tricky endeavor, as it’s a tropical forest plant that needs shade and constant moisture. It will grow between 5 and 10 feet tall at maturity, and if you live in tropical zones 10 and 11, you should give this beautiful perennial a chance. Not only can you benefit from its luxuriant foliage, you’ll be producing one of the more expensive spices in the world, all on your own.
Growing Zone
Thriving in zones 10 to 11, green cardamom really struggles in cold temperatures. That means if you live in any zone below 10, it’s best to grow green cardamom in a greenhouse or in pots, and bring it indoors before winter (like turmeric).
Sunlight and Soil
Green cardamom thrives in partial shade; direct sunlight will scorch its delicate leaves. Like turmeric, it prefers rich, loamy, and well-drained soil with high organic content. Keep the soil moist and slightly acidic (pH 5.5 to pH 6.5) for ideal growth.
Watering and Climate
Watering should be frequent, but don’t over do it. High humidity and warm temperatures between 60 and 90 degrees Fahrenheit is the environment where green cardamom thrives. You’ll want to protect it from strong winds and dry air.
Harvesting
It takes 2 to 3 years for green cardamom to reach maturity and start producing pods. You know they’re ready when the pods turn bright green, and are slightly firm to the touch. Handpick the pods before they start splitting to preserve their flavor and unique essential oils, then dry them in the shade to retain that vibrant green color.
Black Cardamom

Despite the name, black cardamom is nothing like green cardamom, and should never be used in the same applications. For starters, its an entirely different species of plant (Amomum and Aframomum), and once you smell it, you’ll understand what I mean.
Cooking With Black Cardamom
Black cardamom has a smoky, earthy, nearly tarry-like aroma and flavor that (I find) works well with meat dishes. I usually use black cardamom when I’m cooking lamb — it pairs well with cumin and black pepper, and gives a lot of depth to a dish. You can grind it and mix it with other herbs, or if you use it like I do, leave it whole to flavor the food and remove the dark, brown-black pods before serving.
Growing Black Cardamom
There’s not a lot of easily accessible information about growing black cardamom for yourself, but from my research, it seems to have similar needs as green cardamom — consistently warm temperatures, consistently moist soil, and partial shade.
Growing Zone
Thriving in zones 9 to 11, black cardamom prefers a warm and humid environment. For cooler climates, a greenhouse is ideal.
Sunlight and Soil
Like green cardamom, black cardamom thrives in partial shade, and too much sunlight will dry it right up. Make sure the soil is well draining and rich with organics.
Watering and Climate
Water black cardamom consistently, but don’t drown it. It loves a sub-tropical environment, with high humidity and temperatures between 50 and 85 degrees Fahrenheit.
Harvesting
Pods are ready when they turn brown. This cardamom variety takes 2 to 3 years to reach maturity and produce usable pods. Harvest the pods before they split open. You can cure them over a fire, or leave them directly in the sun to develop that smoky flavor that they are known for.
Fenugreek

You may think you have never directly encountered this useful legume seed, but if you’ve ever drizzled artificial maple syrup on your pancakes, you’ve actually met this spice. One smell of the whole seeds will clue you in to the fact that these seeds are the source of many artificial maple flavorings. With such a warm, sweet aroma, you would think that they’re a prime dessert spice, but they’re almost exclusively used in savory dishes.
Cooking With Fenugreek
I include fenugreek seeds in my masala chai brews, in dals and in one of my favorites: dosas. They impart a wonderful nutty aroma to these fermented crepes. Around the world, they flavor Iranian lamb stews, Ethiopian breads, and Turkish dried beef.
As a bonus, fenugreek seeds can easily be sprouted at any time of the year. Their crunchy sprouts feature in many Indian dishes, and they can be eaten raw or cooked.
Growing Fenugreek
When the weather warms outdoors, you’ll be pleased to know that fenugreek is extremely easy to grow. As a legume, it can be used as a soil-building cover crop, and easy-to-eat annual, and a delightful-smelling herb to grow where its maple aroma will be appreciated.
You can order fenugreek seeds for the garden, but I’ve had great success with growing plants from the organic fenugreek seeds I ordered for my kitchen.
Growing Zone
Fenugreek likes living in zones 6 to 9. In colder places, it can be grown as an aromatic annual. It’s a quick germinator, and matures in just a few months.
Sunlight and Soil
Fenugreek thrives in full sun. It needs about six hours of direct sunlight every day. Grow it in sandy soil that drains quickly. This plant is hardy, and can tolerate poor soils.
Watering and Climate
Moderately water fenugreek, letting the soil get dry between watering. It can be slightly drought resistant, giving some grace to new growers.
Harvesting
Fresh fenugreek greens can be harvested in as quickly as 30 to 40 days. For seeds on the other hand, you’ll have to wait 3 to 4 months until the pods dry on the plant. Once dry, collect, thresh, and store them in an airtight container.
Fennel Seeds

These striped seeds are wonderful in most pasta dishes, as well as in dishes where beans or vegetables are featured. This is one of the more fun spices to experiment with, as it enhances a surprising number of dishes.
Cooking With Fennel Seeds
With a sweet, licorice-like flavor, fennel seeds are one of my more often-used spices. Whenever you want to make a dish taste like sausage — even if no sausage is involved — just add black pepper, garlic, and fennel seed.
The feathery leaves are wonderful in salads and teas, and the hollow stems can be used as licorice-flavored straws. Can you imagine a better way to sip sun tea?
Other Uses of Fennel Seeds
Additionally, fennel is well known in some parts of the world as a quick cure to indigestion. Next time you’ve over-indulged on a favorite dish, give this remedy a try: Grab a pinch of fennel seeds, chew them up, then place the pulp under your tongue. As the fennel-sweetness turns to bitterness, you may find that your stomach ache has lessened considerably.
Growing Fennel Seeds
Fennel is so easy to grow that it’s considered an invasive plant in some parts of the United States. Use that nature to your advantage by making a fennel patch in your garden, where you can grow your own seeds and delicious foliage.
One note of warning, though — fennel is an allelopathic plant, meaning it releases chemicals into the soil that inhibit or stunt the growth of other nonfennel plants. Just give fennel its own space away from other plants, and it will be happy (and so will the rest of your garden).
Growing Zone
Fennel grows well in zones 4 to 9. It’s hardy and can survive as a perennial in warmer areas, and as an annual in cooler places.
Sunlight and Soil
Full sun brings out fennel’s savory and distinct flavor. It likes well-drained soil that’s rich in organic matter, like the spices mentioned above.
Watering and Climate
Fennel prefers a nice, mild 50 to 80 degrees Fahrenheit, and if you happen to forget about watering for a while, no worries — it’s fairly drought tolerant.
Harvesting
You’ll know fennel is ready to harvest when the flower heads dry out and turn brown. The best way to cure fennel is to chop off the heads full of seeds and dry them inside.
Szechwan or Sichuan Peppercorn

You’ve probably never tried the unique fruits of the prickly ash tree (Zanthoxylum simulans), but they’re unforgettable once you’ve met.
First off, they look like tiny versions of the piranha plant from the Super Mario games (but maybe you need to be a big nerd to appreciate that).
Cooking With Szechwan Peppercorn
With a fragrant, citrusy flavor and an unexpected tingly, numbing effect on the tongue, they create a flavor experience almost unknown in the West. We use these not-pepper peppercorns with pickles, in all of our vegetable ferments (they make a wonderful ingredient to a spicy sauerkraut), with roasted nuts, and very often, in one of our favorite homemade dishes, a nonpork version of mapo tofu. (Note: The recipe here features pork, but you can easily substitute ground chicken or turkey, or just omit meat entirely.)
Growing Szechwan Peppercorn
Growing Zone
If you happen to appreciate this strange spice as much as my husband and I, I am happy to tell you it can be grown anywhere in zones 5 to 9. It is a small tree, and will grow up to 11 feet, so plan its sunny planting location accordingly.
Sunlight and Soil
This shrub loves being in full sunlight (although it can handle partial shade) as long as it’s getting about six hours of sunlight a day.
Watering and Climate
The small, Sichuan tree can thrive through mild winters and warm summers — no extremes for this pepper plant. Make sure the soil stays wet, adding some mulch around the base can help retain moisture, too.
Harvesting
These red seed husks should be ready for harvest in late summer before they split open.
Kalonji or Nigella Seeds

You may have seen Nigella in the birdseed aisle, or be familiar with its flowerbed counterpart, the delightfully-named “love-in-a-mist.” Now it’s time to properly meet it in the kitchen.
Cooking With Kalonji Seeds
These jet-black, matte-finish seeds (called “kalonji” in Indian cooking) are uniquely crunchy, herby, and if eaten plain, taste somewhat like an everything bagel. They are a fun, attractive inclusion in savory breads and crackers (make some “everything bagel-ception” by sprinkling them on your everything bagel). They are also good sprinkled over roasted potatoes or root vegetables, and they make a tasty garnish on pretty much any curry or dal.
Growing Kalonji Seeds
A kalonji (Nigella sativa) plant is as easy to grow as its garden cousin, and has gorgeous flowers and wonderfully weird seed pods to boot. They’re a tender annual, so make sure to get them started once all threat of frost has passed and enjoy their unexpectedly beautiful display.
Growing Zone
Thriving in a range of zones from 3 to 9, kalonji are incredibly adaptable and can be grown as an annual in most climates.
Sunlight and Soil
Give this plant the full sun that it desires. Partial shade is okay too, but not its favorite.
Kalonji likes sandy, well-draining soil, and doesn’t need as much fertilizer as the spices listed above. In fact, overly rich soil can lead to too much leaf growth, jeopardizing the production of its flowers and seeds.
Watering and Climate
Moderate watering is enough for the kalonji plant, and you can let the soil dry out in-between. Like fennel, no worries if you forget to water it, kalonji is tolerant to drought once it’s established.
Harvesting
You’re good to harvest these seed pods when they are dry and turn brown, usually around the 3-month mark. Cure by cutting open the pods and letting the seeds dry.
Star Anise

This spice wins the award for “prettiest” in my book. Star anise is a fragrant and lovely addition to tea, spiced cider, or mulled wine, where it adds to the presentation if allowed to float on the top.
Cooking With Star Anise
This seed pod of Illicium verum, or star anise, is very much anise and licorice-like in flavor, and adds a sense of warmth to foods. It’s much used in the East, where it is one of the spices in China’s famous 5-spice powder. It is often simmered with duck, seafood, or fruits.
Growing Star Anise
Growing star anise has the same challenges as the other tropical shrubs in this list. It needs warm, moist, dappled conditions to grow well. This beautiful tropical evergreen can be grown in pots, so if you’re up for the challenge, give the unusual houseplant/patio plant/outdoor shrub a try.
Growing Zone
If you’re dreaming of growing your own star anise, you’ll need to be in zones 8 to 10, or be ready to get creative with a container. This slow-grower thrives in warm, frost-free areas, making it a bit of a challenge for northern homesteaders.
Sunlight and Soil
Star anise isn’t fussy, but it does best in in slightly acidic, well-draining soil.
Make sure to keep your star anise out of scorching sunlight, as it prefers a more dappled exposure.
Watering and Climate
Keep the soil consistently moist for your star anise, especially when the weather turns dry. It loves warm, humid conditions and will not stand up to frost. If planted in pots, bring them inside for winter.
Harvesting
Patience is key with star anise. It takes at least six years before it’s first pods are ready. When they turn a deep brown, you’ll know it’s time to harvest. You’ll want to make sure they are completely dry to lock in their signature flavor.
Before I Go — a Note in Favor of Whole Spices

When you get into buying your own spices to cook (yay you!), you’ll quickly find that pre-ground spices are almost like sawdust when compared to home-ground spices. I strongly recommend buying spices whole when possible, and grinding them at home just before using. I use a good old-fashioned molcajete (mortar and pestle pictured) to pulverize my spices by hand, and the flavor difference is unreal. Try it for yourself and see.
And of course, if you’re growing your own spices, you’ll learn directly what kind of a flavor difference there is.
When I was in my twenties and trying unfamiliar spices, experimenting with them in the kitchen helped me discover how much I loved cooking. They’re still an important part of my cooking, and now they’re old friends. I hope that you, likewise, can get to the spice aisle, make some new acquaintances, and add a whole new set of flavors to your spice repertoire.
If you have a favorite spice that brought you to cooking, or better yet, if you grow your own unusual and flavorful spices, let us know in the comments below.

















Leave a Reply