Lettuce is the most-consumed leaf vegetable (a fact that I find rather sad as I am a cheerleader for greens and believe many of them deserve far more time in the limelight). I suppose it’s somewhat deserved. Lettuce, after all, has a very old history, cultivated as far back as 4500 BC (evidenced by its likeness being carved in Egyptian tombs).
The Egyptians cultivated it both for seeds and religious purposes, but it’s likely it was eaten around the world well before then. According to history, their Greek and Roman neighbors had no problem eating lettuce as common fare.

And its widespread consumption has increased over time. Most people, even if they don’t like vegetables, will still deign to allow a single, limp lettuce leaf entrapped between the buns of fast-food burgers, or the translucent shreds of iceberg topping a drive-through taco. You’re wiser than that, I hope. Any gardener who grows lettuce is privy to the absolute beauty of their form in the garden. Lettuce leaves can be found in a whole rainbow of leaf shapes and colors that truly transcend the sad bags of off-white iceberg chunks available at the grocery store. And lettuce is tasty, too — both raw and cooked (a little-understood fact in the West).
But the fact you’re reading this article means you’re probably interested in growing your own lettuce and in saving the seeds as well. I’m happy to have you here. Let’s talk about how to make your lettuce patch self-sufficient.
1. Grow Lettuce

Lettuce, as we know it, is often sold as a bunch of leaves in a plastic bag, or a tightly-wrapped head that is occasionally confused with cabbage. But lettuce is really a member of the same botanical family as sunflowers, dandelions, and artichokes, and it is far more than justa buncha leaves. That means, if you want to save seeds from your lettuce, you’ll have to grow it yourself. That said, I am aware that grocery stores sometimes sell “living lettuce” with the hydroponically-grown roots still attached, so that may be an exception to the rule because you can technically replant the lettuce and let it continue its life cycle. What type of lettuce you’ll get from the possibly-hybridized seeds, however, is anyone’s guess.
Growing lettuce from seed is pretty rewarding. The dazzling variety of lettuce types actually in existence far, far exceeds the boring ol’ iceberg and Romaine you see at the grocery store.
2. Allow Lettuce to Bolt and Flower

Lettuce is a cool-weather plant, which means that once spring has run its course, it’ll want to stop producing leaves and start producing flowers before the summer heat kills it off. Since we’re in the business of saving seeds, allowing a lettuce plant to bolt is exactly what we want. For those of you who have grown lettuce in the past, this may take a bit of getting used to — as letting lettuce bolt is something that salad-lovers try to forestall as long as possible.
A lettuce plant changes shape when it begins to bolt. It sends up a tall flower stalk, loosely hedged with small, bitter-flavored leaves, crowned with small, dandelion-like flowers. Some large lettuce plants can produce quite the array of blooms.
Now, usually at this point, I would tell you to protect the seeds’ purity by only allowing one variety to flower, or to use alternate-day isolation to maintain pure seed … but in doing so, I would be a hypocrite. The truth is, I happily and freely allow my various lettuce plants to bloom, cross-pollinate, and produce mixed seeds every year. One year, I planted red Romaine, oakleaf, buttercrunch, and black-seeded Simpson lettuce varieties. I saved seeds, and the next year, I got some wine-colored oakleaf lettuce and green-and-red spotted buttercrunch. It’s fun to mix and match when every spring brings a surprise.
If you want to save pure seed, lettuce is easy to work with since it is largely self-pollinating. Plant different varieties at least 10 to 20 feet apart from each other.
3. Allow Seed Heads to Dry
After being pollinated, the lettuce flowers will quickly turn into tiny, fluffy seed heads, much like miniature dandelions. The seeds run the risk of drifting away dandelion-style if you allow them to completely dry on the plant. I like to watch the plants until the seed heads just open, then pluck them individually as they ripen. Granted, I usually harvest seeds from about 10 plants any given year, so this sort of intensive seed-gathering can make sense (and give me more finished seeds in the long run).
If you’re harvesting larger amounts, allow the entire flower stalk to turn to mature seeds, then snip it off at the base. You’ll notice that milky latex will exude from the snipped stalk immediately, cluing you in to the fact the seeds are not entirely dry.
4. Dry More
The seeds will need to fully, crisply dry before you can clean them and put them in storage. I accomplish this by putting a handful of flower stalks in a mesh bag and allowing it to hang from my covered porch in the hot early-summer air. A week or two should do the trick.
5. Rub Seeds Free
Now it’s time to separate the tiny, almond-shaped seeds from the mass of plant material. This is easier said than done. Of the many types of seeds I grow and harvest, I admit lettuce seeds are some of the most annoying to process (in my humble opinion). It’s easy to rub the brittle-dry flower stalks between your hands to free the seeds and crumble the entire thing into dust … but a totally different matter to end up with clean, debris-free seeds at the end. That’s why the next step is optional.
6. Winnow Seeds (Optional)
Lettuce seeds are tiny, lightweight things, and winnowing them free from the rest of the mess does take some careful handling. I have had many a moment while trying to winnow my lettuce seeds, when the breeze has carried everything away — seeds and all. After many years of trying to end up with perfectly clean lettuce seeds, I now admit that I don’t bother with perfect winnowing anymore. I free the seeds from the seed heads, take out the big, stemmy stalks that I can, and call it a day. My stored lettuce seeds are now stored among leafy junk, but they still sprout fine in the spring.
If you want clean seeds, you’re going to have a bit more work ahead of you. Here’s the best method I’ve found for cleaning seeds.
- Rub the lettuce seed/leaf/stalk mixture between your hands as much as possible, breaking up any clumps of seeds.
- Deposit it all into a mixing bowl.
- Grab a second mixing bowl and go outside on a lightly breezy day
(and I do mean lightly — anything more than the kind of breeze that will gently push the hair away from your face will be too strong). - Pour the material from one bowl to the other, with about 2 or 3 inches between each bowl (If the breeze is just right, the lighter chaff and leaf material will blow outside of the bowl, and the slightly heavier seeds will drop straight down into the bowl).
- You’ll have to repeat the pouring motion many times before you have clean seeds.
7. Put in a Labeled Envelope and Store
Once you have cleaned seeds (or not-so-clean seeds) dried and ready, put them in an envelope and label with the date and variety. Keep the seeds in cool, dry storage, and they’ll be ready to plant next spring, as soon as the soil is workable.
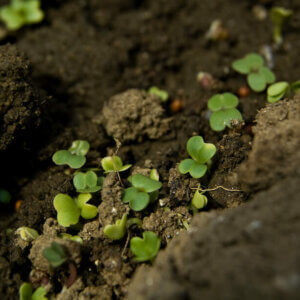
8. Plant Next Year
As always, the whole point of saving seeds is to have a self-sufficient store of to plant next year. Make sure to dig your saved seeds out of storage, get them back in the soil, and enjoy your salads and stir-fry all over again.
You’ll likely have excess seeds, so you can also share them with friends and neighbors, or donate them to churches, charities, or food banks, if they’ll accept them. This year, I took the extra garden seeds that I couldn’t share and gave them to my local thrift store on the condition that they be given away for free, not sold.
Now lettuce know in the comments below (and forgive that pun) if you save your own lettuce seeds, what varieties you like best, and any seedy stories you’d like to share. We welcome your tips, tricks, and anecdotes!

































Leave a Reply