In the past, I’ve had a love-hate relationship with cucumbers. I loved their crisp, sweet flavor, so cooling to crunch on a hot summer day, and the way their aroma filled the kitchen with a fresh scent. I hated when the summer droughts would come and deform my cucumber crop into awkwardly-shaped spheres with squiggles of underdeveloped fruit at the end — and despised when I missed a few days of picking, and ended up with hard-skinned, hard-seeded cucumbers that have passed that perfect point of palatability.
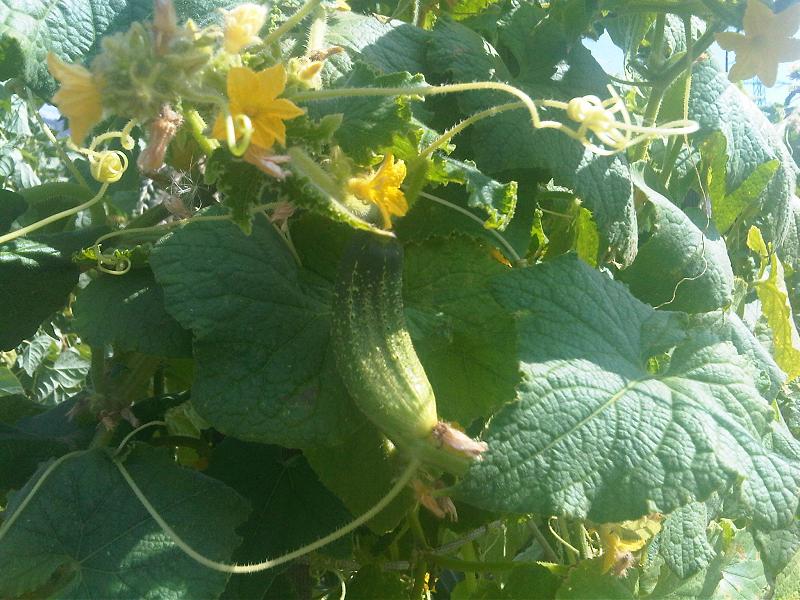
That is, until I started saving my own cucumber seeds.
Now I have a much more love-love relationship, where I can both enjoy the cucumbers that I get at peak perfection and value the cucumbers that have passed beyond the pale. Those past peak become my seed-bearers, and I have a special place in my heart for them.
If you want to learn how to save cucumber seeds to make your garden self-sustaining, and use those cucumbers you missed (haven’t we all done it?), here’s how.
Grow a Cucumber (Not Optional)
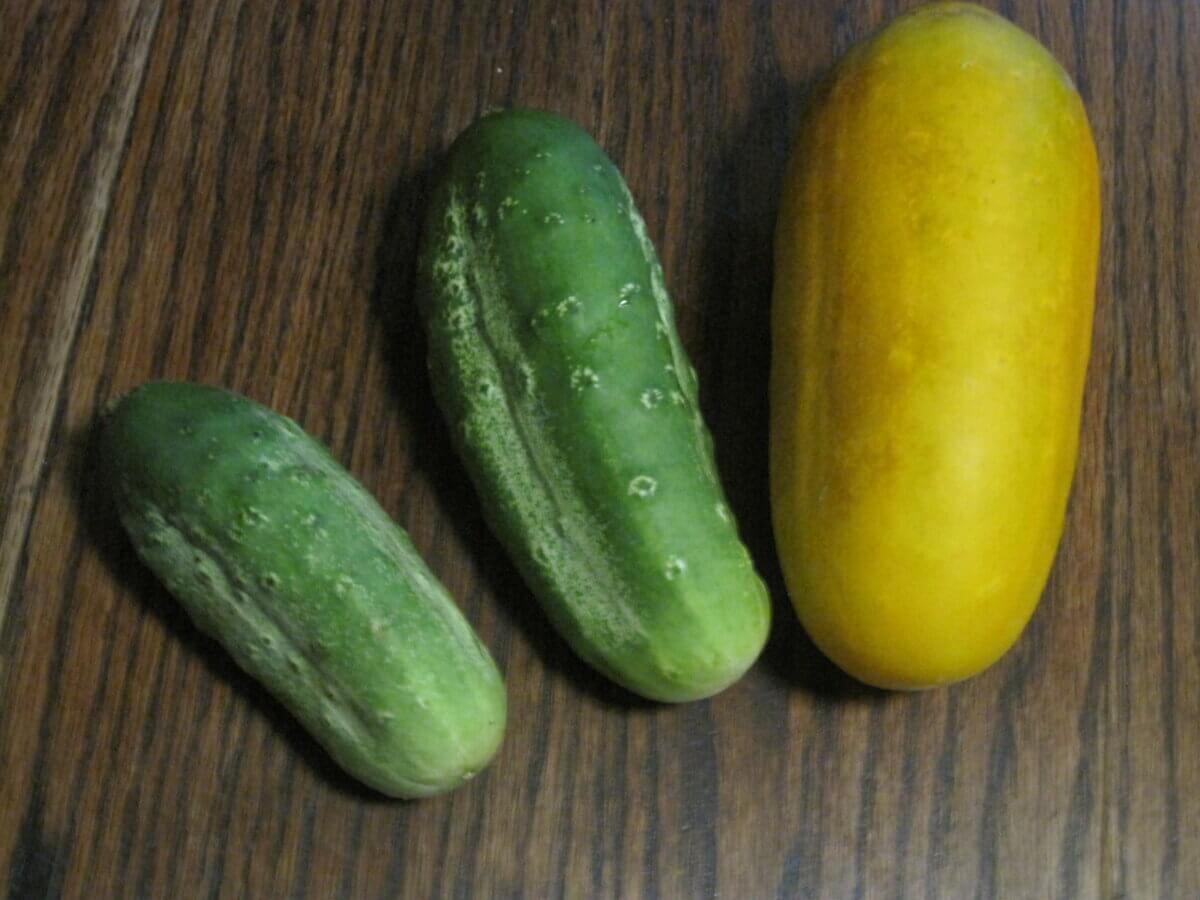
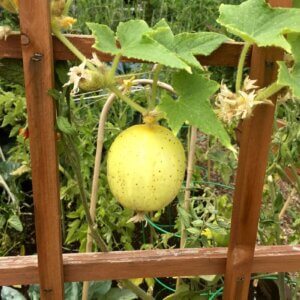
In order to harvest seeds from a cucumber, it needs to be overripe. Frankly, an overripe cucumber isn’t something you’ll ever see at a grocery store or a farmers market. If you’ve only ever seen the glossy, green, tender cucumbers offered by your normal vegetable purveyors, a ripe cucumber will be shocking. They’re huge. They’re rock-hard. They’re … bright yellow? Orange?? Brown???
Yup. A ripe cucumber far more resembles a melon or squash in feeling and form than the sweetly crisp salad-additions you’re used to seeing, and that’s for good reason. Cucumbers, along with the gourds, squash, and melons they resemble, are members of the Cucurbita genus, after all. We enjoy cucumbers in tender infancy, but to get viable seeds, you need to let the fruit fully mature.
I choose a few cucumbers to allow to ripen fully — usually those with a good shape and size — but I also allow the inevitable cucumbers I miss to finish their ripening journey as well. In either case, try to aim for harvesting six ripe fruits from six different plants for the best genetic diversity.
Keep in mind, too, that parthenocarpic cucumbers (the seedless cucumbers that you can grow in a greenhouse), won’t give you seeds. These cucumber varieties were developed to form fruit without pollination (that’s what parthenocarpy means). There’s a chance they may develop a few small seeds if grown outside near other monoecious cucumbers (those that develop male and female flowers like all heirloom varieties), but for seed saving, they aren’t your best bet.
Remember that cucumbers are promiscuous pollen-sharers. If you want pure seed AND you want to grow more than one variety, you have to keep them separated by half a mile. Most of us don’t have that much land, so it’s probably best to just choose one variety each year, or to start a landrace, like I did.
Let the Cucumbers Ripen Far FAR Beyond Deliciousness
So you’ve got some gorgeous cucumber vines growing, and your selected cucumbers are past the point of no return. Leave them on the vines for as long as you can. Depending on the variety, they’ll start to turn yellow, orange, or brown. If possible, allow them to stay on the vine until the vine dies or has completely shifted to their new, ripe color. Better yet, if they have begun to slightly soften, they should be ripe for seed-picking.
Allow Ripe Cucumbers to Sit on the Counter for at Least Two Weeks
When you have harvested your seed-cukes, the waiting isn’t yet over. Allow the cucumbers to sit on a kitchen counter for at least two weeks. Some studies referenced in Suzanne Ashworth’s “Seed to Seed” indicate the waiting time allows any mostly-ready seeds to finish and increases seed viability overall. Don’t fret if a brown spot or two appears on the skin. We’ll be doing worse than that in a minute.
Scoop out Seeds and Ferment
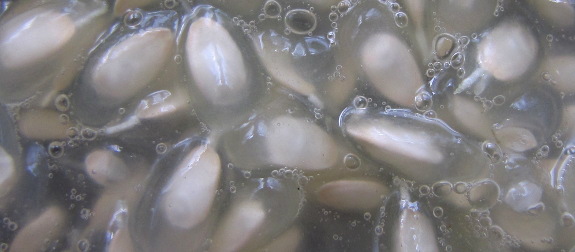
Once your seed cucumbers are sufficiently aged, slice them in half lengthwise and scoop out the seeds with a spoon. Deposit them in a jar — I like to use canning jars for this purpose. As you scoop, you’ll likely notice that every individual seed is encapsulated in a clear, jelly-like sack. This sack is a wonderfully-designed feature of the plant that is riddled with germination-inhibiting enzymes that keep the seeds from prematurely sprouting within the moist interior of their mother fruit. It’s neat, but it’s time to destroy it.
Now that the seeds are out of the fruit, it’s time to break down those protective jelly-bags and set the seeds free. Naturally, the fruits would rot on the ground, which would degrade the enzyme-jelly and allow the seeds to grow. We’re going to do a controlled version of that by fermenting the seedy cucumber pulp. A little neater than the real thing, but I warn you, it’s no less messy.
Add a few tablespoons of water to the jar of jelly-floating seeds, then cover it with a paper towel secured by a rubber band. Place the jar in an area of the kitchen where it won’t be disturbed, and you won’t forget about it, and allow it to ferment.
Depending on the temperature, it’ll take anywhere from 4 to 7 days. You’ll know the fermentation has done its work when the jar smells putrid (fun!) and mold has formed on the top. Hooray! Stinky, seed-freeing success.
Strain and Clean Fermented Seeds
Pour water carefully over the fermented seeds, and stir vigorously. All good seeds should gently sink to the bottom of the jar. Carefully pour off the (nasty) water, being sure to keep the seeds from escaping with the flow. You can also pour the seeds through a fine-mesh strainer to make sure you don’t lose your hard work down the drain. Rinse a few times, then spread the seeds out onto a ceramic (not paper) plate.
Allow to Dry

Seeds spread on a paper plate or paper towel to dry, will cling to the surface like they’ve been glued. Be sure to use a glass or ceramic plate as your drying surface. Again, allow seeds two weeks to fully dry, mixing and stirring them every day or so to make sure that their entire surface is exposed to air. You will know that seeds are dry enough for storage when they can be snapped in half cleanly (the so-called “snap” test). Don’t rush this stage. Any trace of moisture left behind with imperfectly dried seeds may result in mold and loss. After all your work, you surely don’t want that.
When in doubt, allow the seeds to dry longer, and keep in mind that these seeds can be appealing to a passing mouse. If you happen to be processing cucumber seeds in the fall, when mice are trying to move indoors for the winter, be sure to dry them out of reach.
Label and Store
Once your seeds are dry, place them in a paper or plastic envelope clearly labeled with the variety and date of harvest. Then store them in cool, dry storage until it’s time for spring to welcome them back to earth again.
Share Extras
If you’ve read any of my other seed-saving guides, you know I always mention sharing. If you save seeds, it’s inevitable you will end up with surplus. I like that. The generosity of plants is soon mirrored by the gardeners that grow them and share their seeds. If you have more than you know what to do with, follow the traditions of all gardeners through time (before seed catalogs were a thing), and pass them along to friends, family, and neighbors. Lacking that, you might donate them to a local seed swap, seed library, school, or food bank.
Plant Next Year
The best part about saving cucumber seeds (indeed, the point of it) is to get those seeds back in the soil come late spring. As you watch those green, paired leaflets rise up from the soil and spread to the sun, I hope you’ll enjoy the added satisfaction of knowing they were your seeds from plants you knew how to save. That sort of self-sufficient skill is the inheritance of any gardener, and one that will potentially set you free from ever ordering a cucumber seed packet from the catalog or store again.
If you’re curious about the types of cucumbers out there, I highly recommend checking out this article. Maybe you’ll find a variety that works for you.
Have you saved any of your own cucumber seeds? Is there a specific variety that you prize, or have you started creating your own? Anyone else out there share my love/hate relationship with overripe cucumbers? Let’s hear from you below.




















Leave a Reply