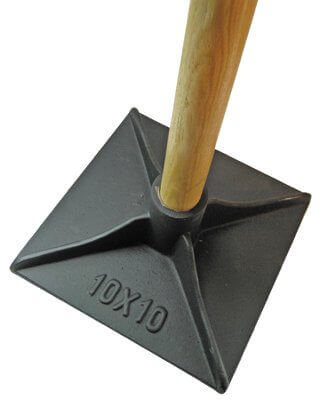
Our Earthbag Building Workshop is about to kick off tomorrow, and I spent the day doing some last minute preparations with our instructor, Scott Howard of Earthen Hand Natural Building.
A big portion of the earthbag construction process is tamping the dirt into bags to make sure they’re packed tightly, and then tamping them again once they’re laid in place in the wall.
You can buy tampers at hardware stores, but they cost anywhere from $20 to $40 depending on the type and size. Our local hardware store was charging $35, and we needed a few of them.
Instead of buying them, we made 4 tampers today with branches and a bag of concrete. All together it cost $16, and it only took us 30 minutes.
Here’s how they’re made:
1) Cut the Branches to Size
You’ll want to choose branches that are sturdy, and at least as thick as what you’d see for a wooden shovel handle at the hardware store. Also, it’s best to use dried wood, since fresh cut wood might shrink a year from now.
We cut the branches to roughly 4-5 feet. Shoulder height or slightly less is appropriate.
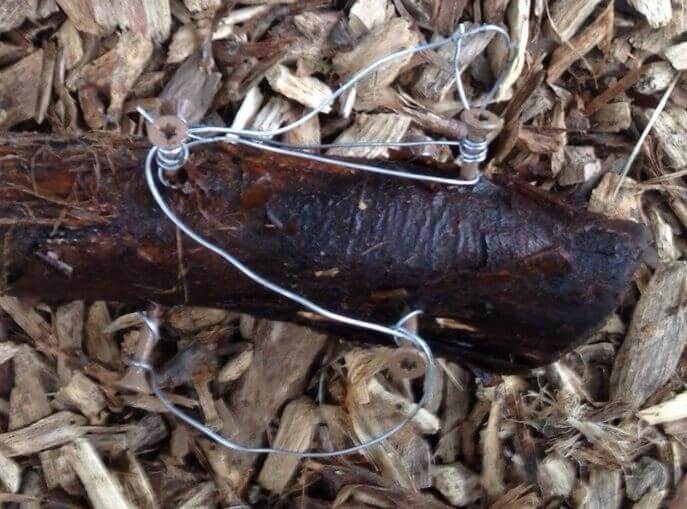
2) Drill Screws Into the Bottom & Wrap Wire Around the Screws
The screws and wire help fix the branch to the concrete and make the entire tamper stronger.
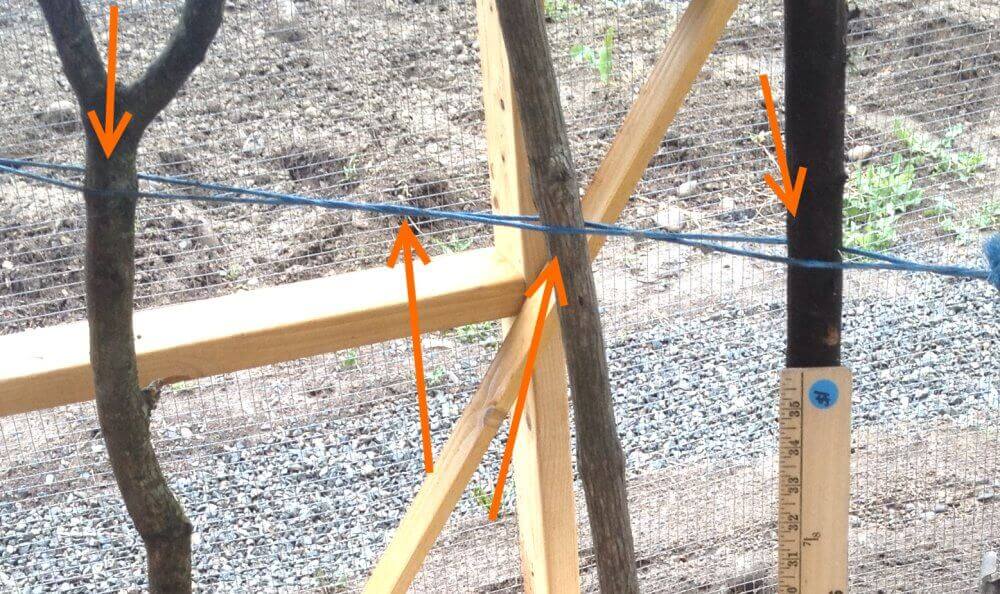
4) Set Up String to Hold The Branches in Place
The string is tight between two points, like a guitar string, and runs back and forth twice, and is twisted around itself. This way, you can place the branches between the strings and it will stay in place while you pour the concrete.
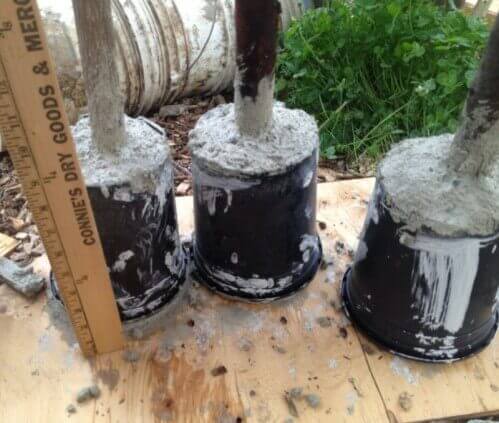
5) Cut Plastic Planters to Size
We used the cheap black plastic planters that you get plant starts in from the nursery. They’re about 6-8 inches tall, and 5-6 inches wide. You can use any similar container depending on the size of the tamper you want.
The large end of the planter goes on top of a piece of plywood. The small end (usually the bottom of the planter) gets cut off so that it becomes a plastic tube, and you can stick the branch in.
See the photos below for a visual, and click the photo to see a larger version.
6) Mix Concrete
We used quick set concrete. It sets in 15 minutes, is hard in 1 hour, and is 90% cured after 24 hours. Technically it takes 28 days to continue curing, but it should be usable by the end of the day tomorrow. The bag of concrete was our only expense since we had screws and wire laying around, and it cost $16.
7) Fill Planters and Use A Stick to Pack the Concrete In
The concrete goes in fairly easily, but you’ll want to take a small stick and poke it in to make sure the concrete makes it into all of the nooks and crannies. When the container is full, I rounded off the concrete smoothly to make the tamper look nicer.
8) Let It Dry & Break Off The Planters
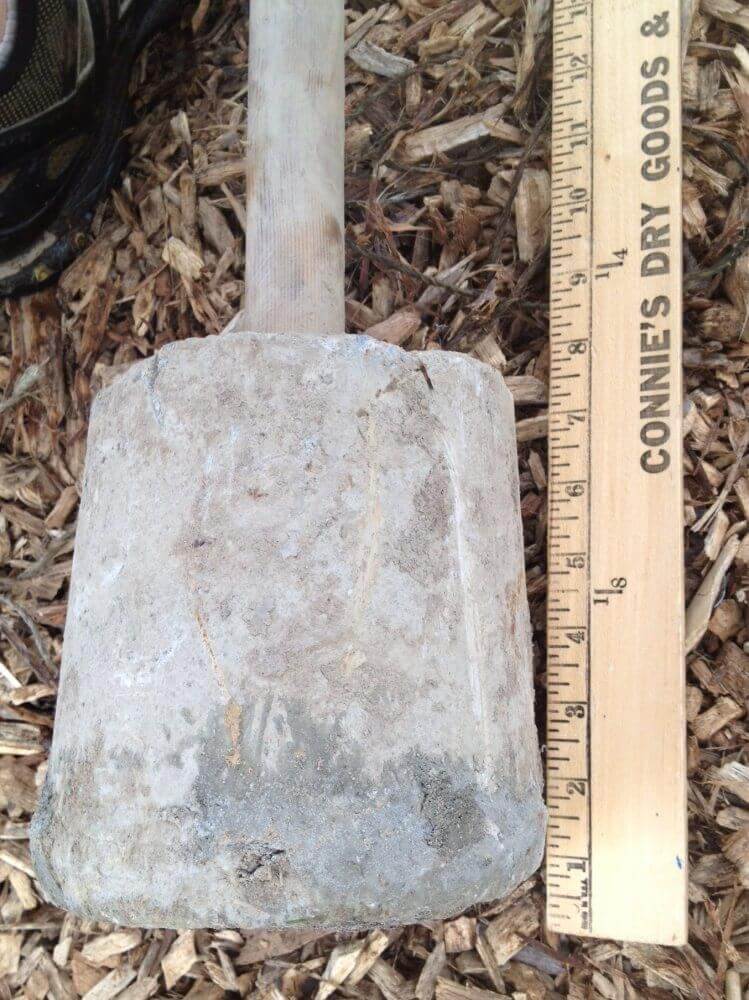
Once the concrete is cured you can either leave the plastic planter on there or break it off, your choice. At that point you’re all set – tamp away! Here’s one of Scott’s finished tampers that he’s been using for years:






















v v nice.
good idea!
Nice I’m going to try it tonight. Thx!
Great idea, going to try it out. Thanks,
Good Idea I’m going to make one this weekend,